
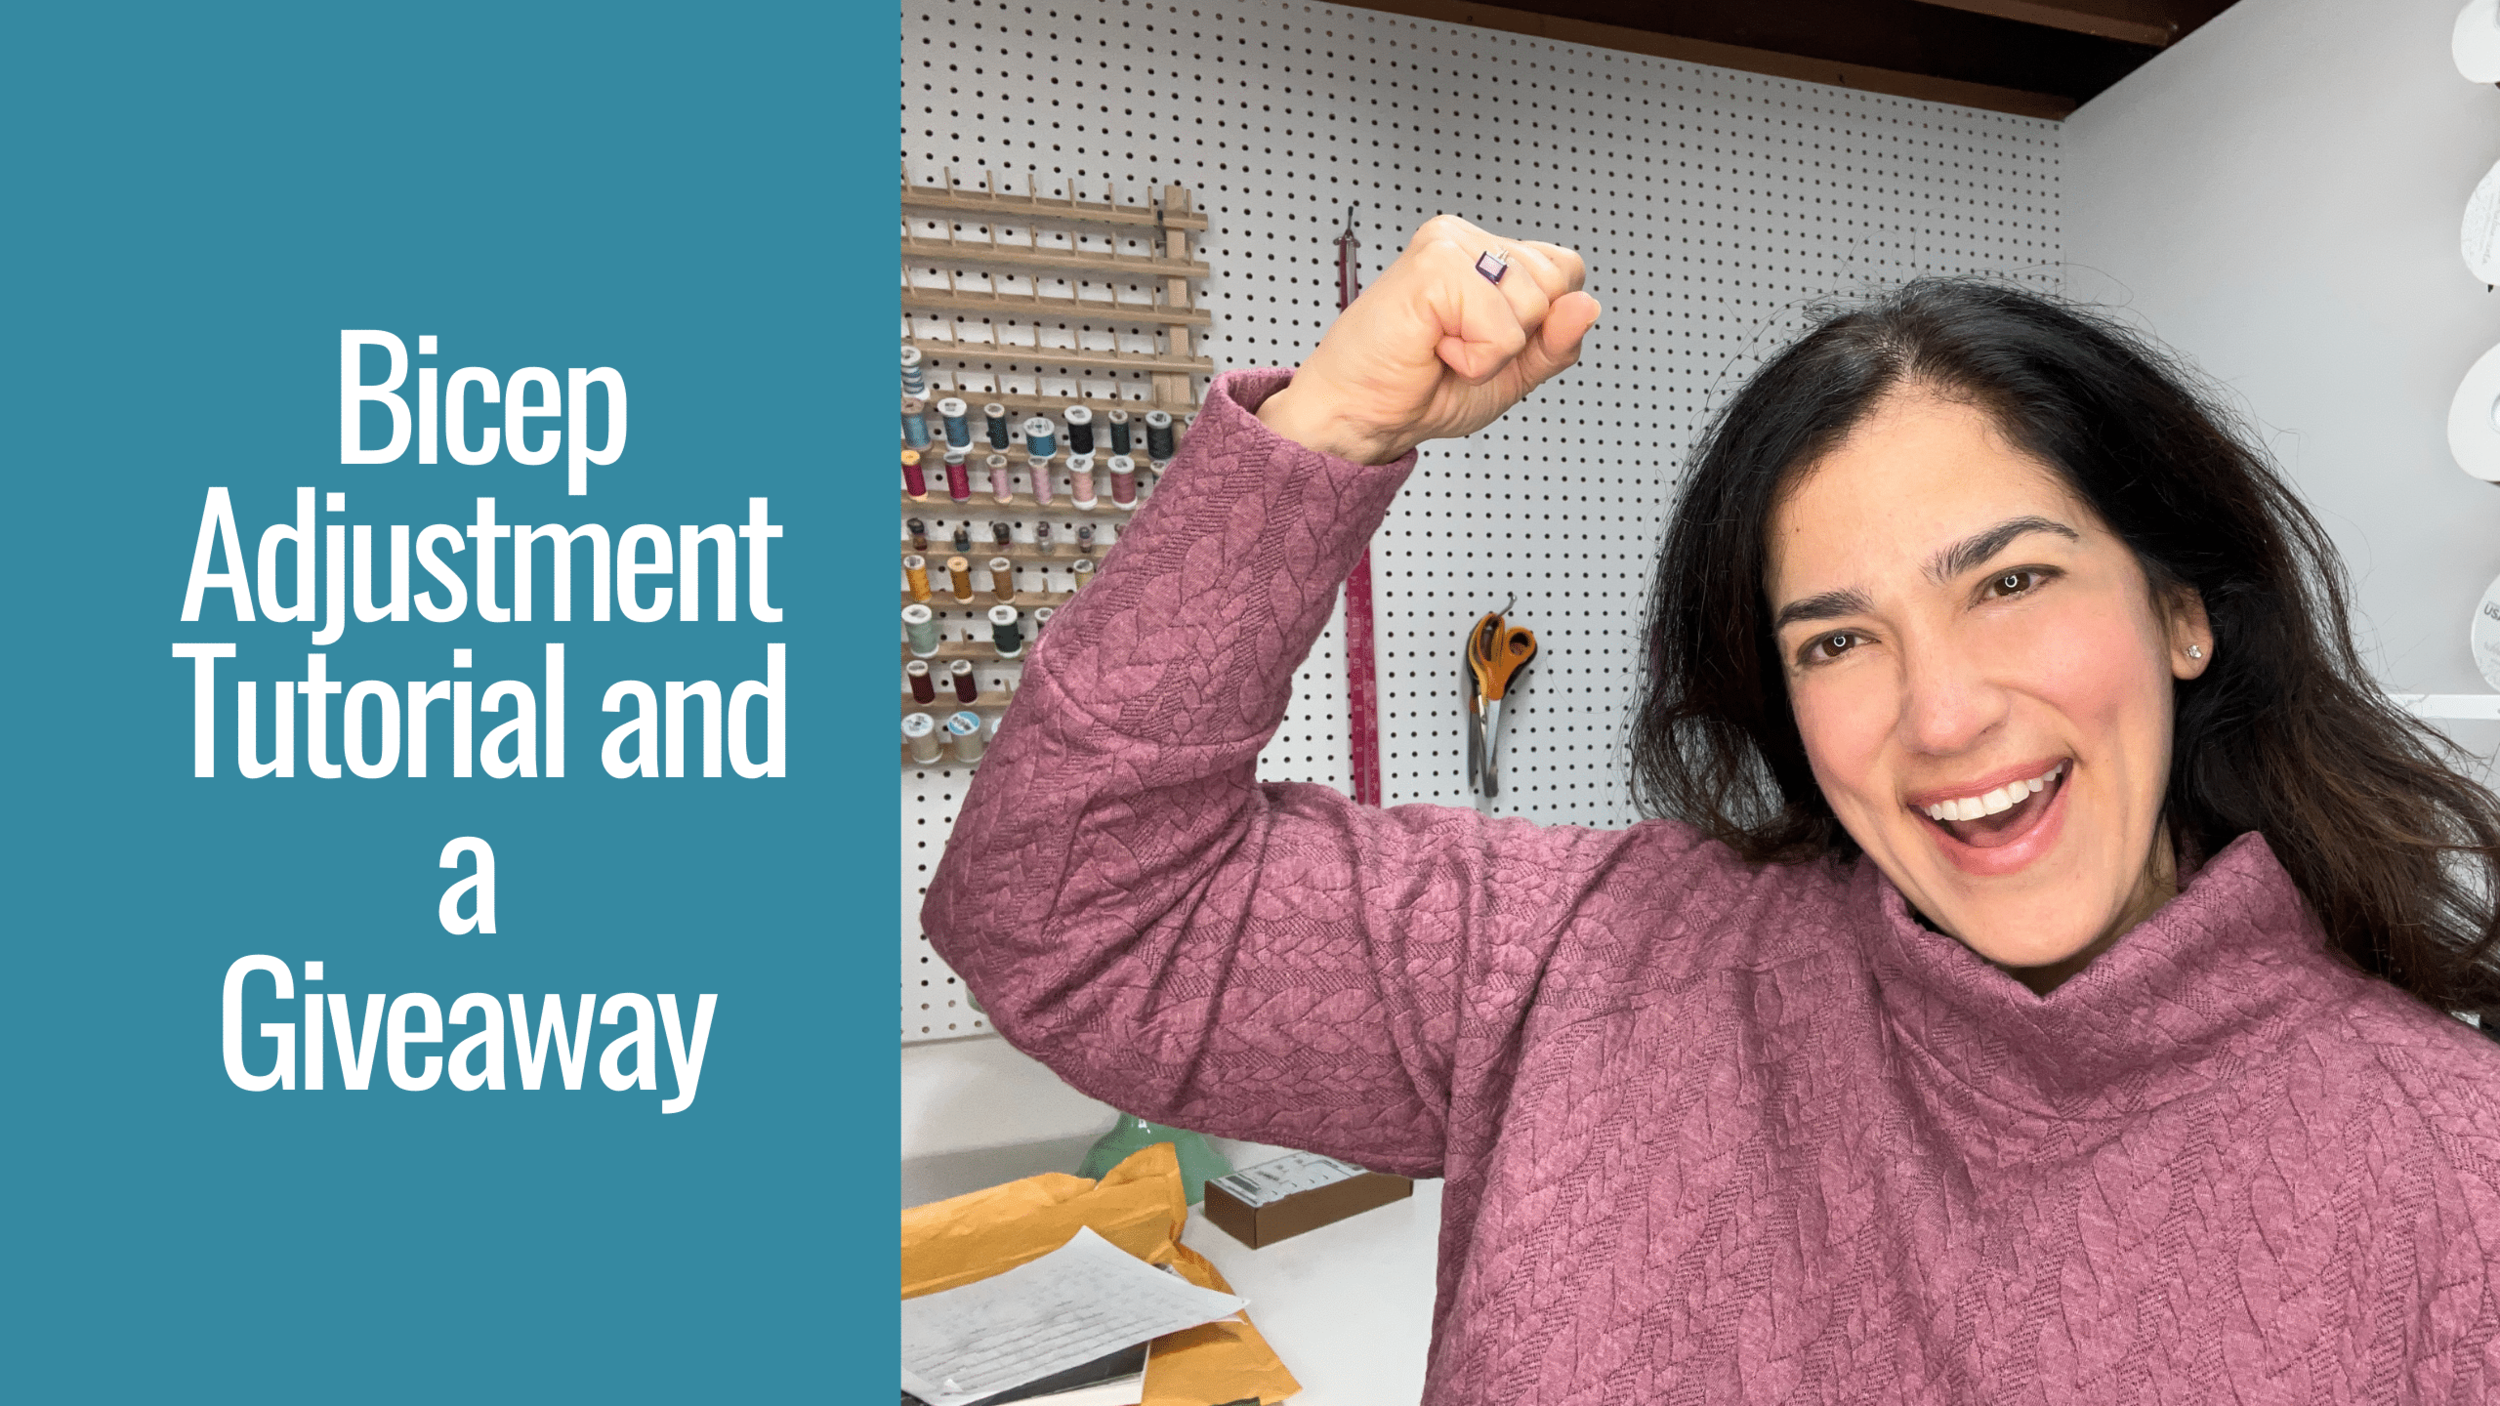
Sew Along M6696 Part 1 - The Bodice

Last week I talked about all the adjustments I made to the M6696 pattern it self, changes that I knew I would have to make like a bicep adjustment and a few that I just didn’t care how they were drafted such as the pockets. This week we dive right into sewing this shirt dress. I must say this is a great pattern and the instructions are pretty darn good.
You can buy the pattern at McCall’s Website here is a link to the pattern. I’m using a light weight denim fabric with stretch. I got it from Melanated Fabrics about a year ago and I’m afraid it is now out of stock but this pattern works with a variety of fabrics. Using denim is the reason why I took the majority of that pleat (or I should say gathers!) in the back of my bodice and why I’m grading my seams to minimize bulk.
I try to keep my sew along videos condensed into one video but in order to go thru this entire pattern it will have to be split into a few different videos. We sew the bodice with darts, we attach an inside yoke using the burrito method, there are plenty of opportunities to split stitch on this pattern so I’m going to show you how to save some time but also make sure your inside yoke looks beautifully finished. We also set in sleeves and I teach you how to trouble shoot if your sleeves have some a little too much extra ease like this pattern does.
Once your darts are done, make sure to press them down or towards the back.
As always don’t forget to press every single seam after you have stitched it. It makes for a professional looking finish, and it’s the difference between something looking homemade versus a beautifully finished garment.

We deviated this time around from slip stitching the inside yoke. Behold the burrito method.
I’m all for using a little bit of needle and thread from time to time. It’s part of the slow sewing that I want to do this year. But that inside yoke is not the spot that I want to slow down, perhaps we will do that for the sleeve cuffs or the collar. Using the burrito method to install the inside yoke is a quick way to get a beautiful finish on your shirt dress.
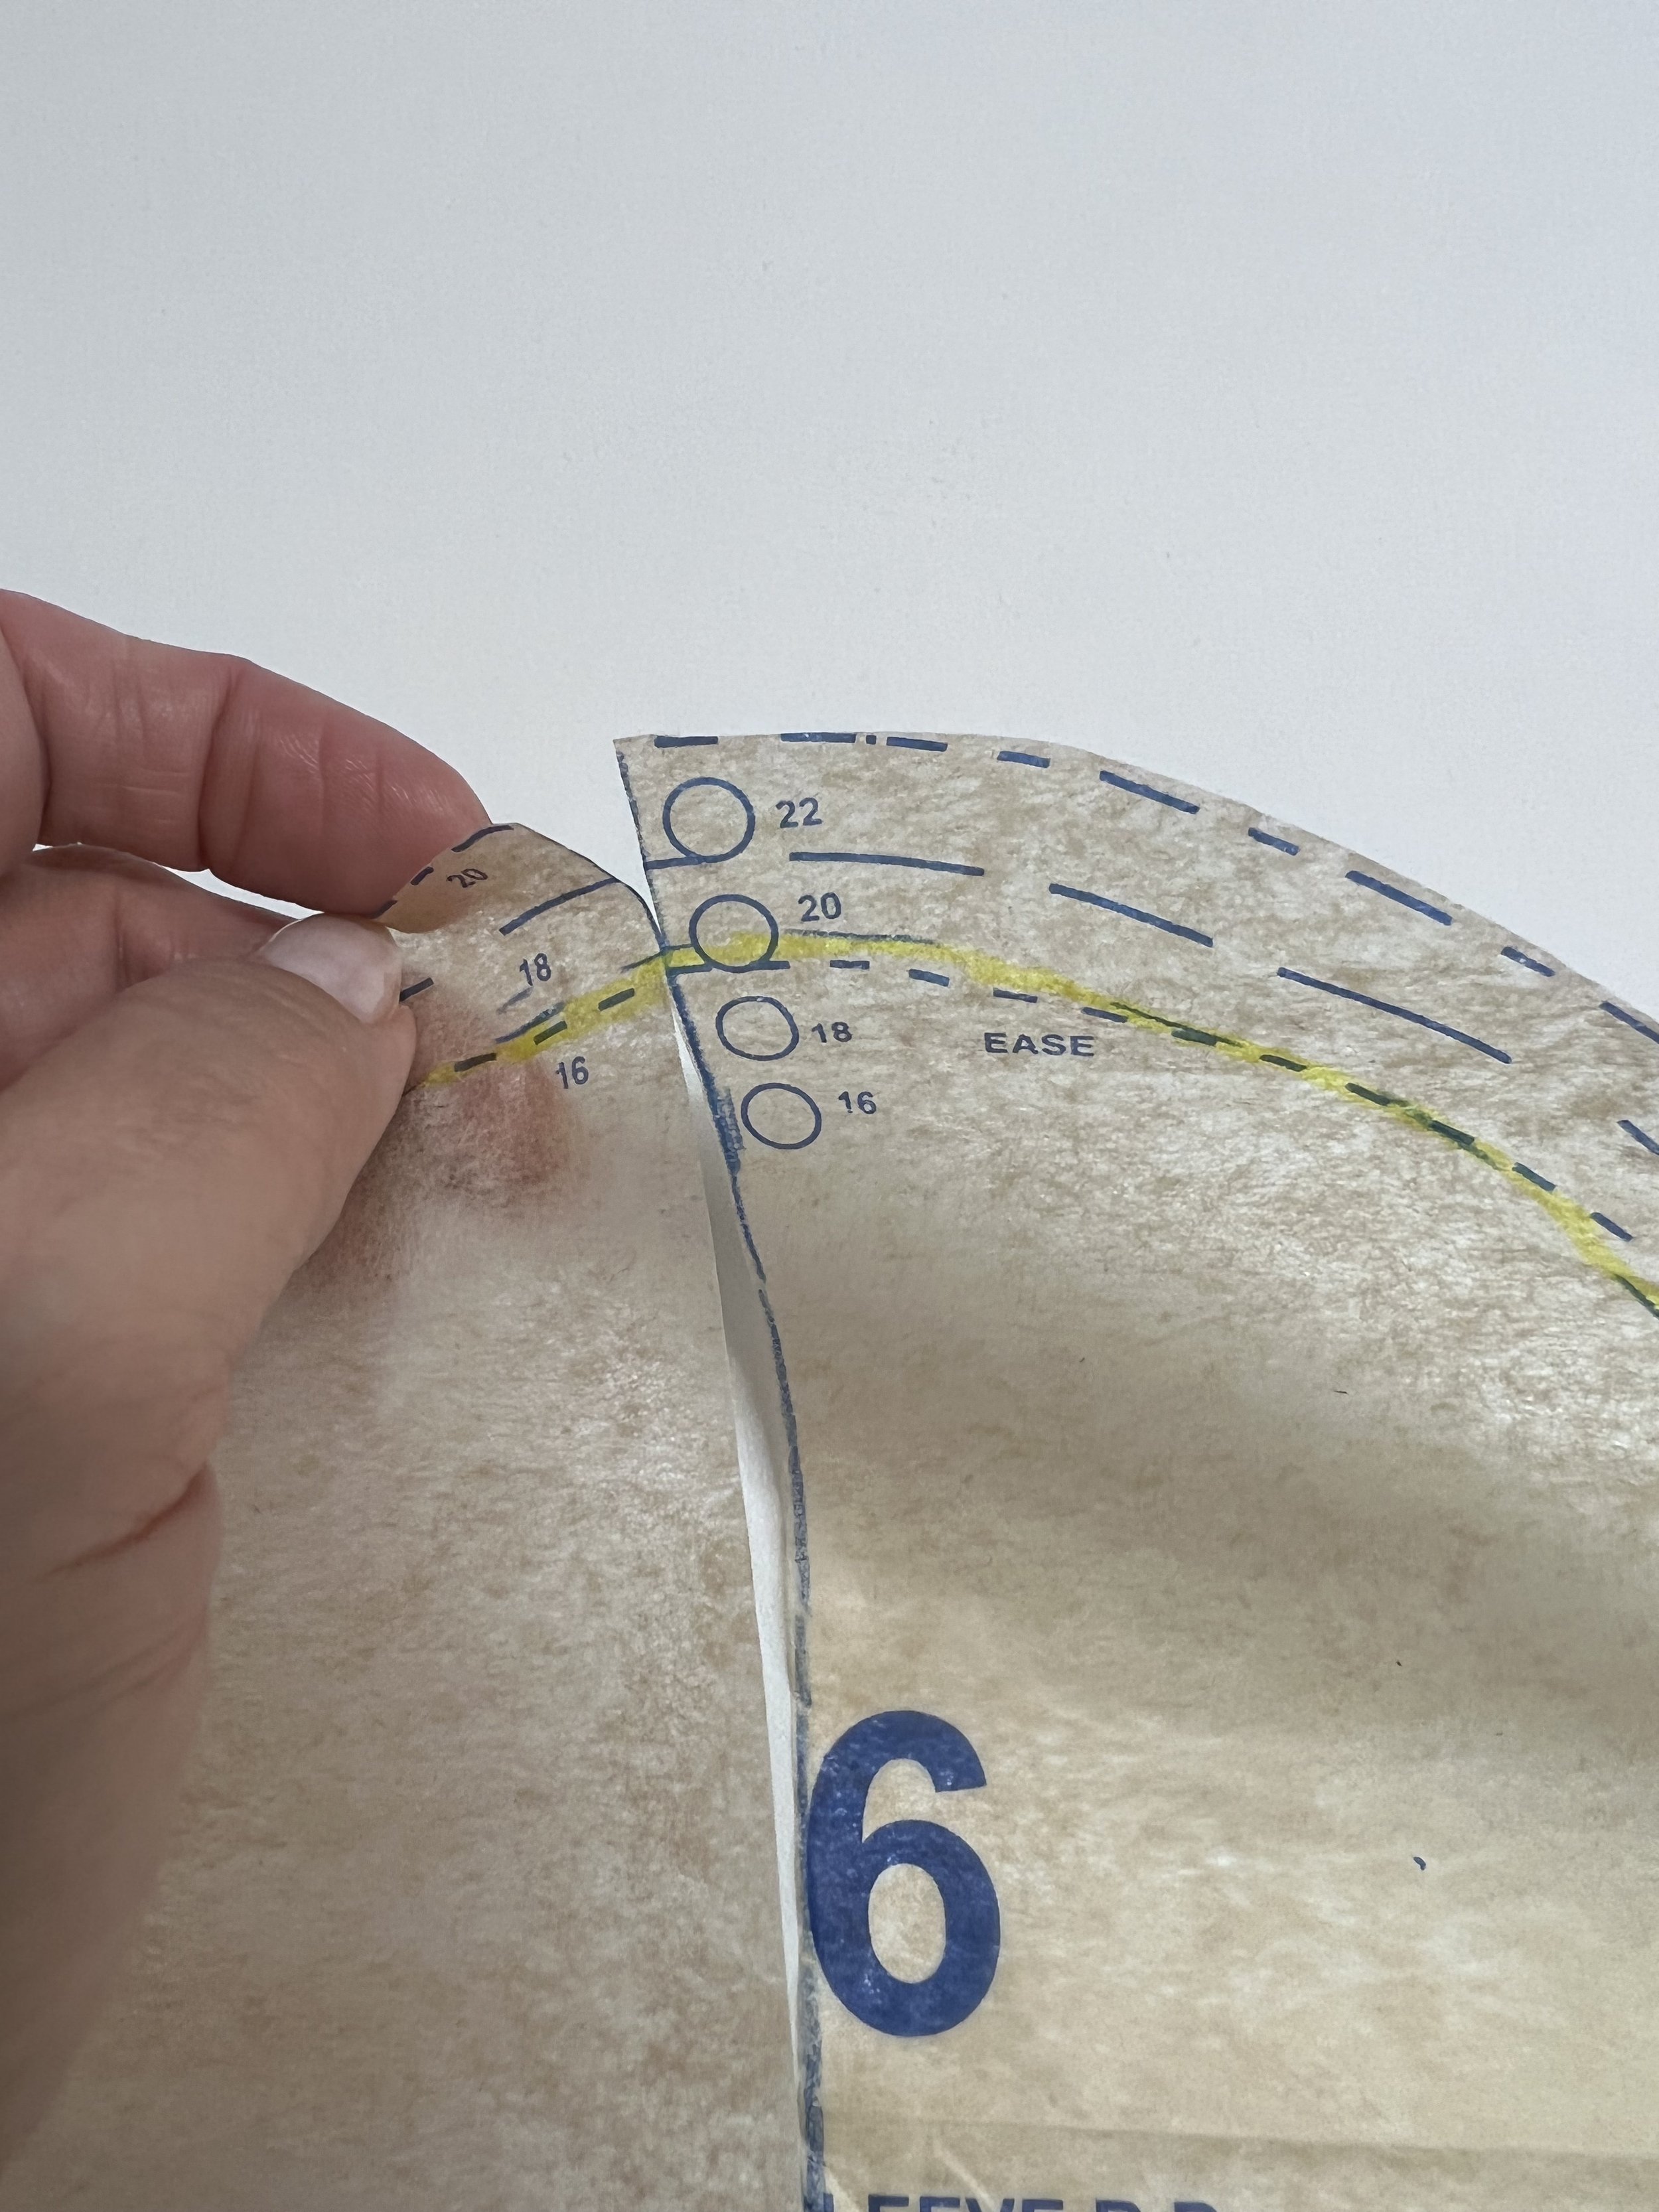
I mention in this video that one of the things I saw from a reviewer on Pattern Review for this pattern was that the sleeve ease on the sleeve caps for this pattern may be a tad too much. If you sew them the usual way we may get puckers no matter what. So if you have that issue, just go ahead and pull the sleeve piece in 1/8” toward the top so it is easier to ease it in.

Set that sleeve in just 1/8” at the top of the sleeve cap so it’s easier to set it in.
Setting sleeves can be tricky, trust me I know all about them! But when do you know when you got the job done? When the seams at the bottom of your sleeve are aligned and when there are no puckers.

The seams are aligned!
I told you on my adjustments video that I wasn’t so sure about those sleeve cuffs and sure enough, once I stitched them in and tried on the bodice it wasn’t going to happen. I went ahead and drafted an simple sleeve cuff with no pointy ends. I stitched it in the same way as I did with the original sleeve cuff pattern and I slip stitched the modified cuffs for a clean finish. If you are not feeling like using needle and thread just yet, top stitching is perfectly acceptable. Just make sure its straight!

Modified Sleeve Cuffs
That’s the beauty of sewing your own clothes. Don’t care for the way a pattern piece was designed? No problem, you can change it! This was one of the easier pattern pieces to change. Just measure the length of the bottom of the sleeve pattern piece. Remember the bottom of the sleeve already has a 5/8” seam allowance, so you have the modified pattern piece width. Then I knew I would have to make the pattern piece at least 3 inches deep because I was going to fold it and then use 5/8” (times 2… remember two seams!) to stitch it in and then slip stitch it, so I had a width of 1-3/4” on my sleeve cuff. Don’t be afraid to draft your own pattern pieces, it’s all about trial and error…. you do have to factor in a little bit of math too, but keep trying and you will get better at it.

M6696 Sewing Pattern & My Wearable Muslin
I’m working on creating a sew along for pattern M6696. This pattern has been around for quite some time. I know, I keep arriving late to all these pattern parties but some times I like to let others make the pattern way before I do and read the reviews before I take a “stab” at it. Sure enough there are plenty of reviews online for this pattern, and they all mention the same exact thing that was bothersome but some more on that later.
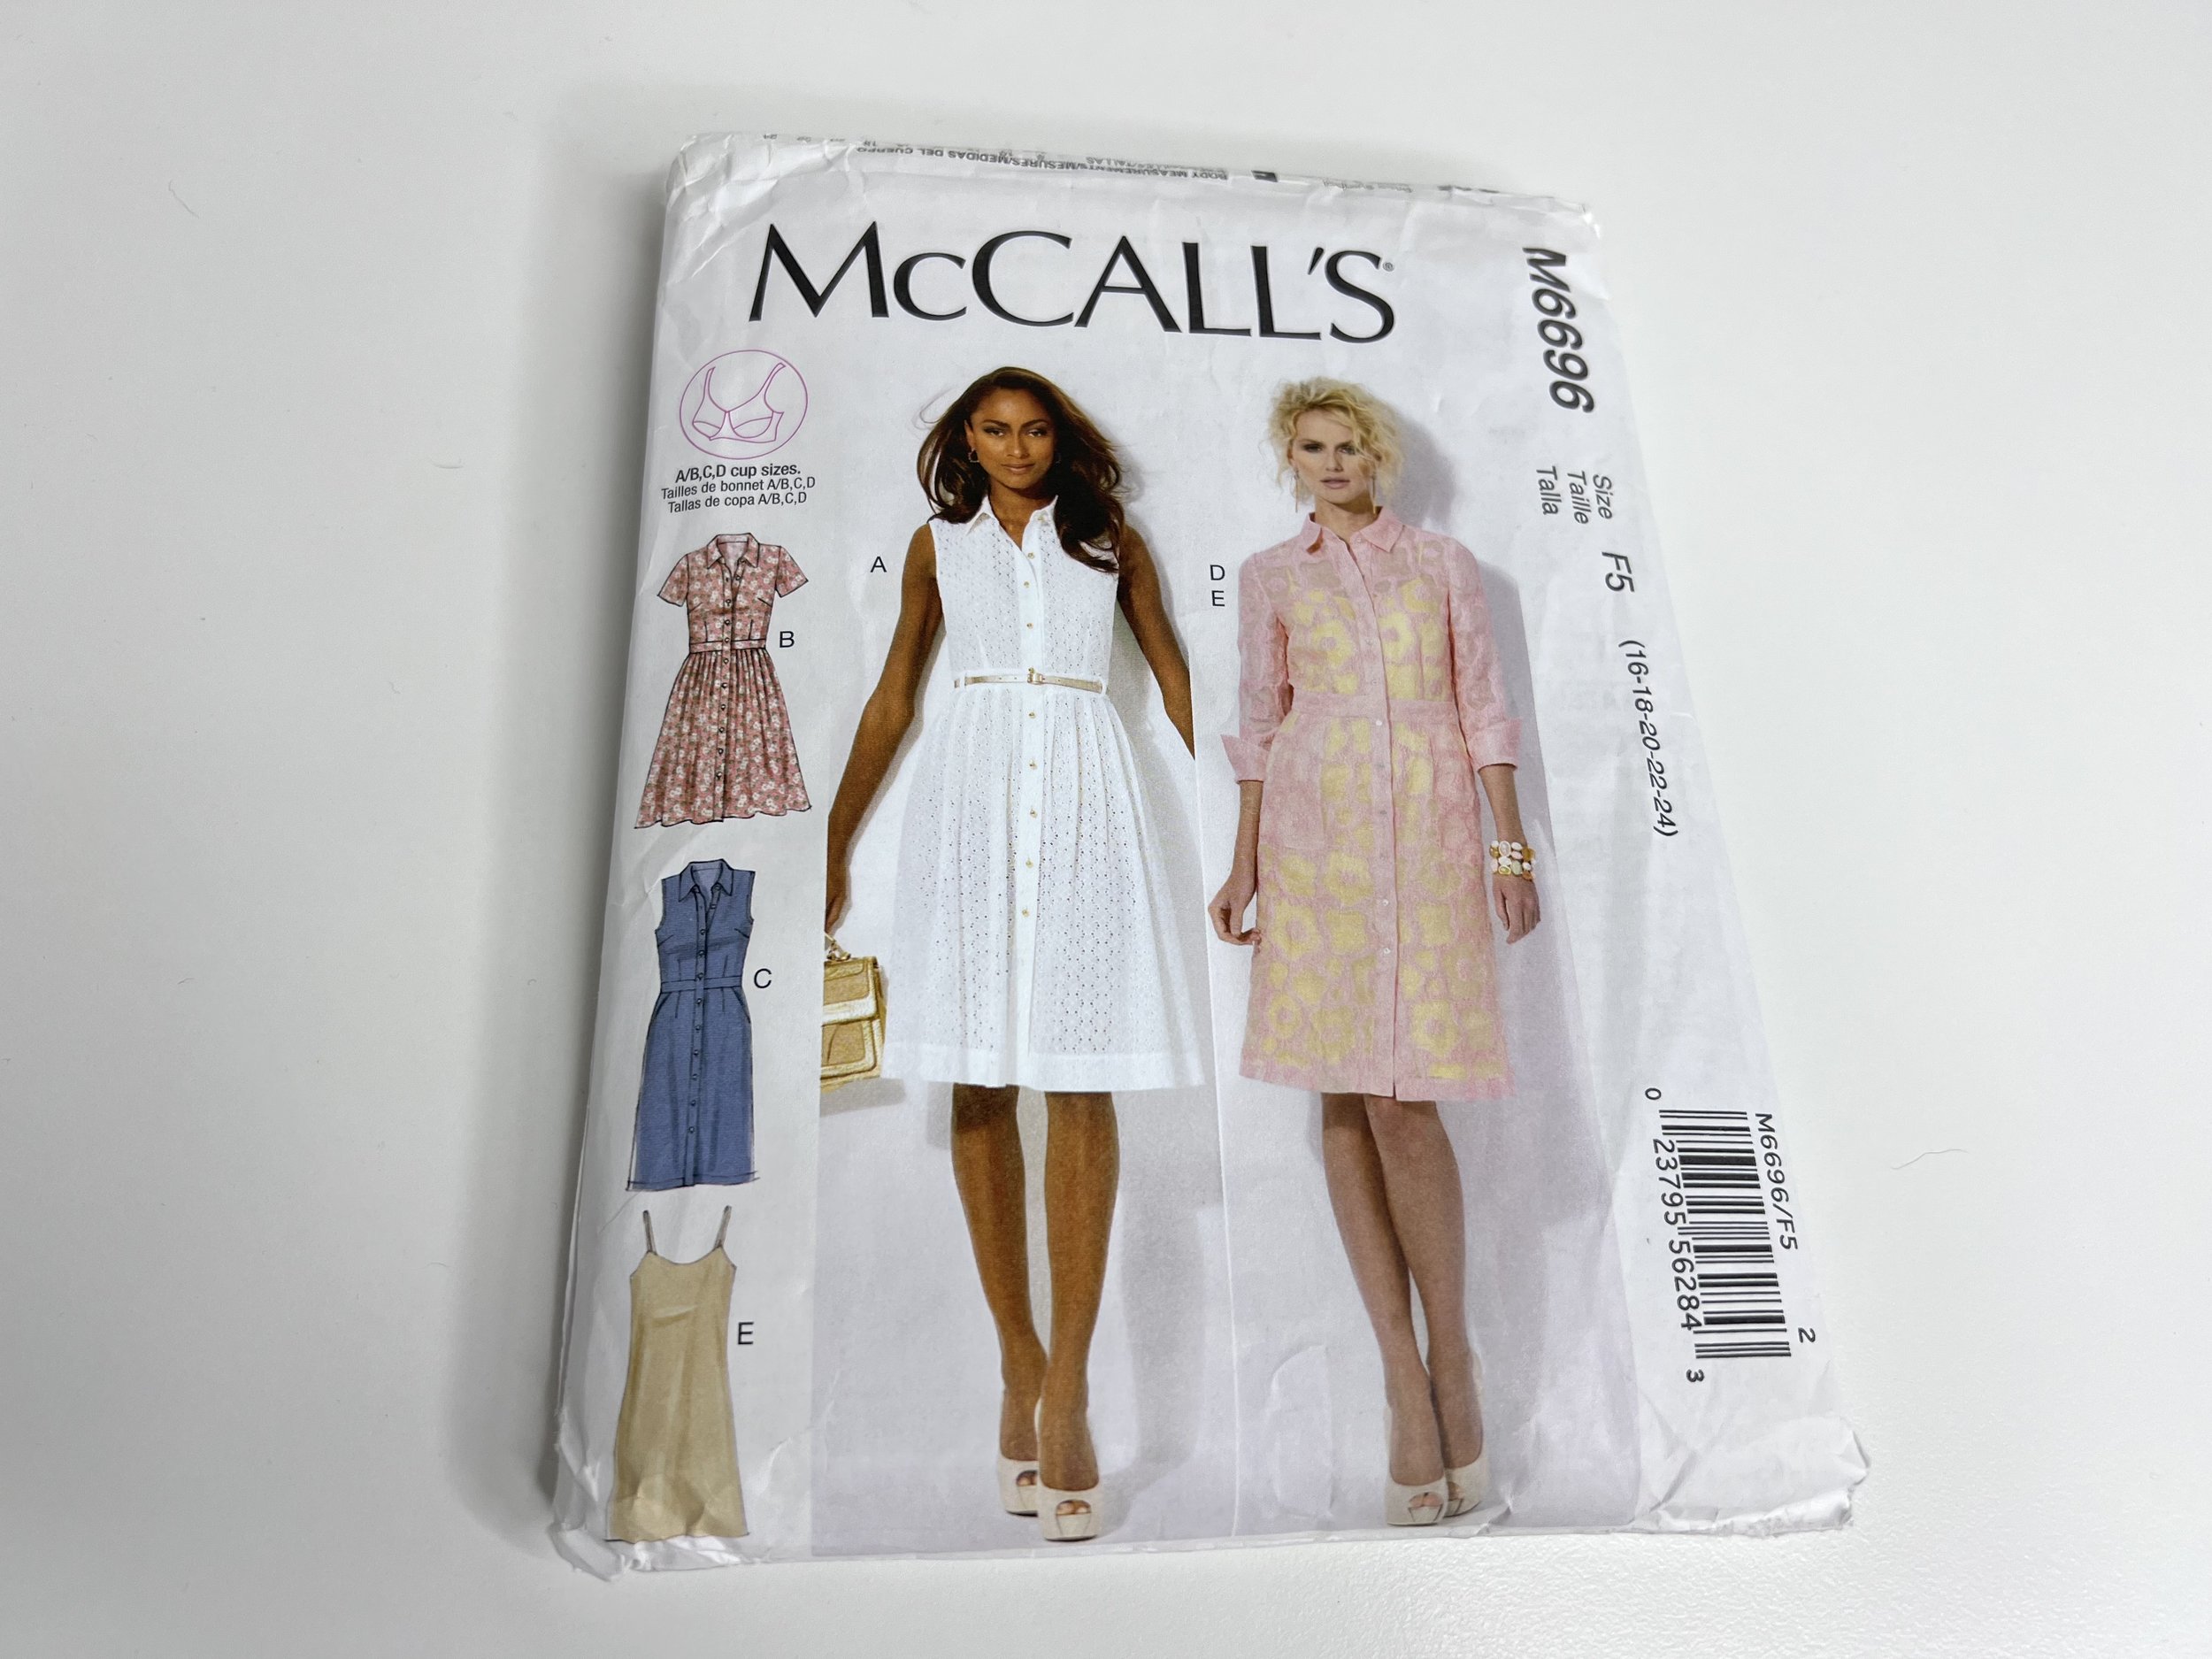
M6696 Dress Pattern
So here are some of the adjustments I made.
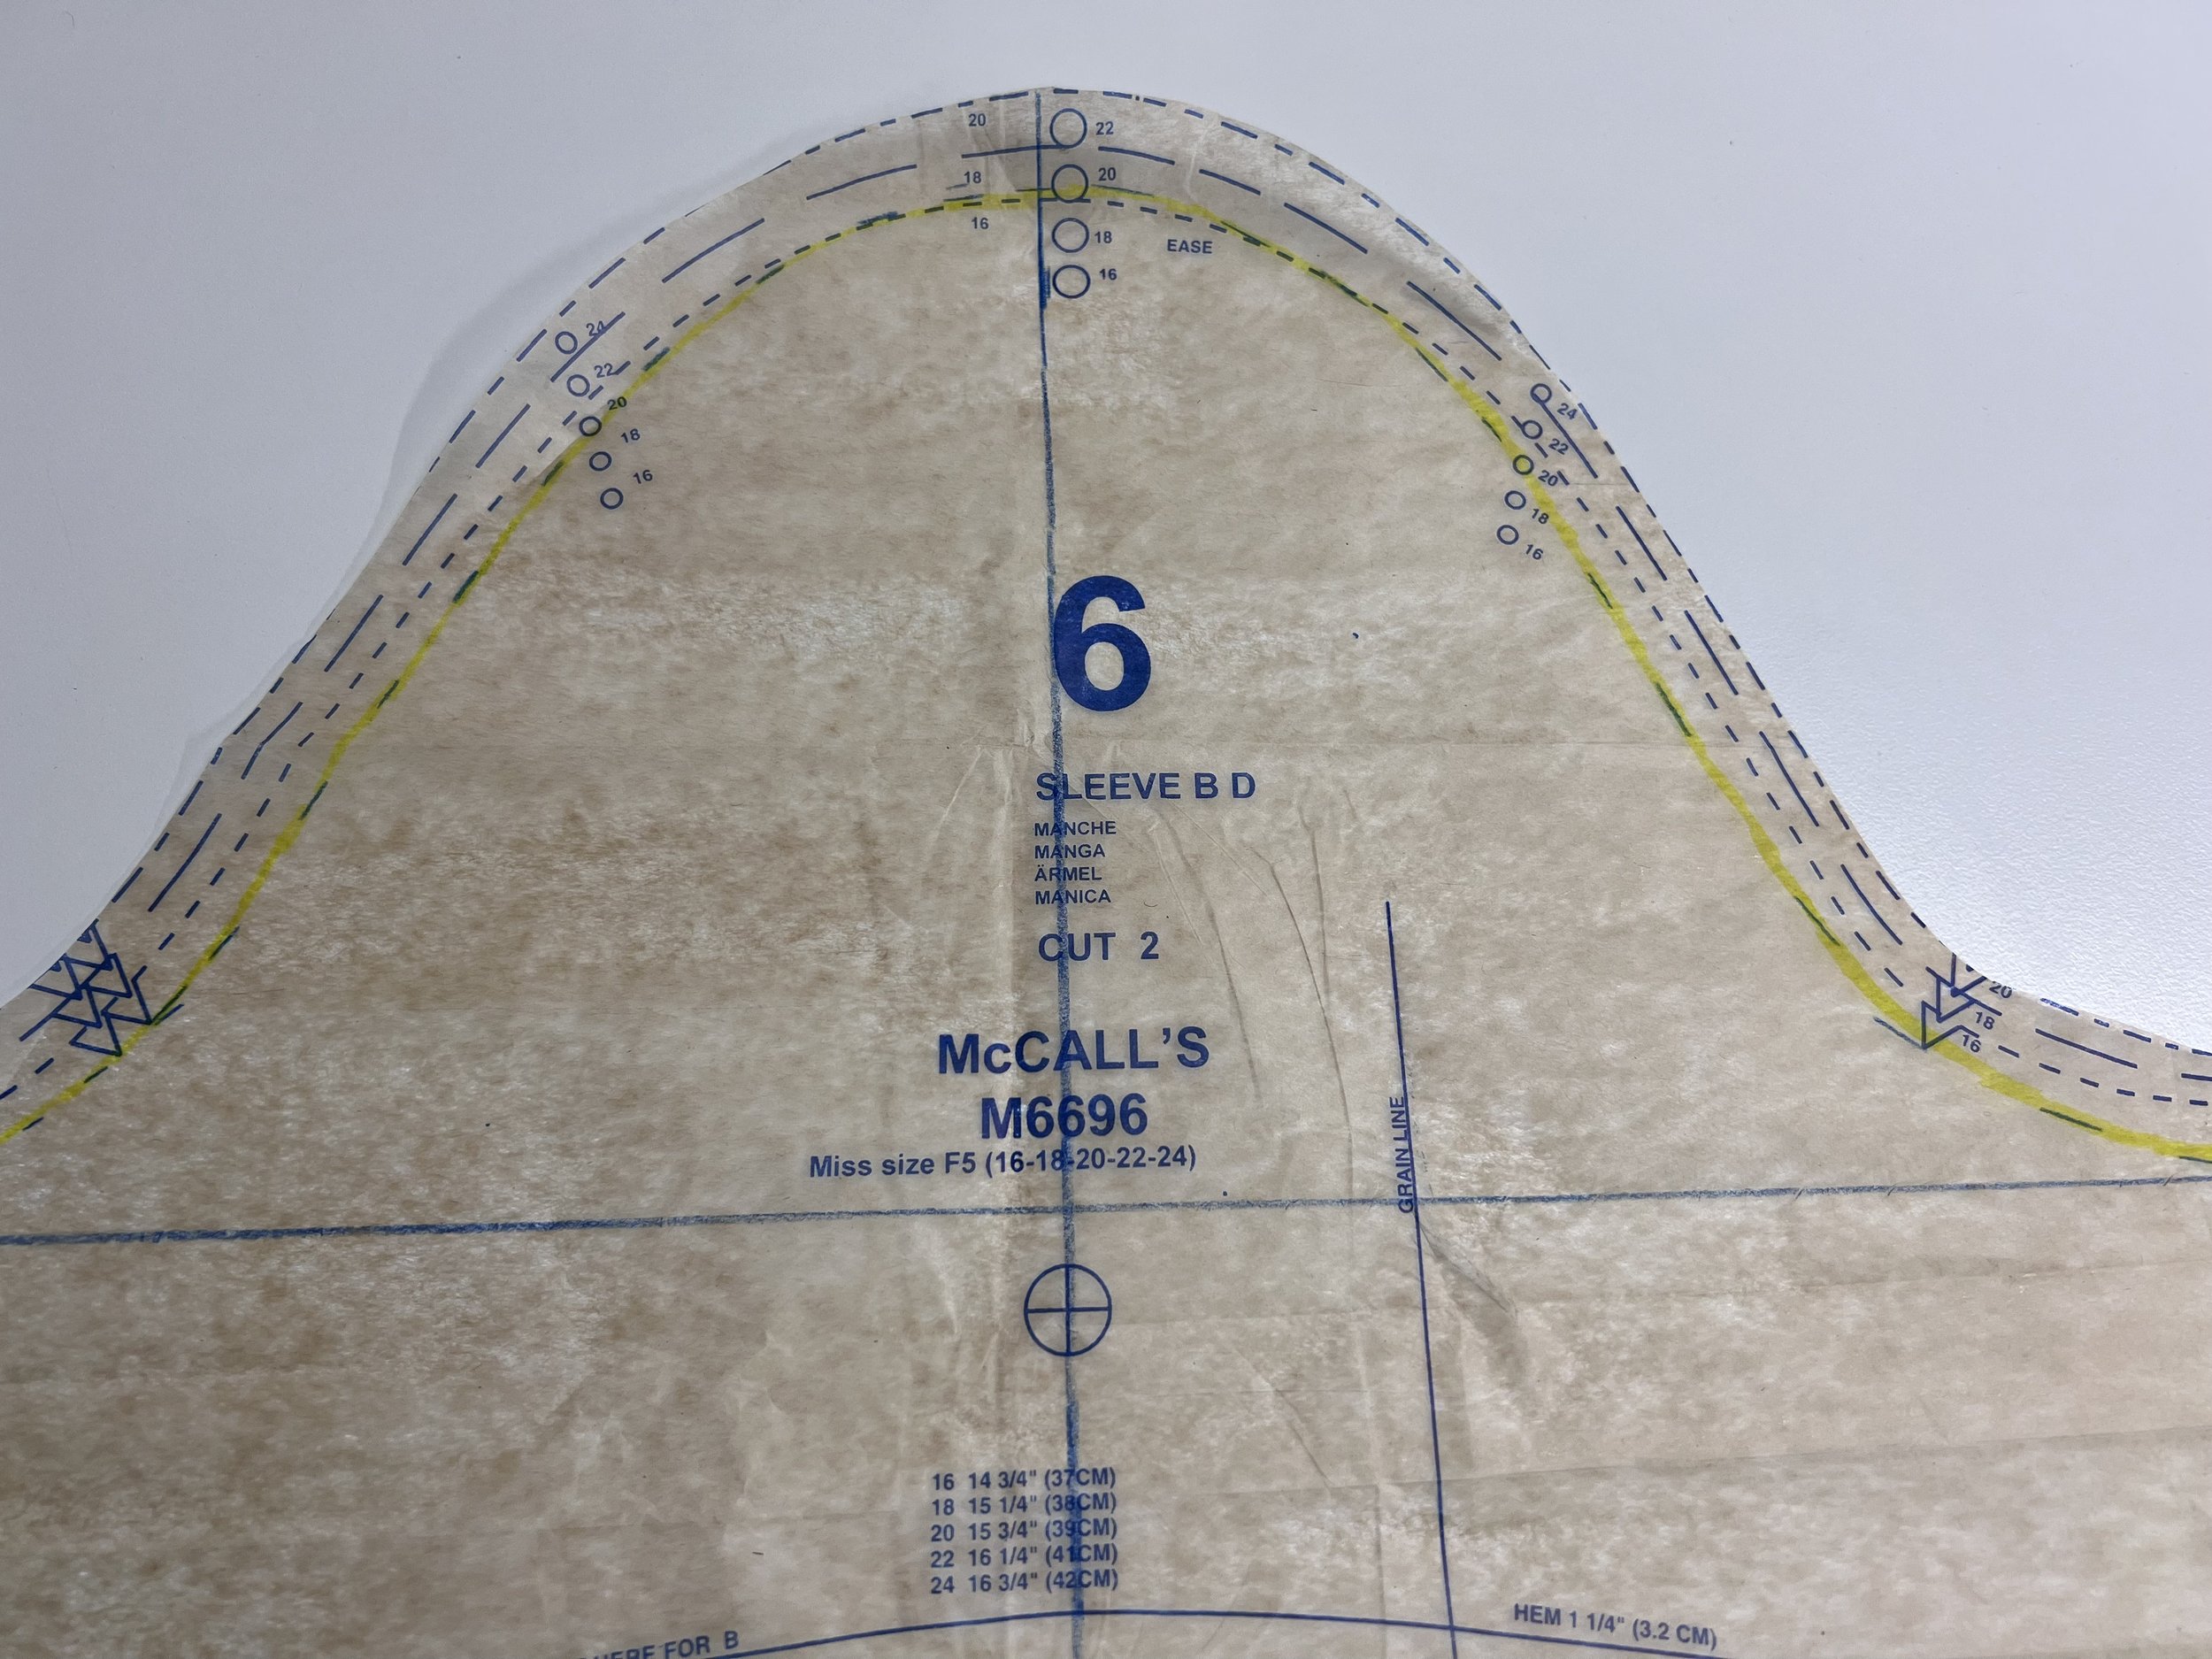
Bust darts - I lowered the bust dart around 1.5” - this is a standard adjustment I have to make for most woven patterns. Always. If you are wondering how you know when you have to lower or raise the bust dart? All darts must point to your bust apex. You can see mine in yellow highlighter below. I usually do a quick tissue fit on this and this pattern was no different. I had to lower it.
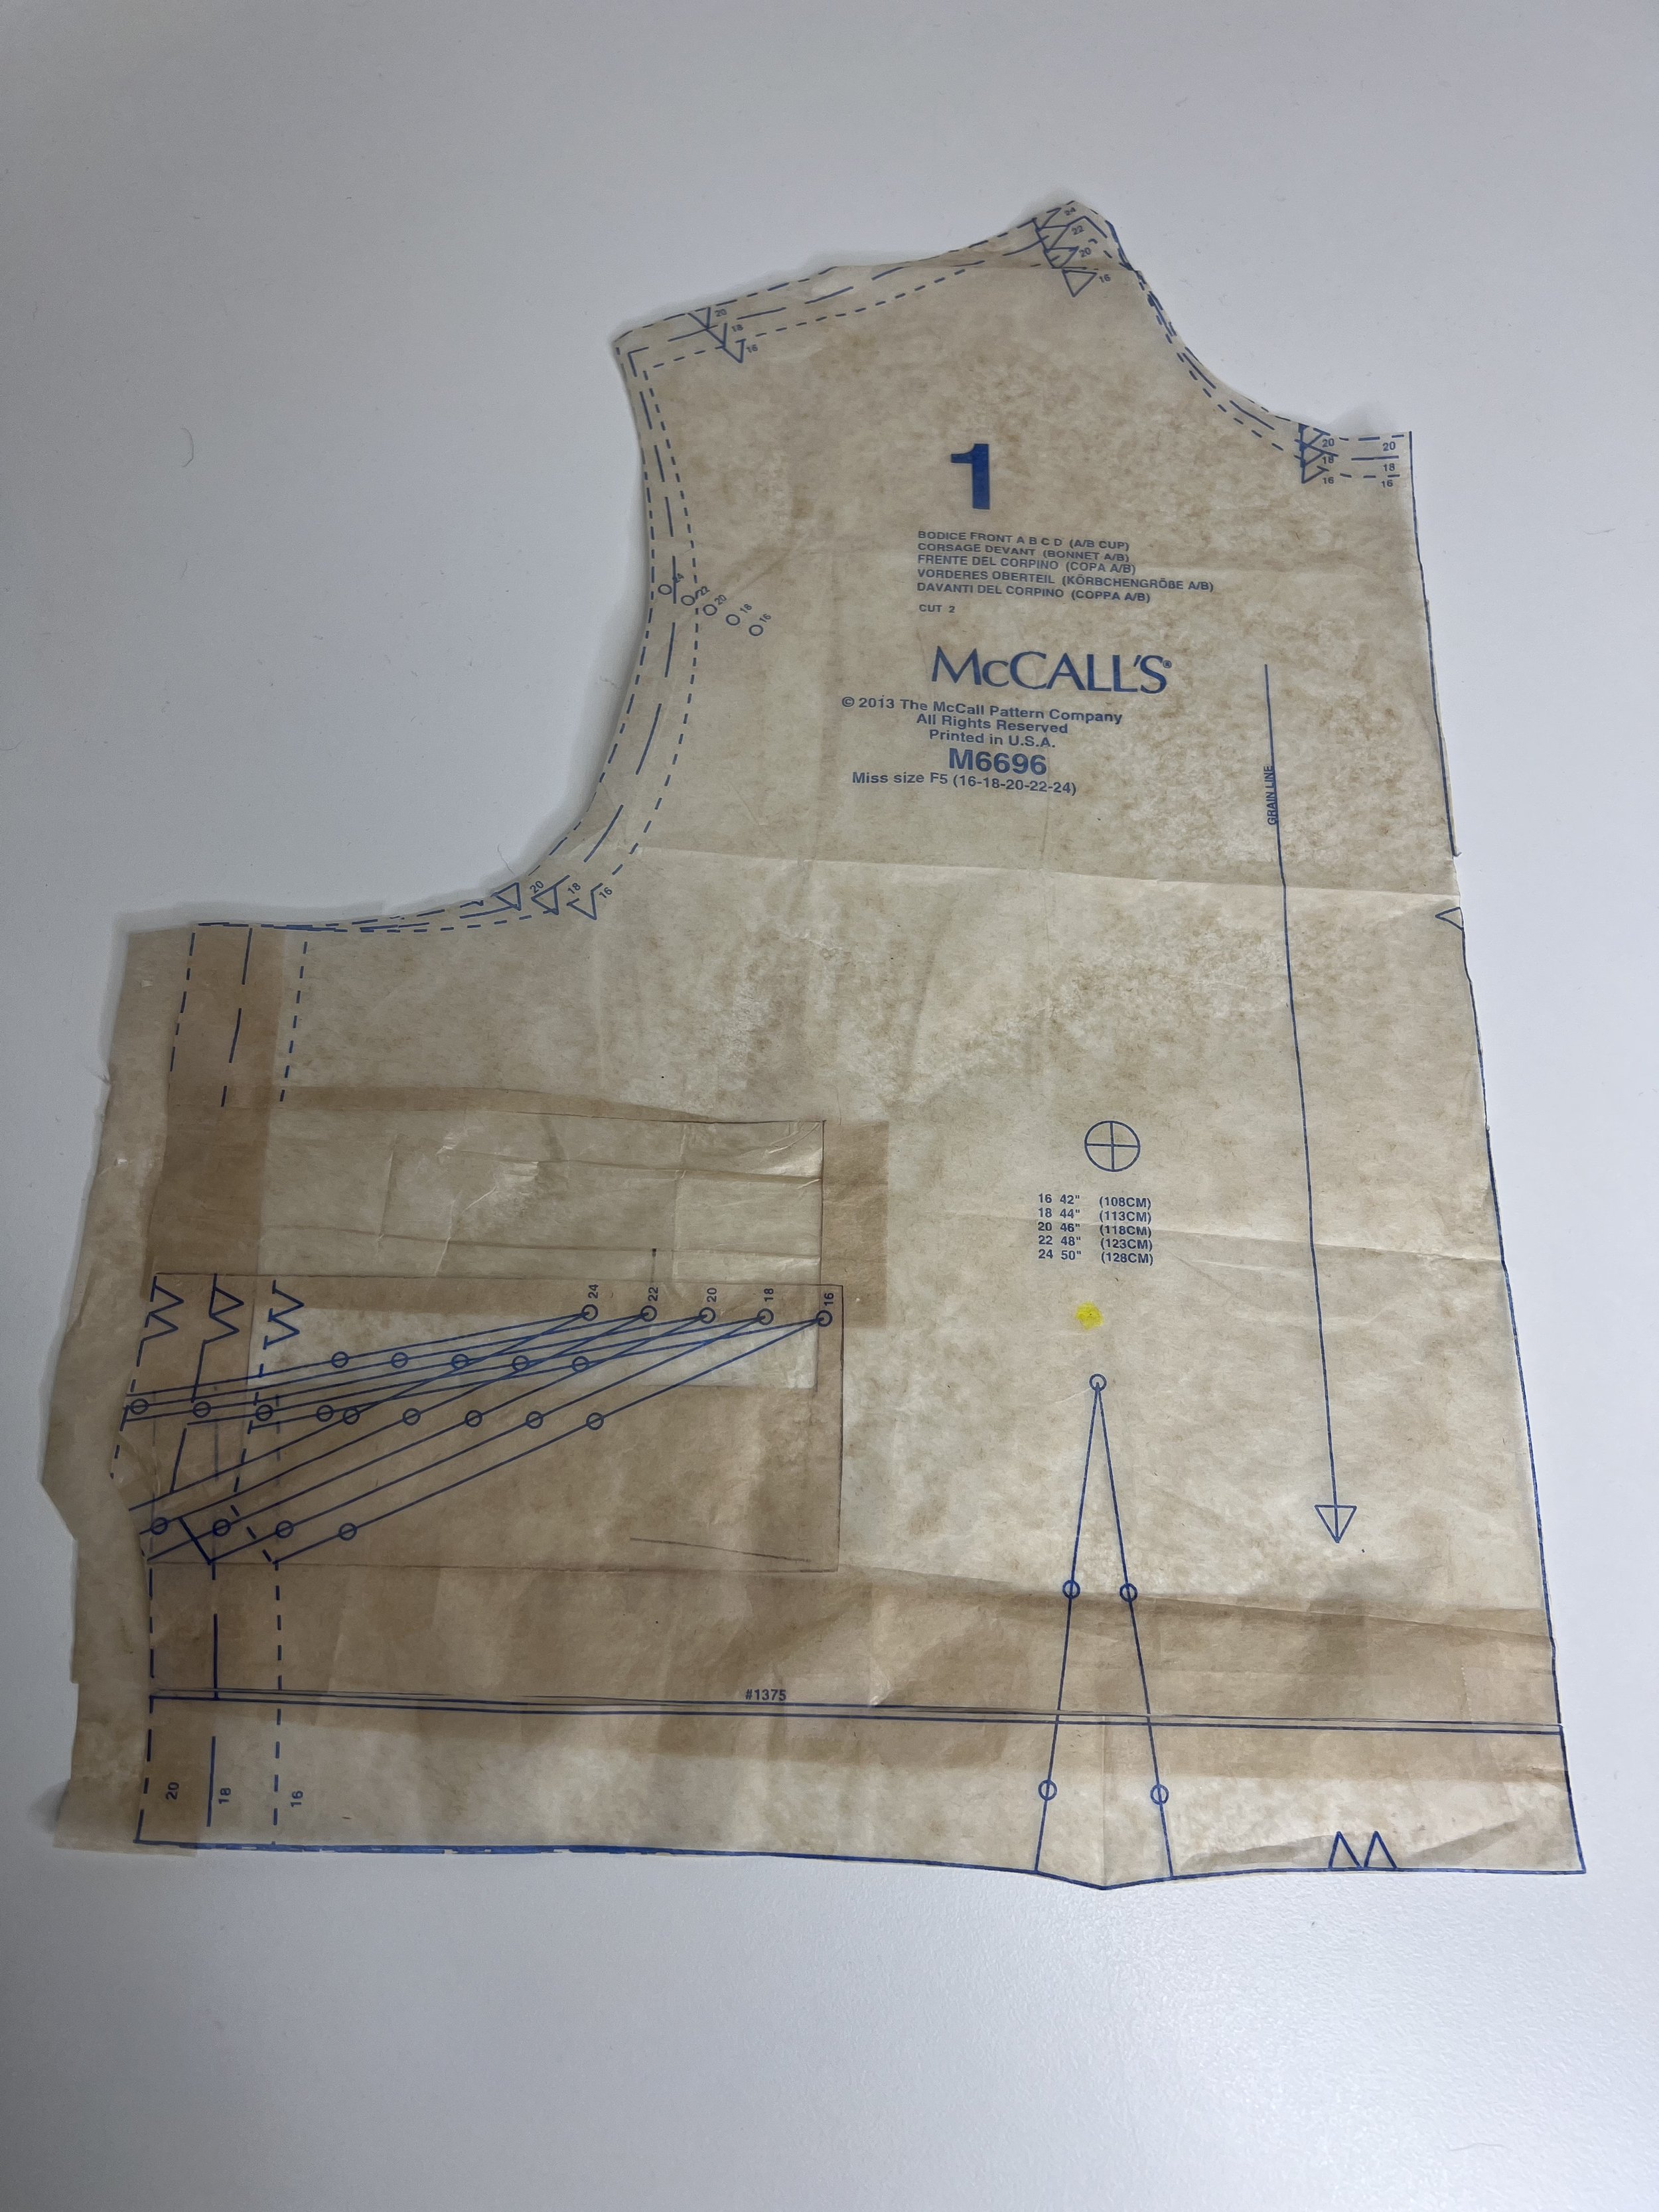
Lowered bust dart on the pattern piece, yellow highlighter dot has my apex that bust dart had to come down.
Size and taking fabric stretch- I cut a size 20 but I had to add 5/8” to my muslin for the bodice essentially making it a size 22. HOWEVER, the muslin that I made has zero stretch and the fabric I’m hoping to use for my final garment has stretch, so I will cut a size 20 and see how it behaves / stretches after one wear. I will also leave the bodice seams finished with a serger but I may have to open those side seams and take it in some more… we shall see after one wear. You can see the additional seam allowance in the picture above. I should have cut a size 22 but I know I’ll end up taking it in based on the stretch amount of my final fabric.
Waist width- I added 1/2” to the waist for the skirt front and back, which will get me to my usual waist size. I wonder once I make my final garment how much will it stretch naturally. I want the fabric to be fitted but not tight. I don’t want the buttons to be pulling on the fabric, so I rather have more fabric to play with than not enough.
Added width to the side front pattern piece for the skirt portion. I already added width to the bodice so now it needs to match the bottom piece.
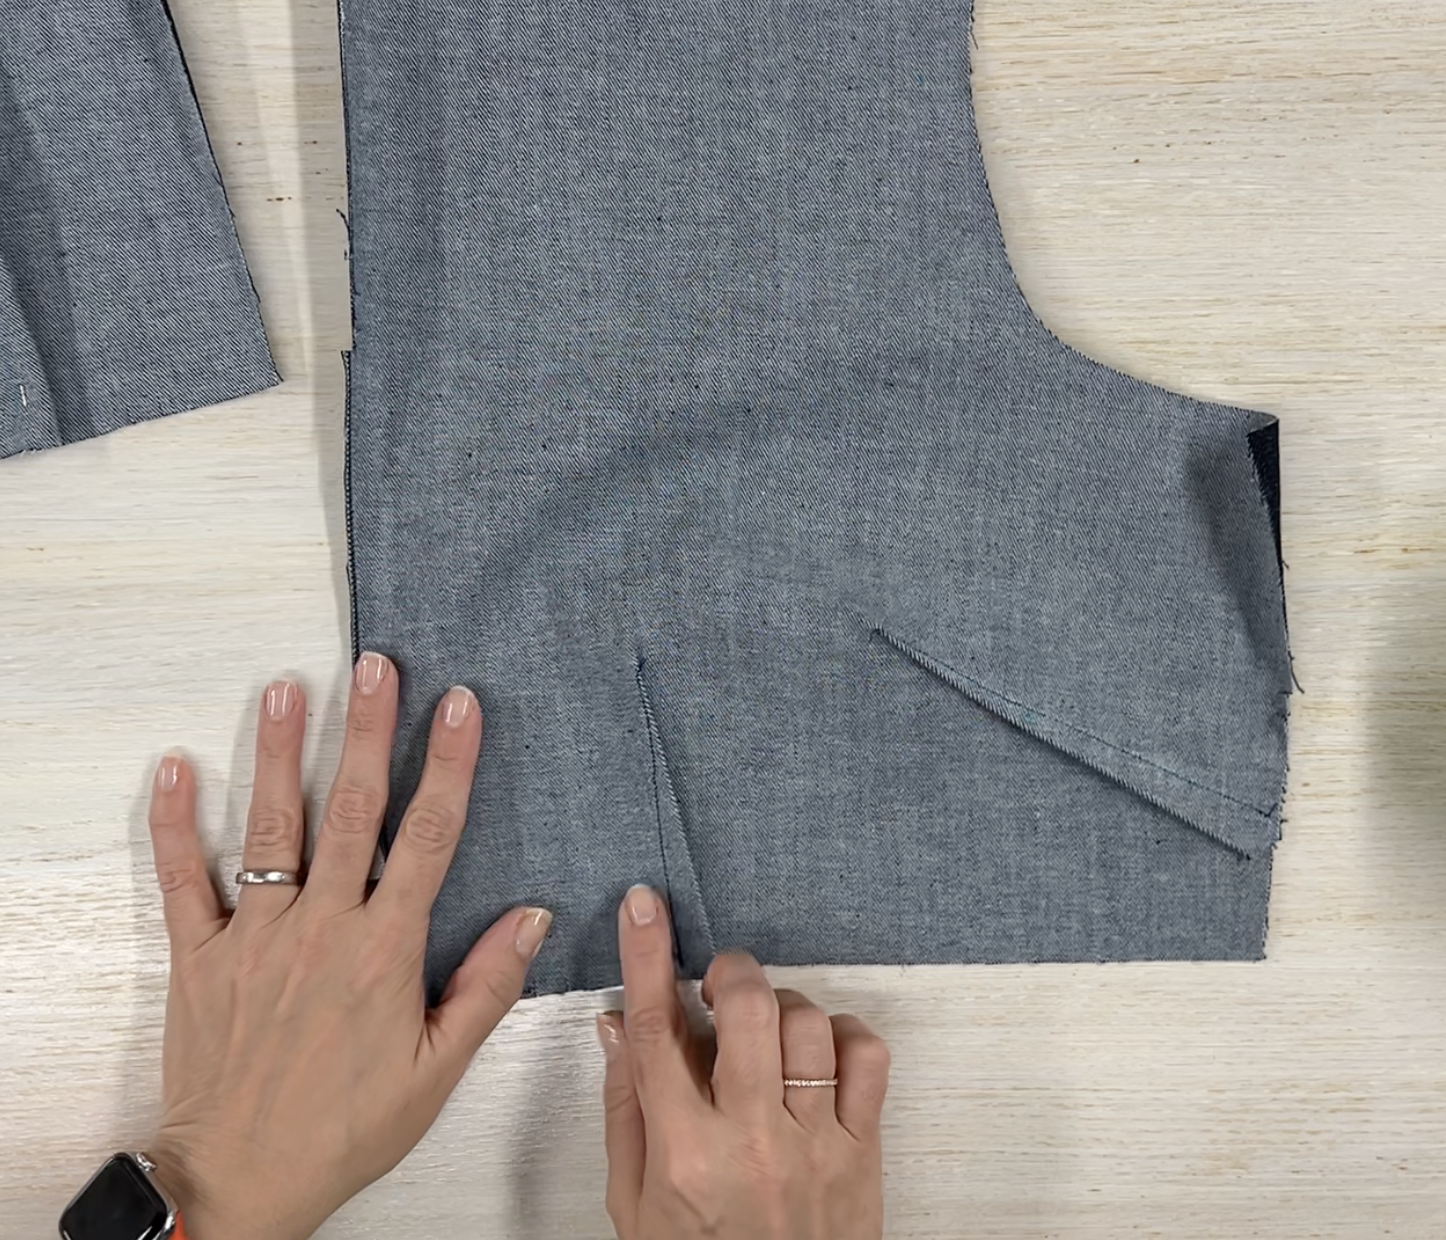
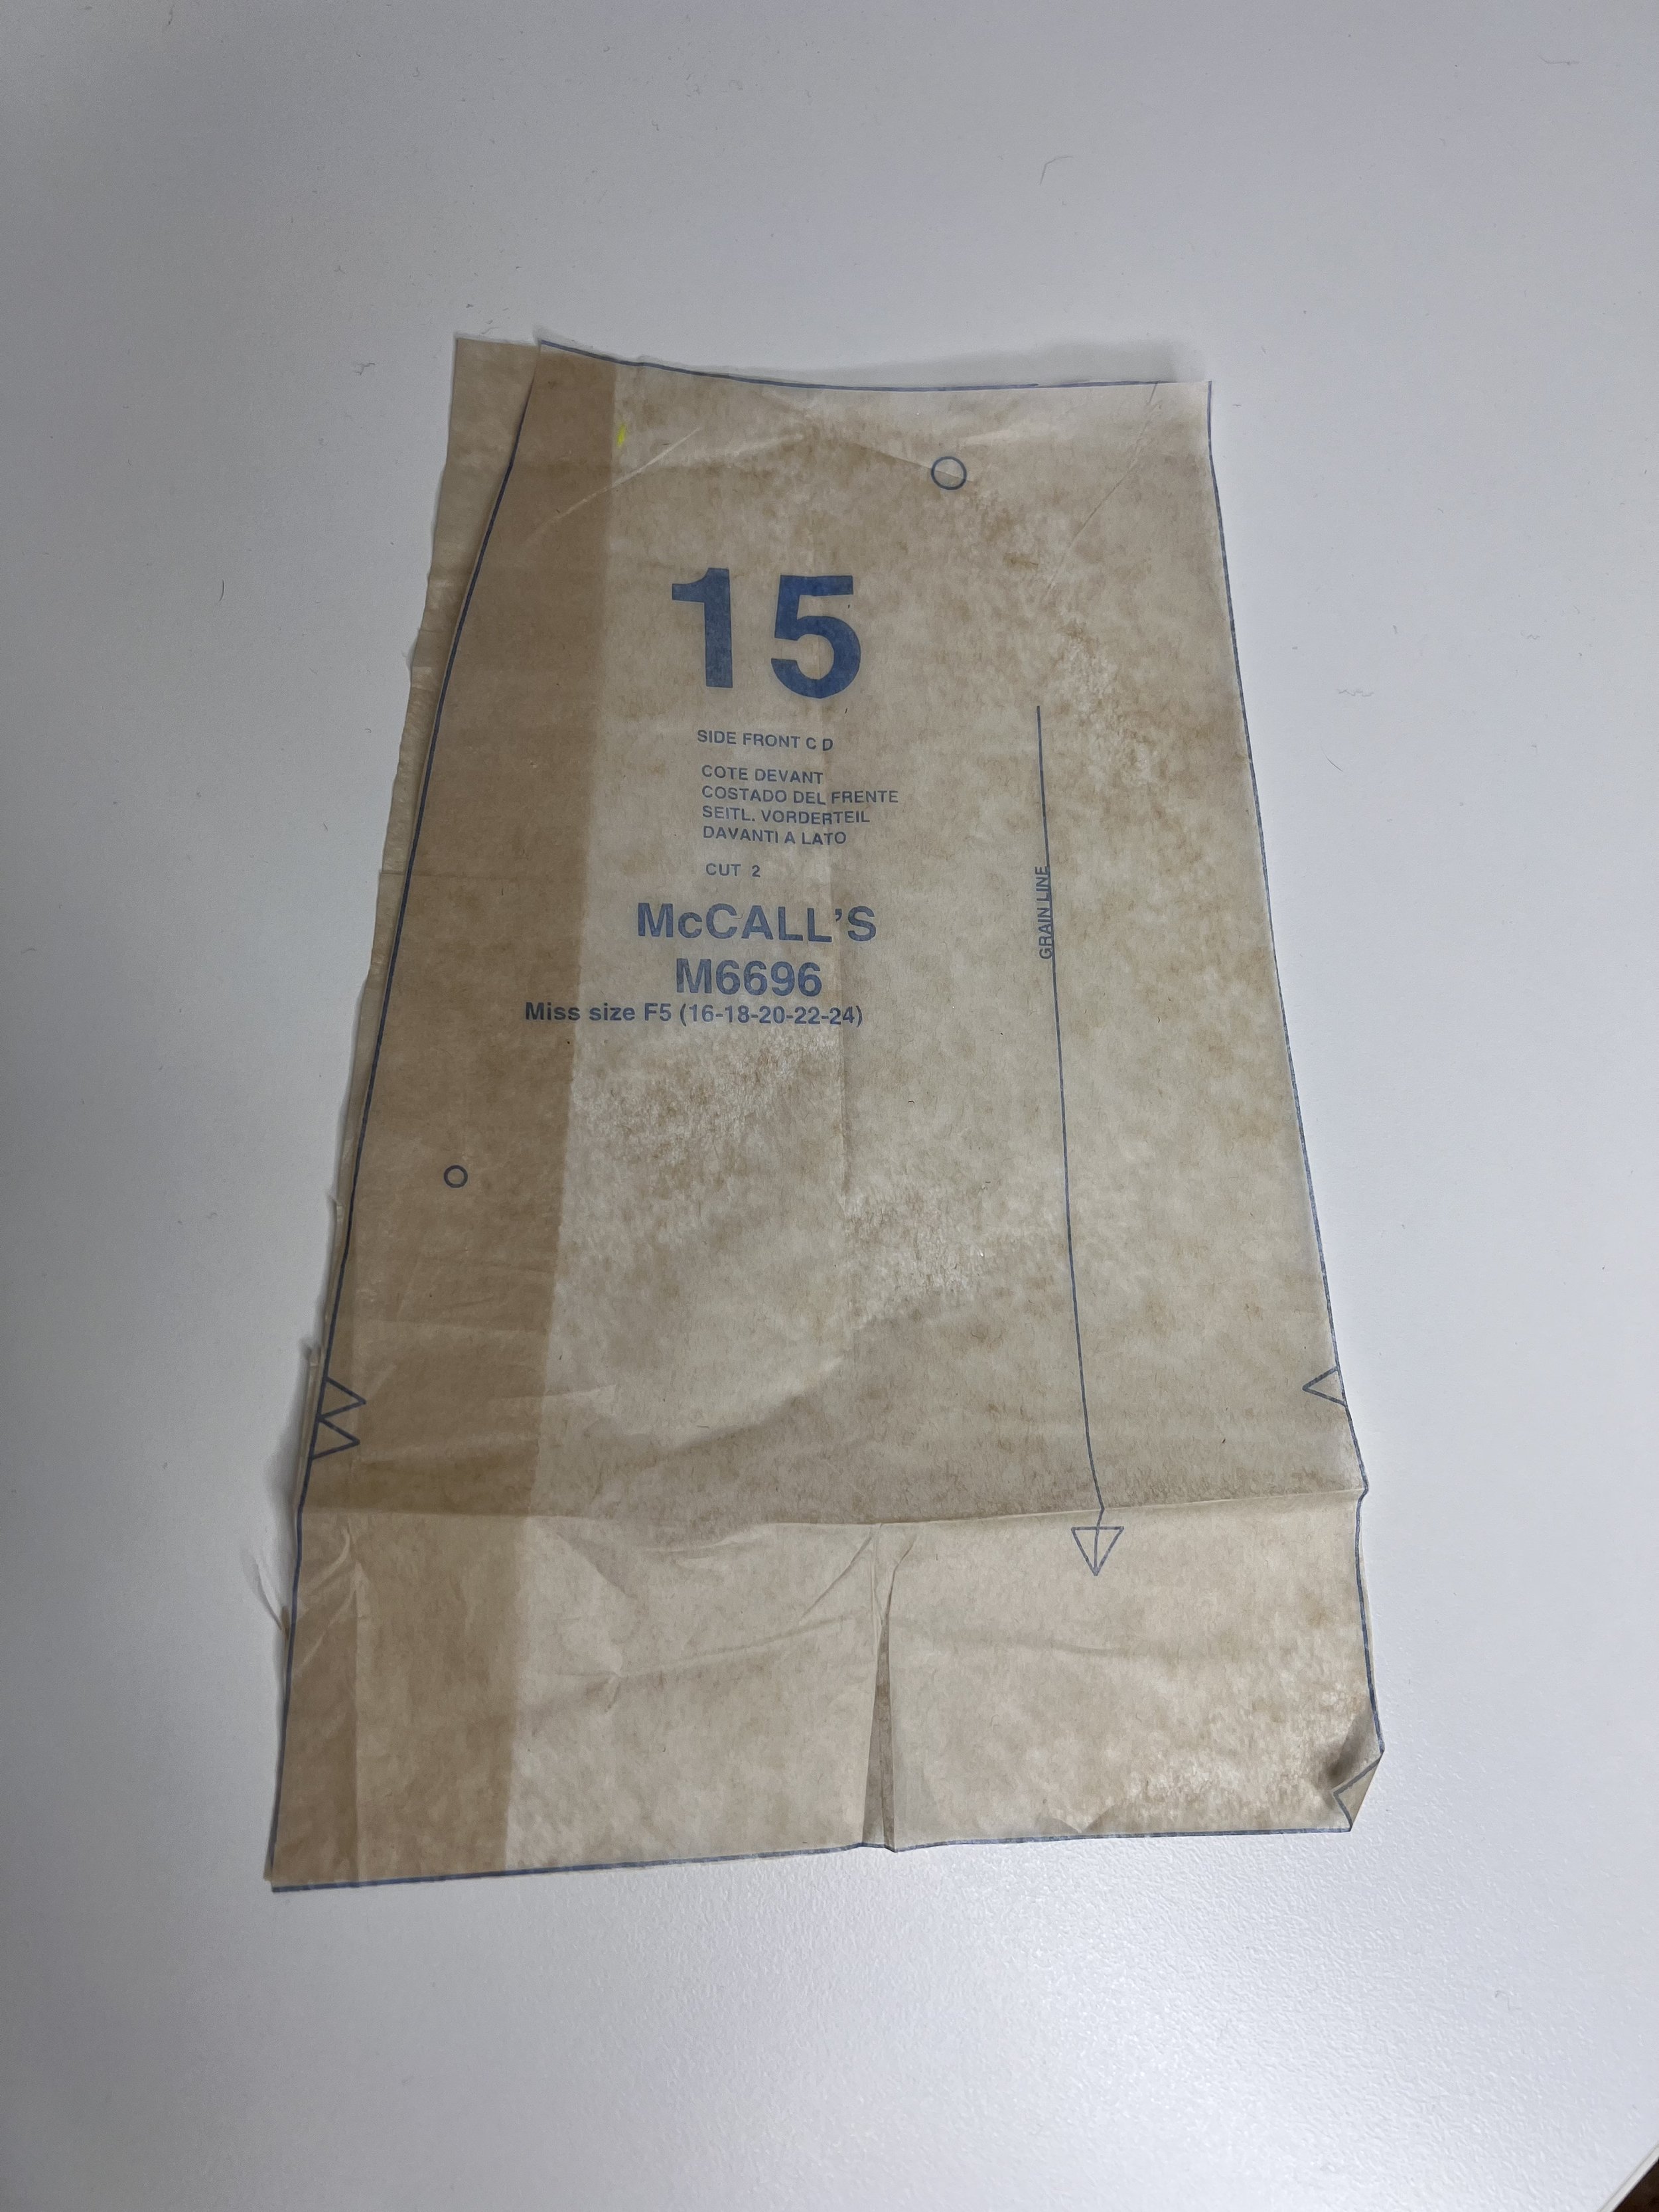
Pockets - I changed the pocket shape for the skirt. I don’t care for the cut of the pockets. They usually stay open when you wear this style of pockets and it is just ugly and unflattering so I changed that too. I used S9261 pocket pattern pieces for this, made a copy of the pattern piece, aligned the circles in pattern piece no. 14 and that is that. So an easy change.

Left pocket facing is my new drafted pocket facing piece with the rounded edge and the original piece with the 45 degree angle.
Bicep Adjustment - I had to do a bicep adjustment and if you haven’t watched the bicep adjustment video its a good one if you ever are in the need to make a bicep adjustment.
Bicep adjustment on M6696. I added an 1” to the overall width.
Sleeve Cuffs -Although my muslin is sleeveless I know I will be changing the cuffs on the pattern. I don’t particularly care for the cuffs on the pattern. There are a few options…. I can redraft the pattern piece so take out some of the pointy ends, I can use a regular cuff but that may be more work than I want to do, OR I can gather the sleeve a little, add a sleeve cuff and be done. I took off 1” off the pointy ends, I’ll try and see how I Feel about them once I put one in. The right picture is the original pattern piece for the sleeve cuff and the left one is the folded pointy ends folded 1”. It’s another quick change on this pattern piece.


Waist band - I kept the entire length of the waist band pattern piece, and it shouldn’t surprise me I used the entire length. I knew I would add some with to the waist and this was a safe assumption to make because once I joined the bodice to the skirt I could always cut away any excess fabric. So keep that in mind when you are cutting your pattern and if you are a rectangle shape like me, then perhaps this is a good way to give yourself a buffer on that waist band.
Back pleat - This was the number one item mentioned on all those pattern reviews. Sure enough when I made bodice muslin no. 1, I agreed with all those reviews. I took out that back pleat, not completely but I left about 1/2” in, and looking at my muslin it still feels like a lot but I want to be able to move a little. Those pleats in the back bodice are rather large and depending on the fabric you are using can look like a big bag of extra fabric. I just folded the piece almost 2” but its almost 4” worth of pleats depending on the pattern size you cut. So that had to be reduced considerably. I added width to my front bodice but notice how I didn’t add width to the back bodice piece… that’s because I knew there would be extra fabric in there to account for the waist width. The back bodice pieces are usually at an angle slanting down… Look at my pattern piece, its straight.

Eliminated around 4” inches of that back pleat at the top and at the bottom of the pattern piece. There is still a little left at the bottom but its an easy adjustment by just measuring and folding the extra tissue to eliminated it or decrease it.
I believe this pattern was released back in 2017. There is a reason it is still being printed (five years later) and it’s still selling quite well. It is a classic dress pattern to have in the pattern stash. I can see multiple iterations of this pattern. Sleeveless, or with sleeves, perhaps ditch the pockets altogether and do a button down shirt dress with the waist band. I can also see this as a beautiful lace (burnout fabric!) dress with a bias cut slip dress underneath… which by the way it has that pattern piece included. You can use linen, chambray, rayons, viscose… heck my second muslin is made out of quilting cotton and it looks great (hello wearable muslin!).
Don’t love the Big Four patterns and you want to look into an Indie Pattern that is similar to this one? Then try Megan Nielsen’s Matilda dress pattern. It’s pretty darn close, the only difference you have pockets in the front bodice and outside pocket detail in the skirt pieces.
So needless to say I’m excited to make it in my lightweight denim fabric. If you haven’t gotten the pattern, I highly recommend it. I would recommend this pattern for a confident beginner or intermediate sewist.


How to Thread a Double Needle and How to Use it.
If you’ve been following me for a while, you know I love knits. As with all knits I like to finish my hems for most knits with a double needle. Not only do I use a double needle for hems, I also use it for top stitching. It’s a handy sewing needle to have in your sewing arsenal. But let’s talk about a few things to note.
There are different kinds of double needles…. There is a Universal Double Needle, a Jeans Double Needle, Metallic Double Needle and a Jersey Double Needle. Don’t believe me? Go check out Schmetz’s needles website. By the way, the have Schmetz has a really nice handy little app you can download that can help you pick the needle type for the type of fabric you are sewing… I have it on my phone and I refer to it often for any fabrics that I’m not quite so sure on what to use.
Some double needles also vary in width! And there is even a triple needle out there and of course the uses for it are many but mostly decorative stitching. But let’s stick with double needles for now.
I usually tend to use a stretch jersey double needle or a Universal Double Needle. It all depends what I’m sewing (I switch between jersey and some topstitching of woven fabrics) but as you thread a double needle the biggest thing you need to keep in mind once you start using is:
Length your stitch. Lengthen your stitch to 3.0mm to 3.5mm.
Loosen up the tension a little. Just a little! Too tight and it may cause tunneling between the two rows of stitches.
Test on a scrap piece of fabric.
If your machine has a double needle function make sure you turn it on, its a safety so you don’t hit the needle plate. That would be a quick way to damage your machine and break the needle.
Do NOT backstitch!!!! So leave your threads long when you start and when you end and you can tie them by hand.
Lastly, go slow. You are using double the thread, if you make a mistake… that is more thread you are ripping out.

Get the Ready to Wear Look with Sewing Patterns
I haven’t done one of these in quite some time. I do these so you get some inspiration as to what you can do with the sewing patterns that we see over and over again. They are very much inspired on Ready to Wear styles out there. Some patterns are older, but some are quite new.
So let’s start with Ralph Lauren because why not? I get ads for Ralph Lauren all the time. I love RL, there is something about that classic style that works year after year. Upon seeing the picture below with the model in the faux suede leather dress I thought, I’ve seen this pattern before. Sure enough I recall seeing something rather similar from Simplicity. its S9042, view B is rather close, you would have to add in a collar, get rid of the band and add a set of cuffs but you could get away without them too.


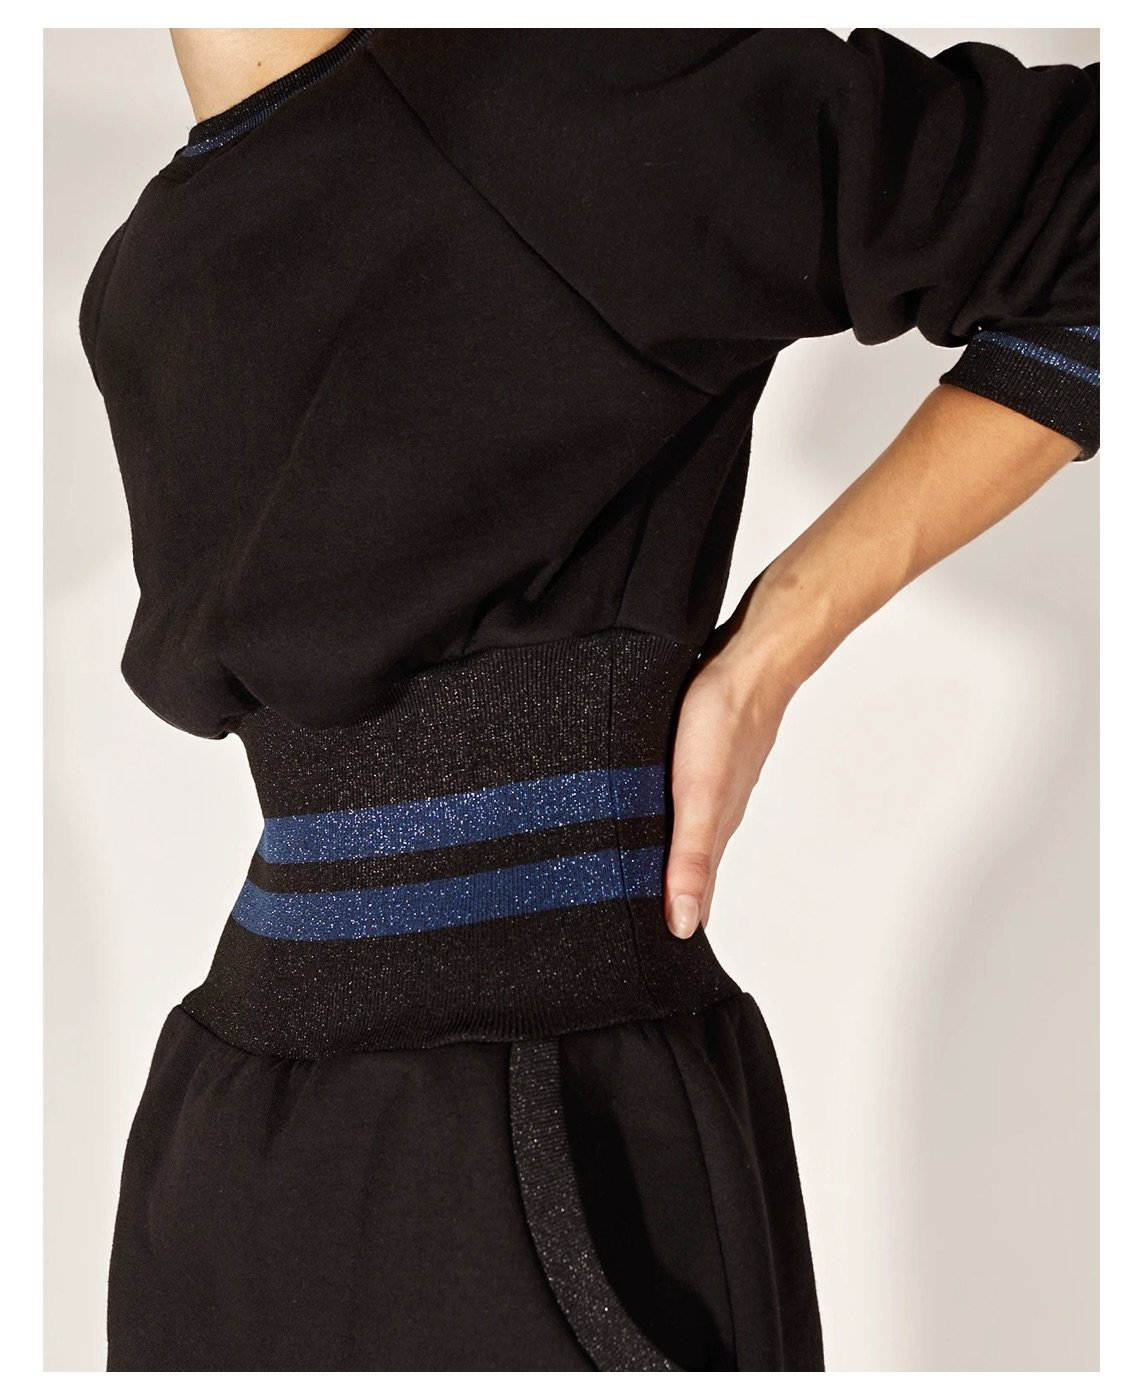
I don’t know about you guys but I miss Cynthia Rowley and her sewing pattern designs. I don’t think I’ve seen one issued in the last two seasons. But Instagram must know I love her because they serve me with Cynthia Rowley ads ALL the time. I saw this black dress with some rib knit at the waist and my mind reminded me we had seen something similar before, and Simplicity S9135 fits. You would have to add in some slash pockets but that’s easy to do, and if you are wondering what is a good slash pocket pattern I highly recommend Mimi G’s S9261 dress (I’ve hacked that pattern for knit dresses more times that I would care to tell you!).


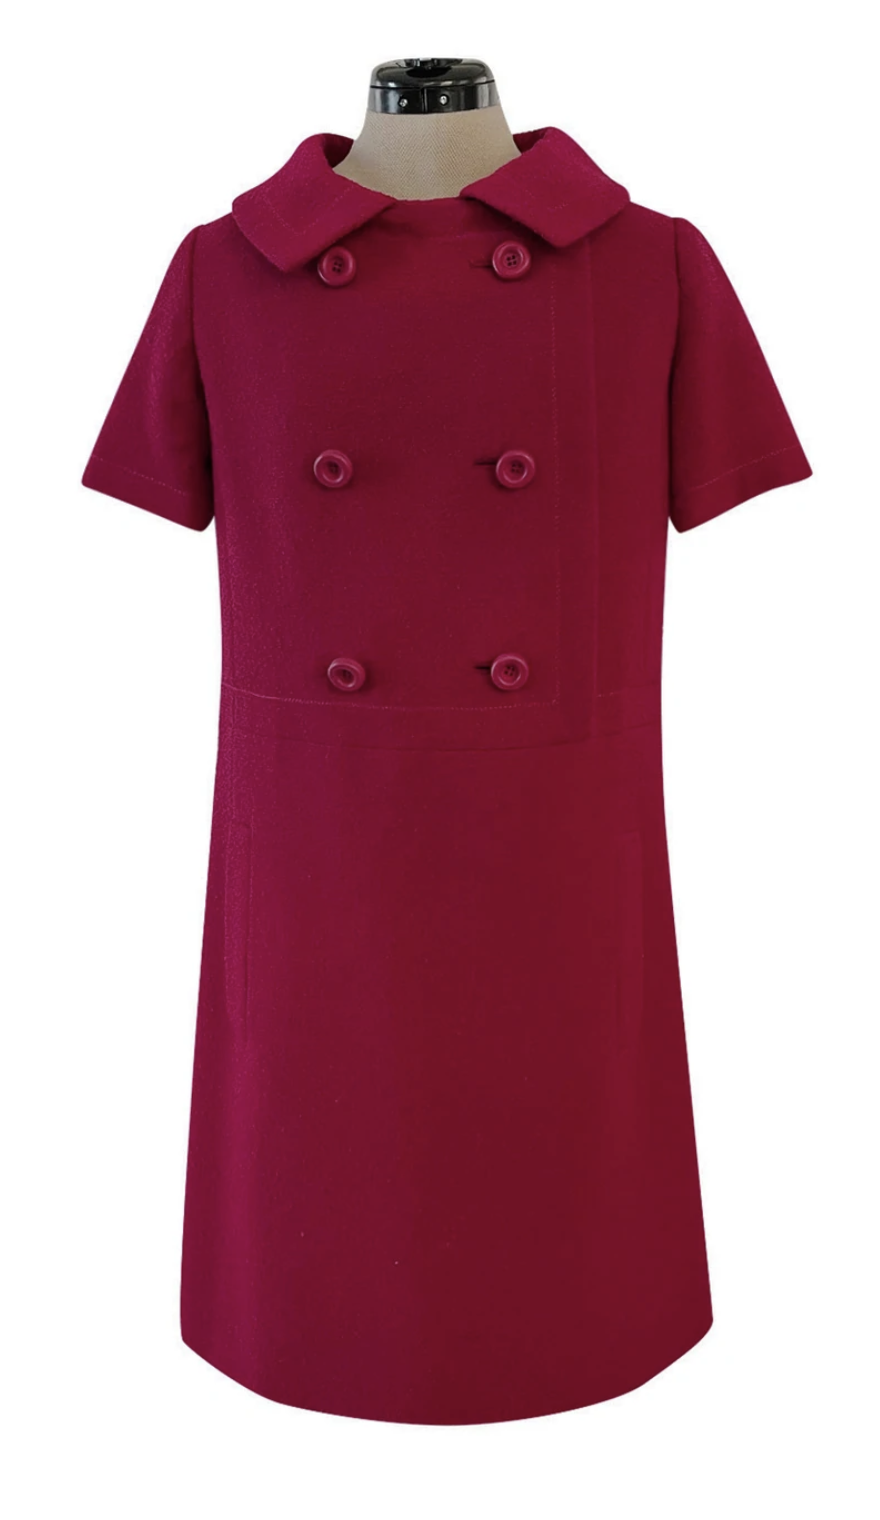
Here is an oldie making a comeback courtesy of Simplicity. Its actually a really good one if you love Dior’s Marc Bohan’s designs circa 1966 Spring Collection. Don’t ask me how I thought of this one but I follow a Vintage Seller of Haute Couture on Instagram (Shrimpton Couture and the owner Cherie knows her garments well and does an amazing job as a vintage seller), she posted a picture of this vintage red dress from Marc Bohan. It retailed for $1,800 but it is now sold. But if you weren’t able to get your hands on the vintage couture you can use Simplicity S9466. This is a vintage pattern that was JUST re-issued as part of their Spring 2022 sewing pattern collection. I haven’t seen the pattern but you may have to add in welt pockets to this dress, but that is not a hard thing to do.

It is still pretty darn cold by us in the Midwest and since it’s winter its going to be cold for a while. I was just looking at this coat from JCrew. it is a Teddy Sherpa Coat… they had it in the most beautiful mauve pink hue. But like one of the stories of my life it is now sold out, but Simplicity comes to the rescue yet again. You can use S8797 to make this coat. Sure it may not be a double breasted coat but this is perfect, and I happen to love that the pattern calls Sherpa as one of the recommended fabrics meaning the pattern is drafted with this fabric in mind.


We have to do a little Sezanne because I’m all about skirts and knee high boots in winter time. So lets look at a few. My daughter loved this skirt and heck I did too! It is called the Alison Skirt from Suzanne, Free People has a similar design and they both retail around $200 plus. Its beautiful, but I’m pretty confident we can make this one. Enter Burda 6252. Can we just say it’s pretty darn close! You can find some beautiful supple faux leather or even corduroy and make it.


Let’s keep going because I absolutely loved this skirt. It is by Sezanne, and it’s called the Keira skirt. It too retails for upwards of $200, closer to $300 actually. I love designs like these because they are simple and classic. Simplicity came in again with a pattern for it. It is Simplicity S9048.


Do you guys follow some of these Fashion Influencers on Instagram who post these pictures of fabulous clothes in beautiful places? I follow a few. I remember this pattern from McCall’s last year. It was McCall’s M8178. This is a dress with godets. I loved this dress, LOVED IT! But I must admit I ran out of time to make it and I saw an Influencer proucing around in a fuchsia and pale pink dress. She looked beautiful. Luckily for me she had a Like it to know it link… and its a ShopBob dress! Of course, like all good things this dress is now sold out in all sizes. I get another chance to make it this summer and I’m going for it! I actually think it would be great sew along because it’s got godets.


Lets do one last one. I know I’m late to this party but this pattern has been in my stash waiting for me and I suspect that some of you have it too. But as I was glancing at some of Altuzzara’s designs this red dress caught my eye. Red, knit and with just enough fun. Yes, I will have to make some modifications but that’s what pattern hacking is alllll about it.


So what do you think? As much as I like to say at times, I’m bored by this last sewing pattern release I have to admit the sewing pattern companies are giving us the looks, they are keeping up with the ready to wear trends and it’s up to us to sew it!
The Bicep Adjustment
Whenever I’m working on a new pattern, out of habit I always measure myself. Upper Bust, Bust, waist, hips and biceps… I’m sure you do that too right? I do. Every. Single. Time. As I start working on M6696 I know that I will have to yet again do a bicep adjustment amongst a few other adjustments, but for today lets focus on on bicep adjustments.
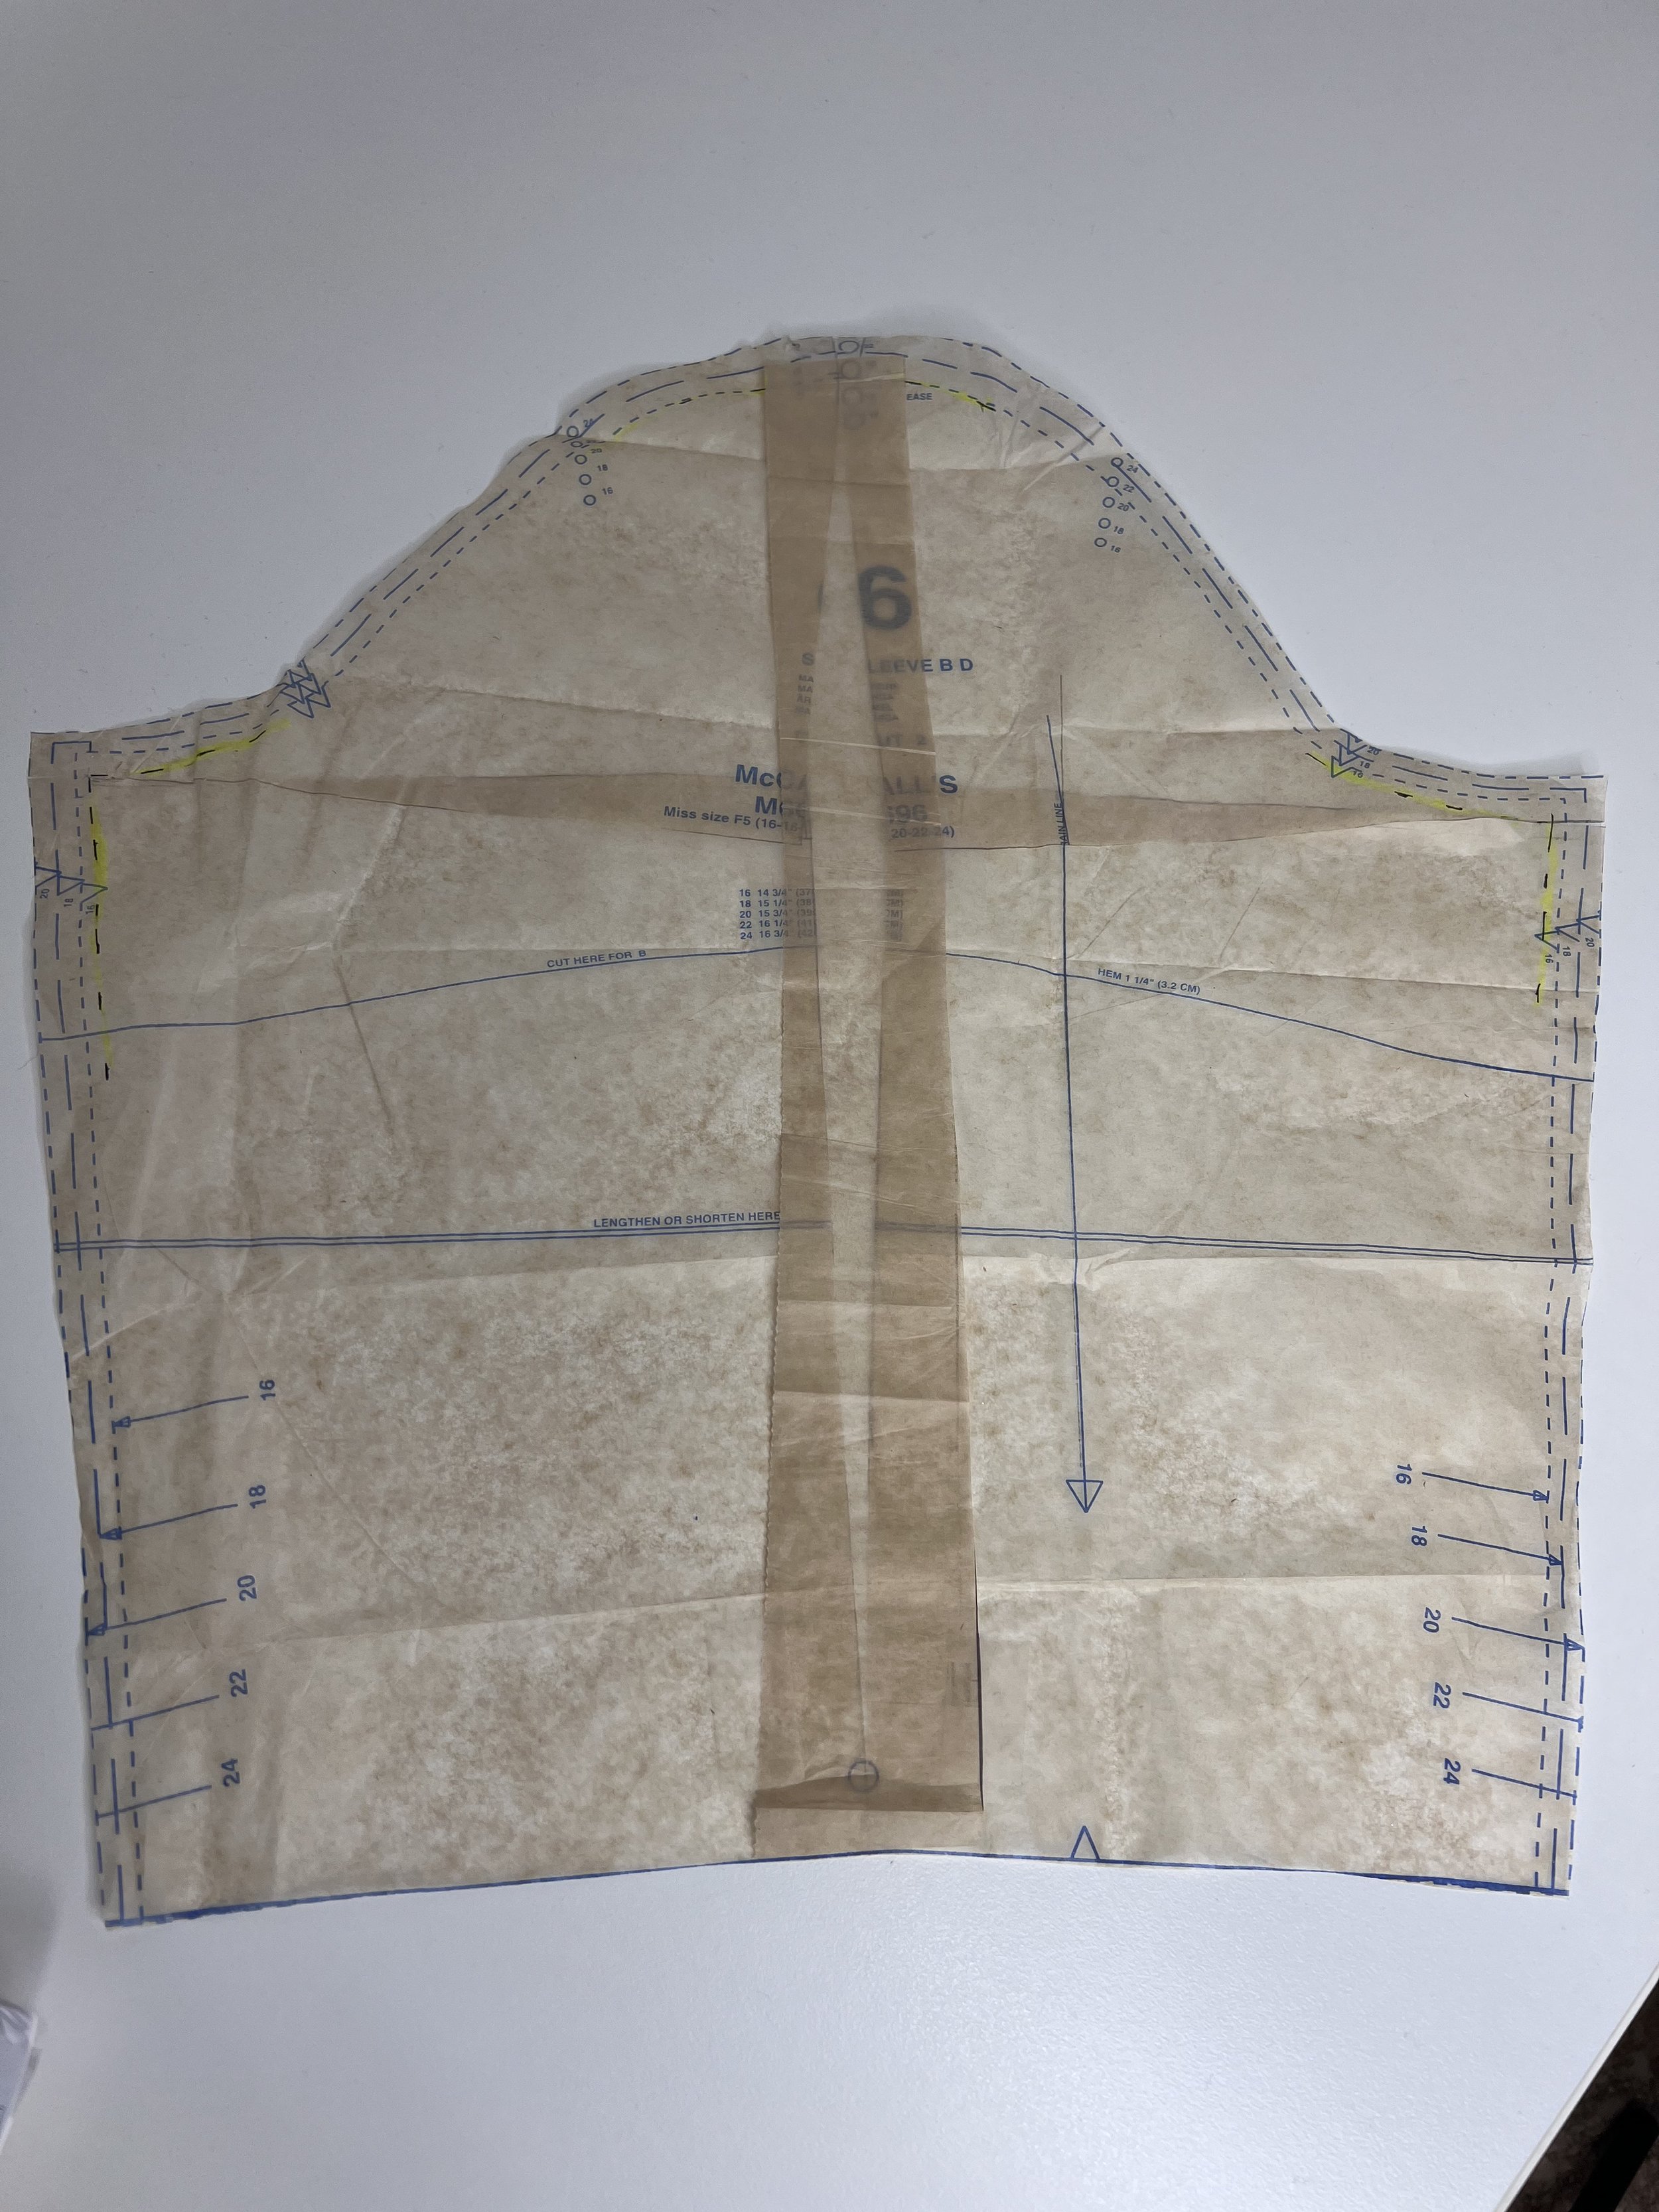
So first of all, how do you know if you have to do a bicep adjustment? So first things first, figure out the size of the bodice or size of the pattern that you have to cut. In my case I’m using a size 20 based on my bust / upper bust measurements so I’m cutting a sleeve for a size 20 bodice. My bicep measures 15”. The size 20 for the sleeve pattern measures 15-3/4”. I could use this piece as is BUT the sleeve will be tight, and as I move about I don’t want to have a tight sleeve.

I’m using a size 20 bodice so I’m cutting a size 20 sleeve. If this is your first time doing a bicep adjustment, trace the sleeve pattern before you make any adjustments!
As a rule of thumb, you should have between 1” to 2” on the upper arm for all woven garments. Key word here woven garments. So although my 15-3/4” sleeve will fit I don’t want it to be tight so I’m going to add an 1” to the pattern piece so I will give myself a 1- 3/4” ease.
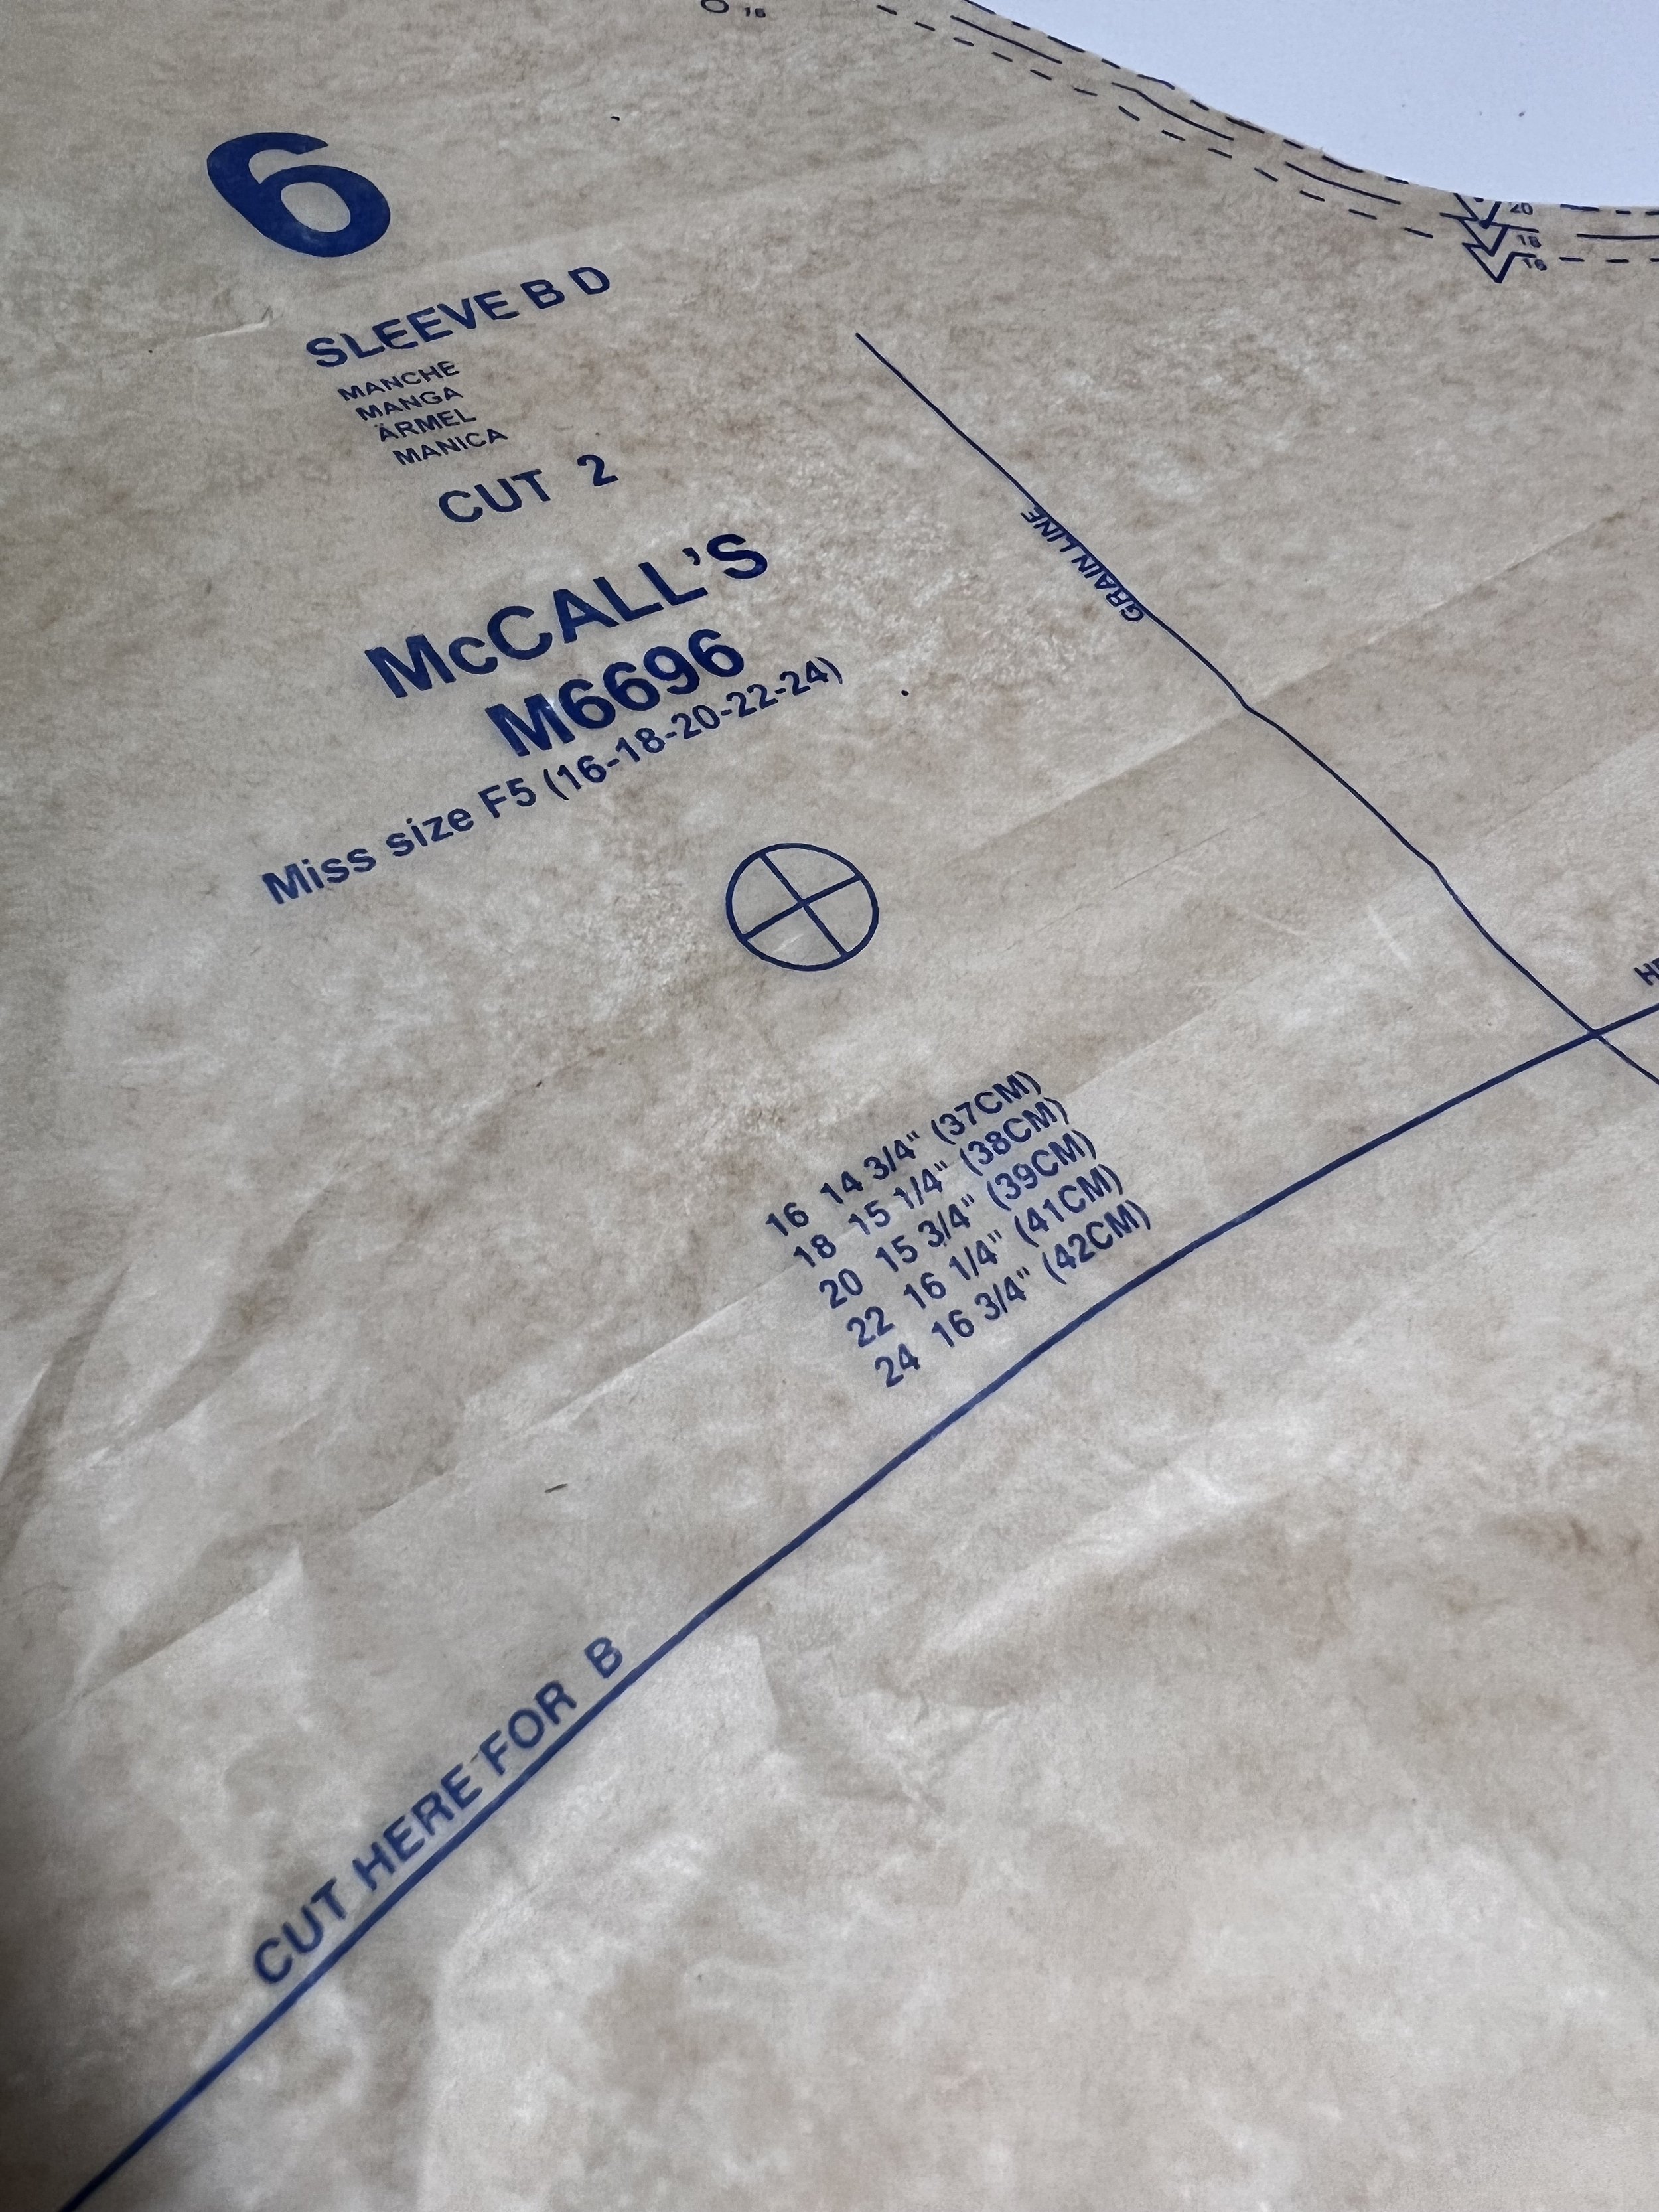
M6696 sleeve pattern piece. In it, you will see the measurements for the biceps for each size. If this is not listed, all you have to do is measure the pattern from side to side and take out the seam allowances (in my case 5/8”) so remember there is a seam allowance at each side of the sleeve!
Ease is really up to you, so I’m giving myself a little extra room. If I try it on and I want it to be tighter then I can always take it in.

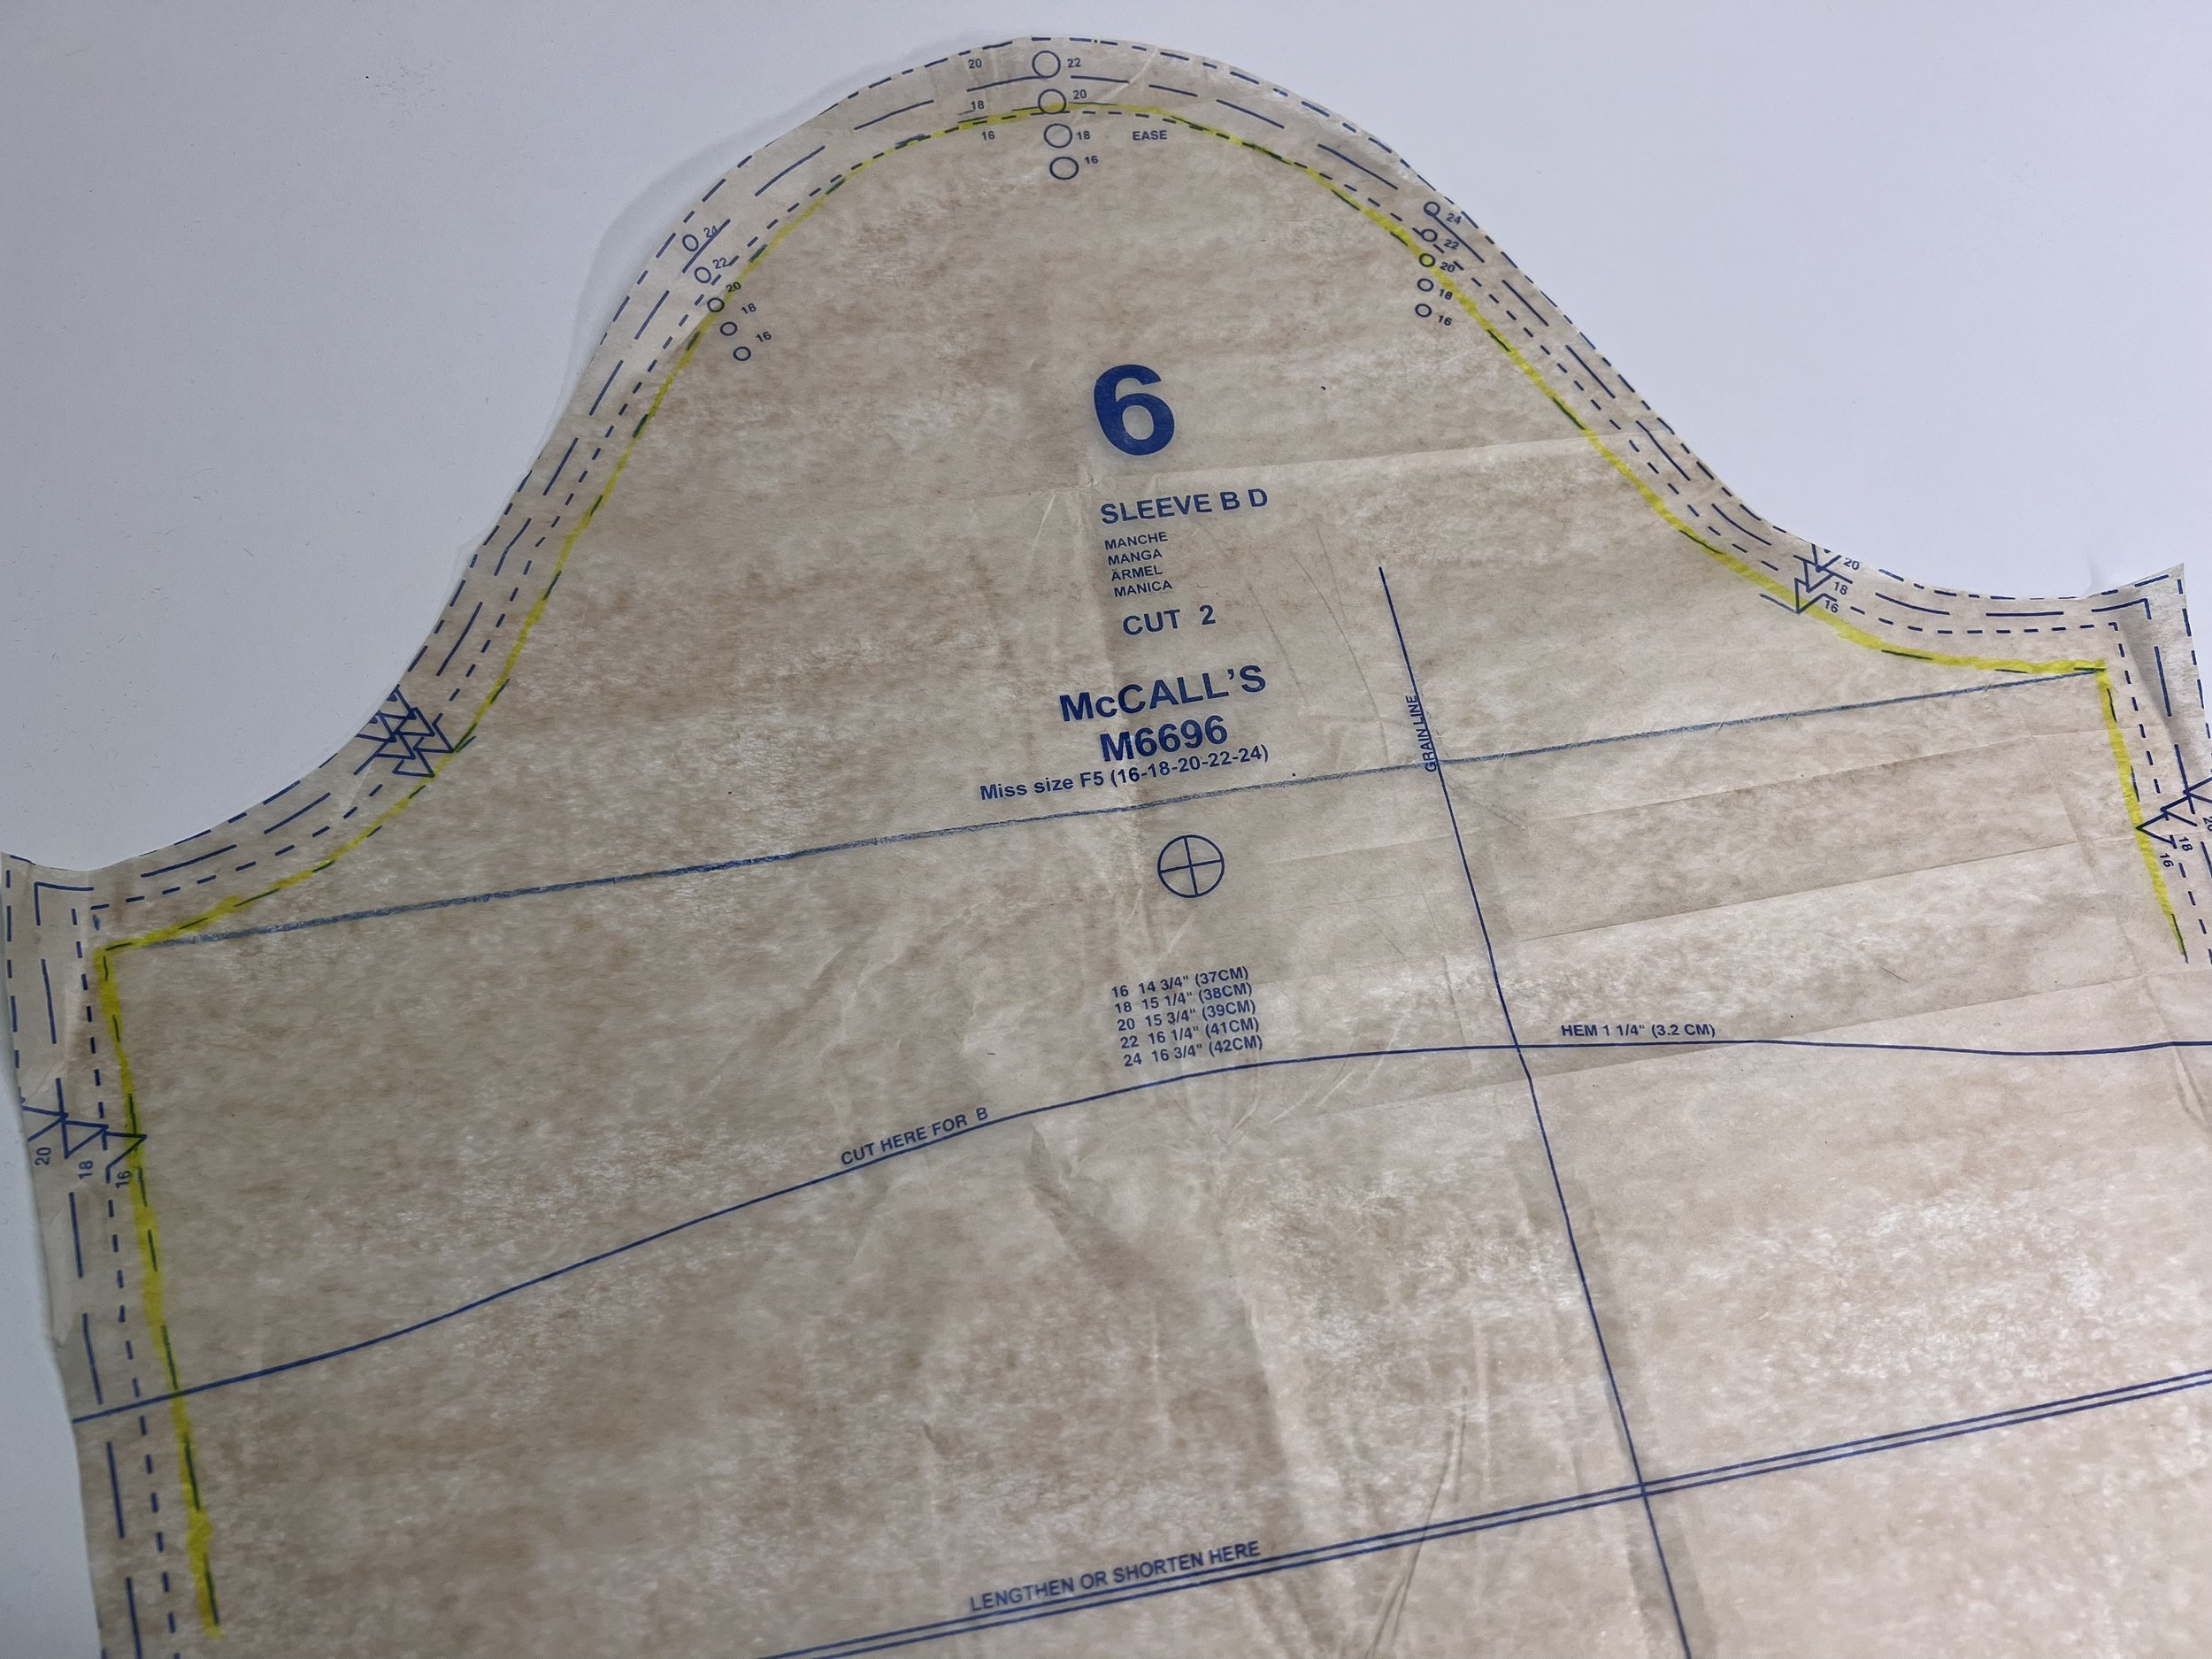
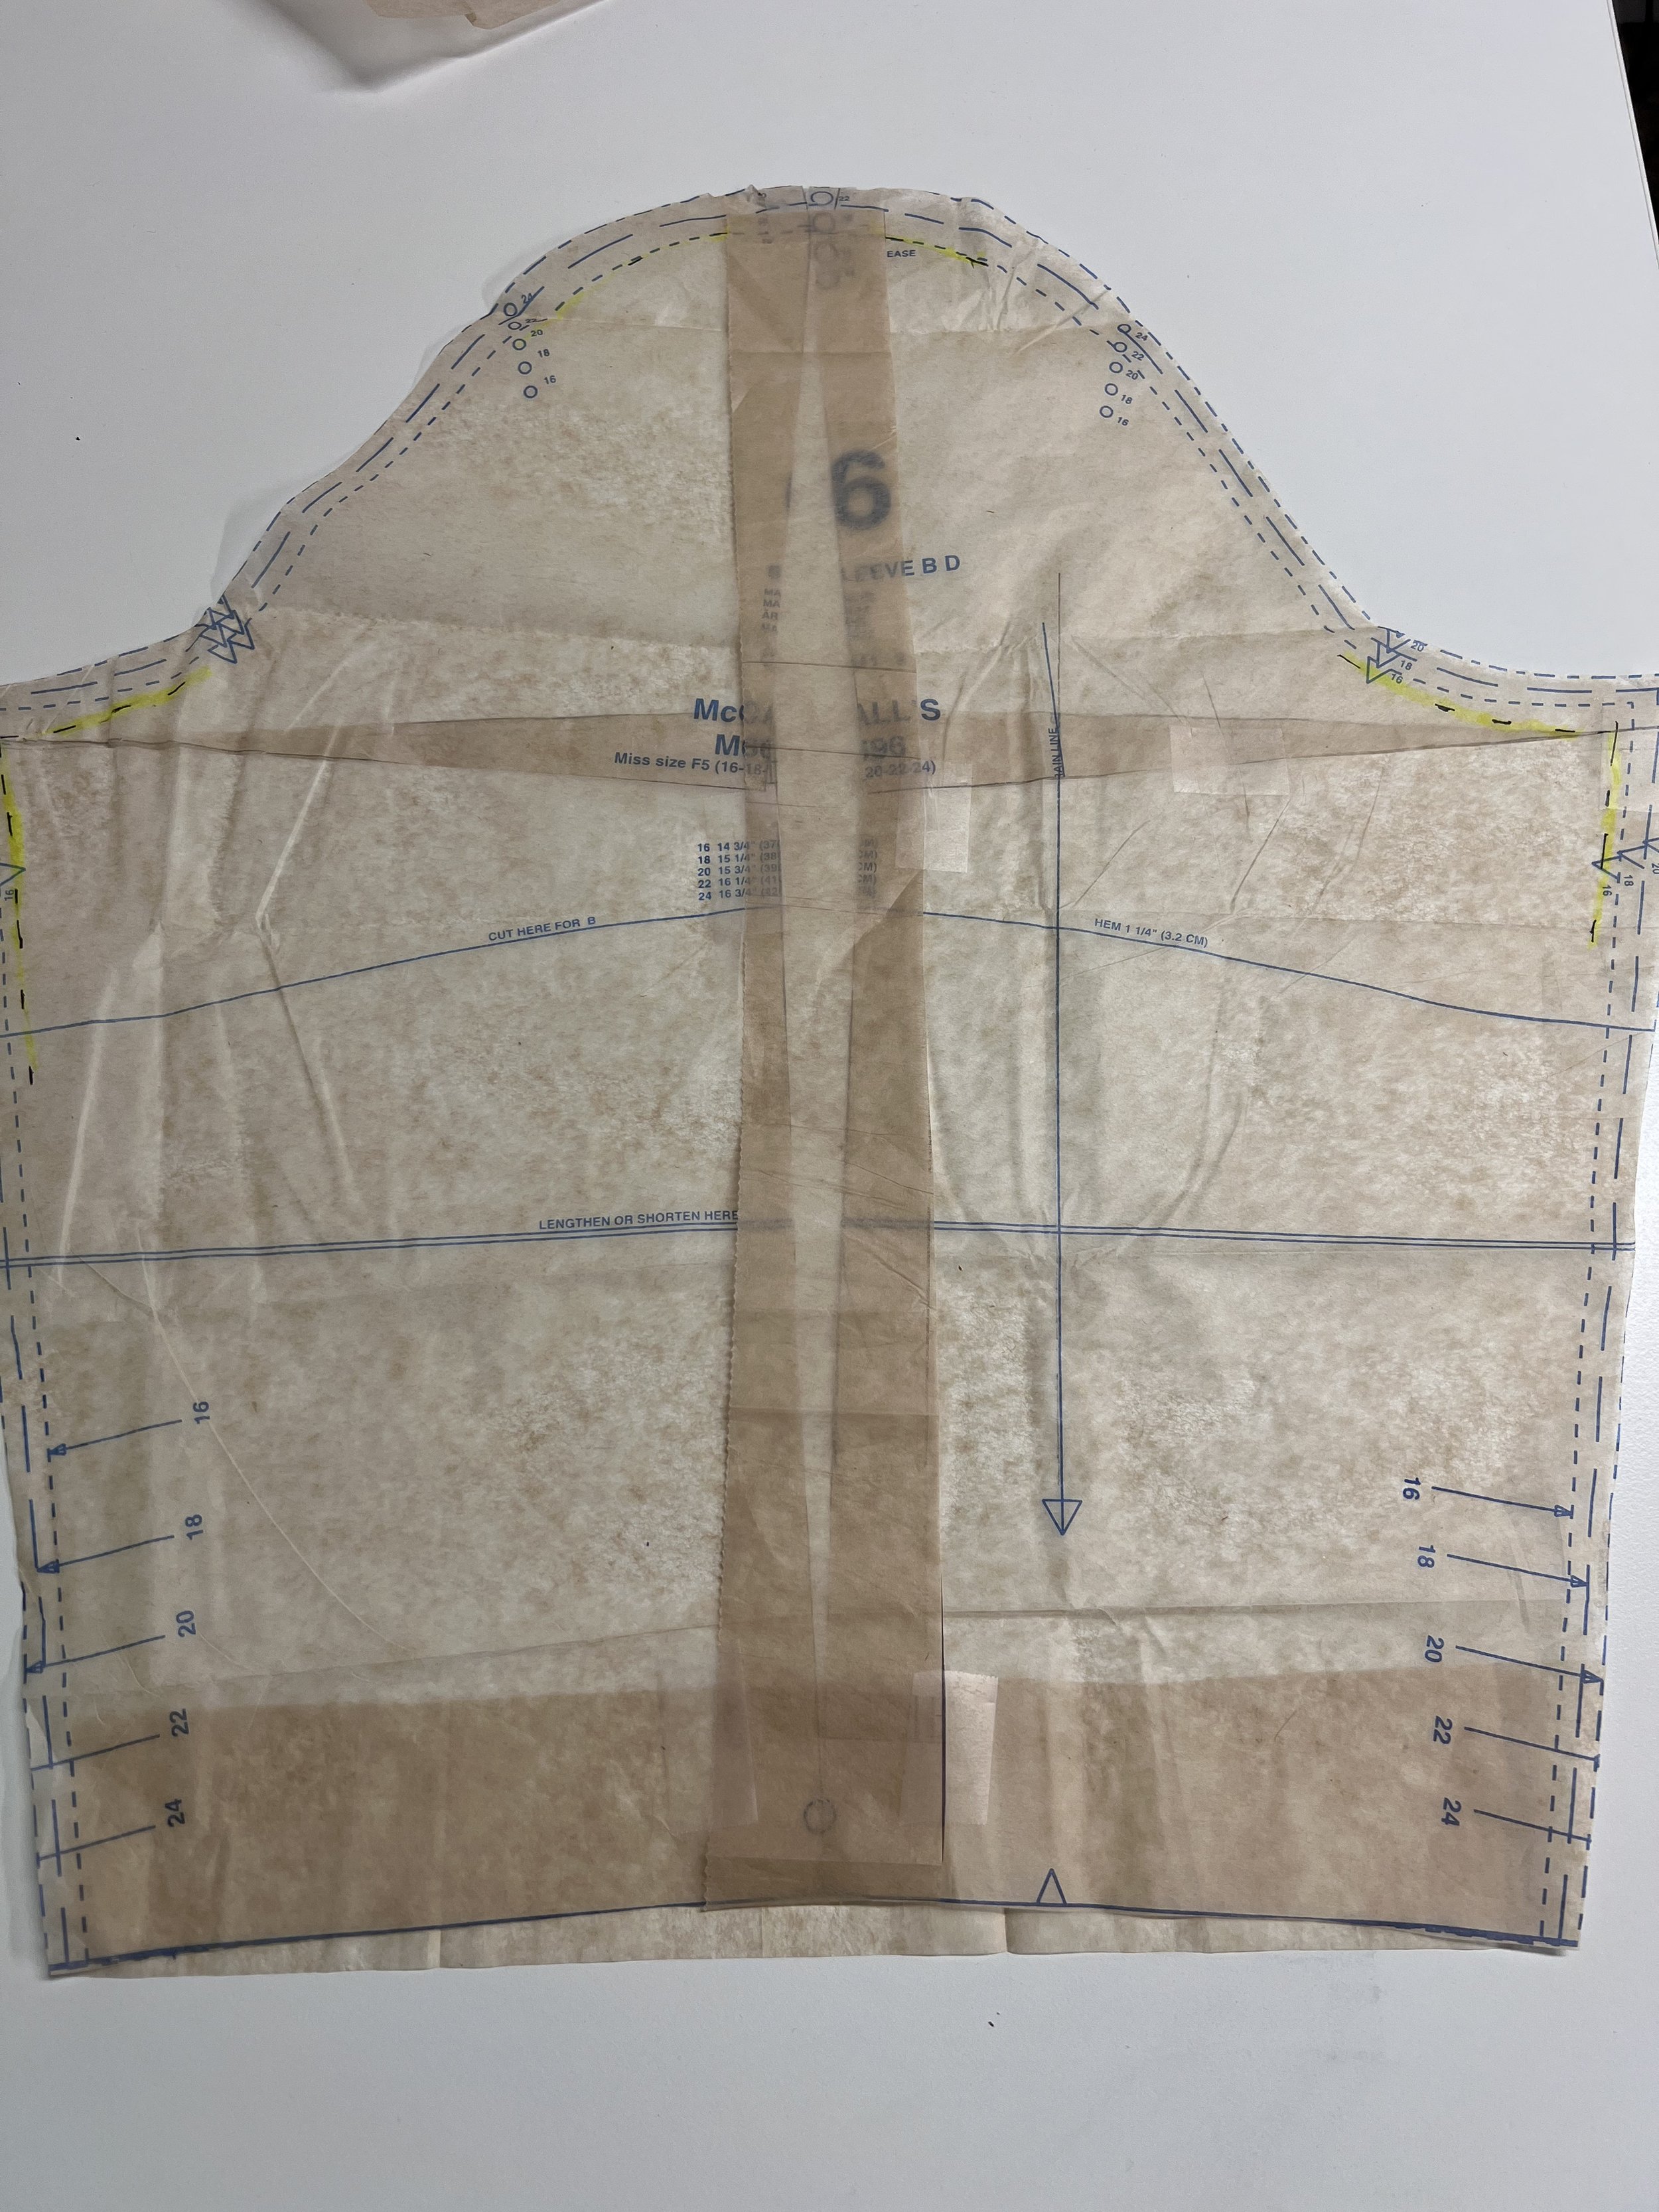
Traced sleeve pattern, make sure to mark your grainline, notches, circles, top of the sleeve, etc.
If this is your first time doing a bicep adjustment, I suggest you trace your sleeve pattern first!!! So we have to do a little prep work so we can begin.
Now that you traced your sleeve, I want you to mark your seam allowances on the cap of the sleeve and the sides. In my case it is 5/8”. Use whatever seam allowance your pattern uses. It is always listed in the pattern instructions.


I used a blue pencil and high liter yellow line to show my seam allowance at the sleeve cap, sides and also at the bottom.

Here is the sleeve pattern with all seam allowances on the sides, cap of the sleeve and also at the bottom.
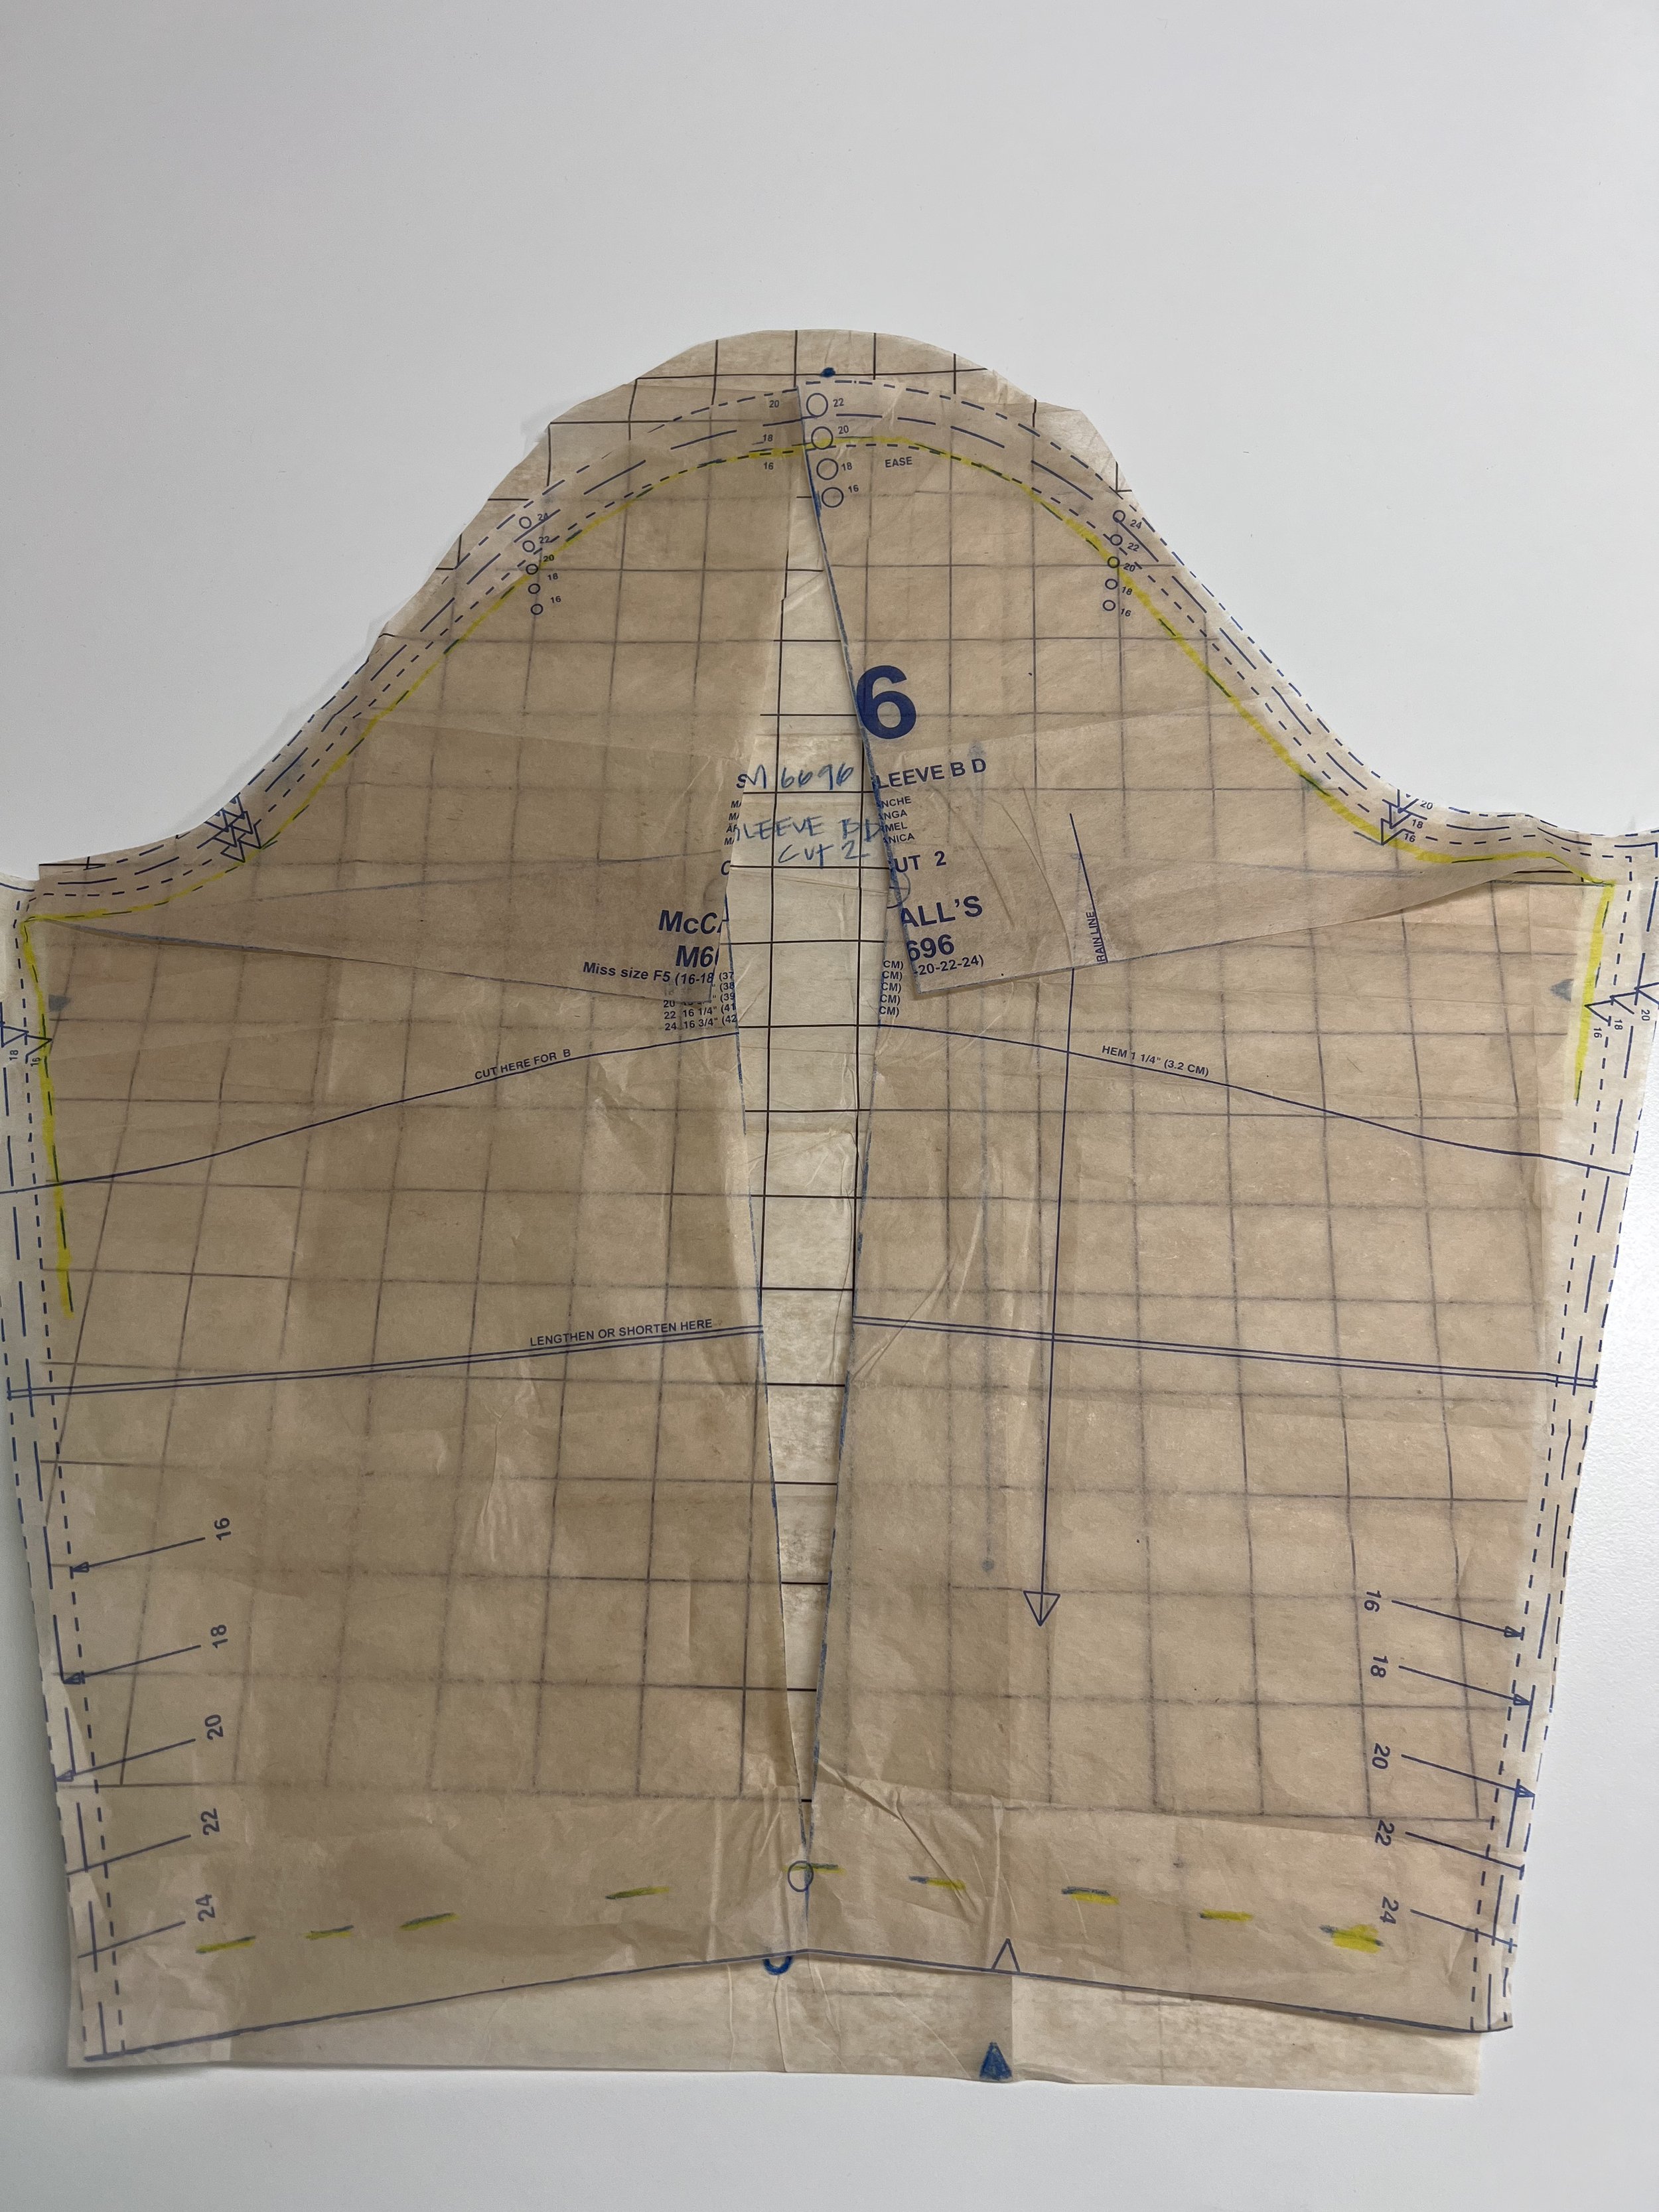
Now I want you to draw a straight horizontal line ———- from side to side. Use a ruler! Where will this line go? It will go were the two seam allowances intersect. This also happens to be the widest point of your sleeve.
Draw a horizontal line —- from side to seam were the two seam allowances intersect.
Now I want you to make a vertical line | from the top of the sleeve cap to the bottom of the sleeve. Make sure you are at the top of the sleeve cap. You may see notches close to the middle of the sleeve but that may not be the exact top of the sleeve. Again top of the sleeve! to the bottom of the sleeve.
Make sure you draw a vertical | line from the top of the cap of the sleeve to the bottom of the sleeve pattern. Make sure you do this at the TOP of the sleeve.
This is where the fun begins!
I want you to cut with your rotary cutter or your paper scissors. Thru those two lines, BUT I want you to leave about 1/16” of an inch of paper that we will use as a pivot point. I want you to do this for both vertical and horizontal lines. Go slow! If you cut thru it just grab a small piece of tape and reinforce it in that gap.
See that little pivot point I left? Its small but it will help me keep the pattern piece together but also manipulate the pattern so I can adjust as needed.
You should be able to move the center of your sleeve. That gap in the center of your sleeve is how we will add 1” to the width of our sleeve. You can add an whatever amount you need to add to this spot. It may be 1/2”, 3/4” or even 7/8”. Add whatever amount you need. Use your ruler!!! Do not “eyeball it”


Use a ruler to measure how much you need to add.
Now that you have added 1”, grab some tape and tape the sleeve down. I also like to add in a cut of tissue pattern paper and as a reinforcement. You should also make sure the bottom of your sleeve is straight across so add tissue paper there too.
Add tissue paper in the middle of the sleeve pattern piece to reinforce it once you have measured and also add tissue at the bottom of the sleeve. Lastly, make sure to extend your grainline on the pattern piece so you cut it on grain. It is now ready to use!
Your bicep adjustment is done and the pattern piece is ready to use.
But what happens if you need to add more than 1” to the bicep? If you add one more than 1” the top of your sleeve cap will get distorted. See the picture below?

Perhaps you may need to add more than 1” to the bicep pattern piece? Now what? The top of the sleeve pattern piece gets distorted.
That’s where that sleeve that we traced comes in handy. I want you to use that sleeve that we traced to redraw the top of the sleeve cap. Once you have done that … you are done!
Use your traced sleeve pattern to re-trace the top of the sleeve cap along with the 2” bicep adjustment.

Winter Sewing Plans 2022
I finally got used to writing 2022, it usually takes me about two weeks or so. So now that you know my sewing goals for the year lets talk about what I have planned for the winter season.
Sweaters - I could use a few more sweaters in my wardrobe, and my daughter can use a couple of them too. Plus it is cold, we are in deep winter in the midwest.. snow and high of zeros. I ordered this fabric from Minerva. It is a cable knit sweater fabric in Grape and Wine. I had made Sew House Seven Pattern (printed pattern) that is now discontinued but perhaps you can still find it online if you are “itching” to get the exact same pattern. It is Simplicity K8529 , it is a design by Sew House Seven. It is a classic style sweater. Love the neckline because I don’t particular care for anything that feels like its chocking me so I liked this style.

However, I know that I wanted something slightly different so I’m using Sew House Seven’s Toaster Sweater. There are two views to this pattern, version 2 is what I used for my pattern K8529 sweater but the only difference it has a raglan sleeves version for version 1, and that’s the one I will use. It is a great pattern, super easy and quick to make and I know that with 1.5 to 1.8 meters (not yards!! meters) I can make her a sweater.
Dress and Jacket Ensemble - I’ll be using Cynthia Rowley’s S2443, it is also discontinued. I figured after all these years I better start using some of those patterns that I got in the pattern stash. The dress and jacket will be perfect for spring or I can wear the jacket with another top and bottom. I went ahead and ordered the Twill Sahara Stretch Twill Rayon (which I’m afraid to say is now no longer offered as I found some imperfections in the fabric and fabric.com pulled it from their catalogue, but there are a ton of other amazing Twill or even Gabardine fabrics you can use) and a Ponte De Roma fabric for this project. The twill is a stretch woven and I ordered a tad extra in case I want to increase the length of the sleeves or the length of the bodice on the jacket. I need to find a new fabric for the jacket.

Jeans - I’m using the Closet Case Ginger Jeans pattern for this. The pattern calls for a stretch denim so decided to use a 9.5 ounce stretch denim in blue. I’m not so worried about sewing them, let’s just hope my machine doesn’t give up on me, I got plenty of jean sewing needles ready to go. I just know it will be challenging to fit them. I’ve had a few of you mention the Dawn Jeans from Megan Nielsen and its on the list to try, but I want to get the pattern first before I go off buying any fabric for it, and of course see how the Ginger Jeans fitting go.
I’m also using a brand new book called “Fit and Sew Custom Jeans” by Helen Bartley as a reference guide as to a few of the adjustments I need to make along the way.

Sew Along Pattern - Lastly, I owe you all a sew along and I haven’t forgotten about it. I’m using McCalls M6696, a few of you have asked about it. So I think it’s time to get the show on the road. I’ll be using a stretch lightweight denim fabric that I got from Melanated Fabrics about a year ago. The fabric is now sold out but you could also use a chambray, poplin or a linen. I’ll be doing view D.

I also have been looking to make this ensemble for quite some time and I believe the fabric is now long sold out. it is an Indigo Blue Charmeuse I got at Joann’s. The fabric is absolutely beautiful and I’m hoping to make a bias cut skirt using M7931. If you have ever wanted to start getting into bias cut garments, Mimi G did a great sew along for this pattern, and its a great way to get your “feet wet” with sewing on the bias. I’m going to pair it with New Look 6471. Love this pattern, its one of my favorites from New Look and I’ve made it numerous times with different fabrics. it can be a simple short sleeve top or a long sleeve with a pussy bow. The bow pattern piece is cut on the bias, so that’s a fun little detail. One of the things I love the most about this pattern is that the cuffs on all the long sleeves have a cuff band vs. one of those darn elasticated finishes. Let’s just say I do an eye roll every single time. Whatever happened to cutting a short pattern piece on the bias so the finish looks so much better than those elasticated finishes. New Look 6471 is now out of print, but as with all those out of print patterns you can get them on Etsy.


When I look at the list, it doesn’t seem like a lot but like I mentioned in first video of 2022, I’m trying not to do more than I can comfortably do while also juggling all the other stuff. The stuff that I like to call “Kids, Pets and Life”.
So tell me… What are your winter sewing plans?

My Fringe Dress - Chalk and Notch

One of my goals for 2022 is to make more indie patterns. There are some really good ones out there and I have been avoiding them for some time. Mostly because after being spoiled with spending $2 to $6 for a printed tissue pattern its a little bit of a sticker shock to pay $10 to $18 for a pdf pattern and then have to print it, glue it all together and then cut it to size…. JUST so I can start sewing. Needless to say, I have been avoiding them.
I got the Fringe dress as a free download for testing out the Joy Jacket Pattern from Chalk and Notch. I have to say I have been quite impressed with their patterns and I must say, the Fringe Dress is quite the clever pattern. Its perfect for a confident beginner, and if you don’t have a serger aka. overlocker its absolutely perfect.
I initially cut a size 20 and worked on view A the dress. However, based on the finished garment measurements recommendations after making the dress I realized it was a bit too long and a tad too large on me. Chalk and Notch patterns are drafted for a person who is 5’-7” and I’m 5’-5” so… I had to take some length off the bodice. But looking at my first dress I couldn’t quite figure it out until I sent a picture to an instagram friend and together we figured out what needed to change. Overall I LOVED the Fringe Dress and I will make it again, most likely in a linen.
But my first go around using the fabric I selected was very frustrating. I purchased the fabric from Melanated Fabrics about 8 months ago. They were kind enough to send me swatches of two fabrics and I loved this one. It is now sold out, but available at Fabrics.com in a Teal Blue and the manufacturer Telio describes it as a 100% Polyester fabric. It’s soft, has a beautiful drape which was what sealed the deal on me getting it, the color is gorgeous… and that’s were all the happiness about this fabric ends! It frayed like crazy. Let me say that again. I blinked. Boom! It frayed! I couldn’t get a crisp seam after I pressed it (which drove me absolutely bananas!) and the worst offending part about this fabric…. it went off grain the moment I moved it after cutting it. So if you see some extra gray hairs on my video about the Chalk and Notch dress it was because of my fabric choice.

The Fringe Dress - Chalk & Notch
With all that being said, the Fringe Dress is what I like to call a clever pattern… I’ve seen a few others but only a handful of patterns that I can say “oh that’s good design right there”. The seams for the facing and sleeves are “encased” so you don’t see them. That is pretty nice if you don’t have a serger!
Now that I knew how to deal with the diva fabric I made some changes. I cut a size 18 for the bodice, I also took out 1/2” from the length of the bodice and the back pattern pieces along with the facing pieces. I eliminated the tab pieces for the sleeve because I picked the shorter sleeves and this fabric was not playing ball when it came time to turn over the tabs, so those had to go. There is also a tie for the dress, yeah that wasn’t going to happen either with this fabric so that had to be vetoed too.
I initially didn’t interface the area where the facings would be sewn in, but after realizing that my fabric was going to stretch by just looking at it and stay stitching, I decided that maybe, MAYBE after all I was going to add that interfacing in there after all. I also decided to cut on my gathers for the skirt pieces considerably and I cut a size 14 for the skirt, which helped a lot. I used French seams for the skirt pieces since I couldn’t get a crisp seam and the fabric frayed so much I had to encase these seams too.
I’m much happier with the end result and the dress is beautiful. I will be wearing it come summer with a pair of sandals.
Even as the fabric was challenging some times you have to cut each piece one by one and that’s what I had to do with this fabric. So if you love the blue that I linked above buyers beware… this fabric is an absolute diva but in the end it’s worth it. I’m glad I got it, challenging fabrics only make you better.

What’s Next for 2022?
Took a little break from making videos to spend the last weeks of 2021 with my family and focusing on spending time with them before the rat race starts of work, school and YouTube video making starts yet again. In between all the baking, cooking, wrapping four presents, watching movies, walking and sewing… I was able to finish my flannel button down shirt using Butterick B6841, this is my second time using this pattern. It runs large but its your classic button down shirt. I used a Robert Kaufmann Flannel, the fabric I’m wearing is called Nectarine and it is perfect to wear on those cold winter days.
I also made a Fringe Dress from Chalk and Notch, I’m writing a separate post and making a video for this dress because it’s that good.
In my video I forgot to tell you about that Butterick B6858 dress and Top (check out the sew along if you haven’t) the collar is a tricky one but I show you how to do it on my video. My daughter got in on the garment recipient makes for December and I told you about this one in one of my videos that I pair RTW with patterns. I finished a pair of chocolate brown corduroy overalls for my daughter using Simplicity S8615, My only change is that I added a coin pocket so it looked close to the Free People Ziggy overalls. The fabric was from Minerva and I must say for a corduroy its beautiful. Very soft, having a larger wale also helps! It is an 8 wale.
Lastly, I made T-shirts using Simplicity S8376 for both my daughter and I. I used a double brushed knit from Joann’s. I have to say, their double brushed knits are amazing. So soft. The name of this fabric is called Coconut Milk. It may be sold out but if you find it grab it because its a really faint cream color. I had purchased 1.5 yards and when I set my pattern for my daughter I could make hers in one yard of fabric including the sleeves so I was able to get one more yard of fabric on the remnant bin… for less than $2 and make one for myself too.
I think that was enough for me for the month of December.


So what are my sewing goals for 2022?
Here are things I want to make….
Make a pair of stretch jeans that fit me - I haven’t worn jeans in forever. I can honestly say its been at least ten years because finding jeans that fit is so frustrating. I love wearing them but trying on different types of jeans for hours and hours is not my idea of fun so I have avoided for them quite a while. I think it’s time I made my own pair. I’ll be using Closet Core Ginger Jeans. I expect it to be an odyssey.
I want to make more dresses ensembles with a jacket or another garment to go with it, that I can wear to work or wear on the weekends for a casual night out. I’m already planning on using an old pattern from Cynthia Rowley that has been on my stash for some time. It’s K2443.
I would like to try more indie patterns, but will try to focus on patterns that are printed. Call me cheap but I just can’t see myself paying $18 for a PDF pattern and then spend two hours piecing it all together or paying another $15 to have a few patterns printed. Nope! Work smarter not harder.
Make more pants! I love dresses, gosh do I LOOOOOVE my dresses. they are so comfortable. But I also love to wear pants. So 2022 will be the year of the pant.
Slow Sewing- As much as I want to wear my make immediately, I also really enjoy sewing slowly and making sure that things are finished properly. That stitches are straight, that the inside looks as good as the outside and that it fits beautifully.
Post more of my finished garments, and show you the details. I don’t do enough of this and I should!
What I want to avoid in 2022?
Buying patterns that do not suit my body type or they have no-snow-ball-chance-in-hell of me making them. I must admit that I have quite a few of those. McCall’s patterns… I’m looking at you!
Stop buying fabric without a purpose. If I’m going to spend money on fabric I want to make sure I have a pattern and a plan for it. No buying extra fabric that I don’t need, I don’t care how pretty, how good the fabric sale is or how maybe in some distant future I can make X with it. That’s the quickest way to buy fabric that just sits there…. forever.
Be so hard on myself if something is not perfect. Strive for excellence but don’t get frustrated if its not absolutely perfect.
Taking on more projects than I can comfortably tackle in one month.
What are your sewing goals for 2022?

Sew Along for Butterick 6858
If you don’t have Butterick 6858, I’m going to tell you right now… you are MISSING out on a great pattern. The pattern has a dress, top, two collar versions, pants and a skirt. Although the cover model has a long dress this is meant for athletic type of knits or perhaps a modal knit. Don’t use a double brushed, or a lightweight knit. You need something with a little bit of body on the knit. Especially if you are going to tackle the collar that I did for view A or C. It is a little bit of a tricky collar when you read the instructions but I highly recommend you watch the video and it all becomes clear.
What did you particularly like or dislike about the pattern?
I loved this pattern. I did both a dress and also a top. However, I used a double brushed knit for the dress. I mention above you need a knit fabric with some weight to it so the collar stands on its own.
Does it look like the photos/illustrations on the pattern envelope?
Yes it does. It’s actually a rather easy pattern to make besides the collar that can be the only tricky bit on this pattern.
Were the instructions easy to follow?
Yes I’m pretty used to the Big 4 instructions so I can usually figure it out. Again the collar instructions can be tricky with all the notches and gathers, at first it doesn’t make sense but they actually do!
Pattern alterations or any design changes you made:
I took in the sides about 1/2” on both sides but other than that I didn’t make any other alterations.. I may perhaps lengthen the bodice around 2 inches next time.
Would you sew it again? Would you recommend it to others?
Yes, I already did sew it again, and I would recommend it to others. It should be rated easy and I believe it is.

Butterick 6858

Black Friday Pattern and Fabric Haul

Did anyone partake in Black Friday? The sales were pretty darn good but as with everything in life… I had a budget, and I had a few stipulations.
It had to be on sale and it had to be from a small business. I love Fabric.com (and they carry the Art Gallery Fabrics Wild Forgotten collection but only as a quilted cotton and I wanted a rayon fabric) and Joann’s but I wanted to support small businesses this time around, so I got some beautiful fabrics from Style Maker Fabrics.
Here is what I got…
Wild Forgotten Vine Leaves Rayon in Ochre
Large Scale Floral Brushstroke
Stretchy geometric ITY Cream & Blue
I love Style Maker Fabrics! If you don’t have a Wishlist, you should. Its a great way to dream and perhaps get yourself in trouble. With that being said, don’t be like me and leave fabrics in your wish list for long because they DO sell out and as some seasonal fabrics are they don’t get restocked which I sadly found out the hard way.
I also got some great vintage patterns and a few out of print patterns. What did you get for Black Friday? Anything fun?! Fabric or otherwise, I love hearing about it.

My Bodice Sloper Journey
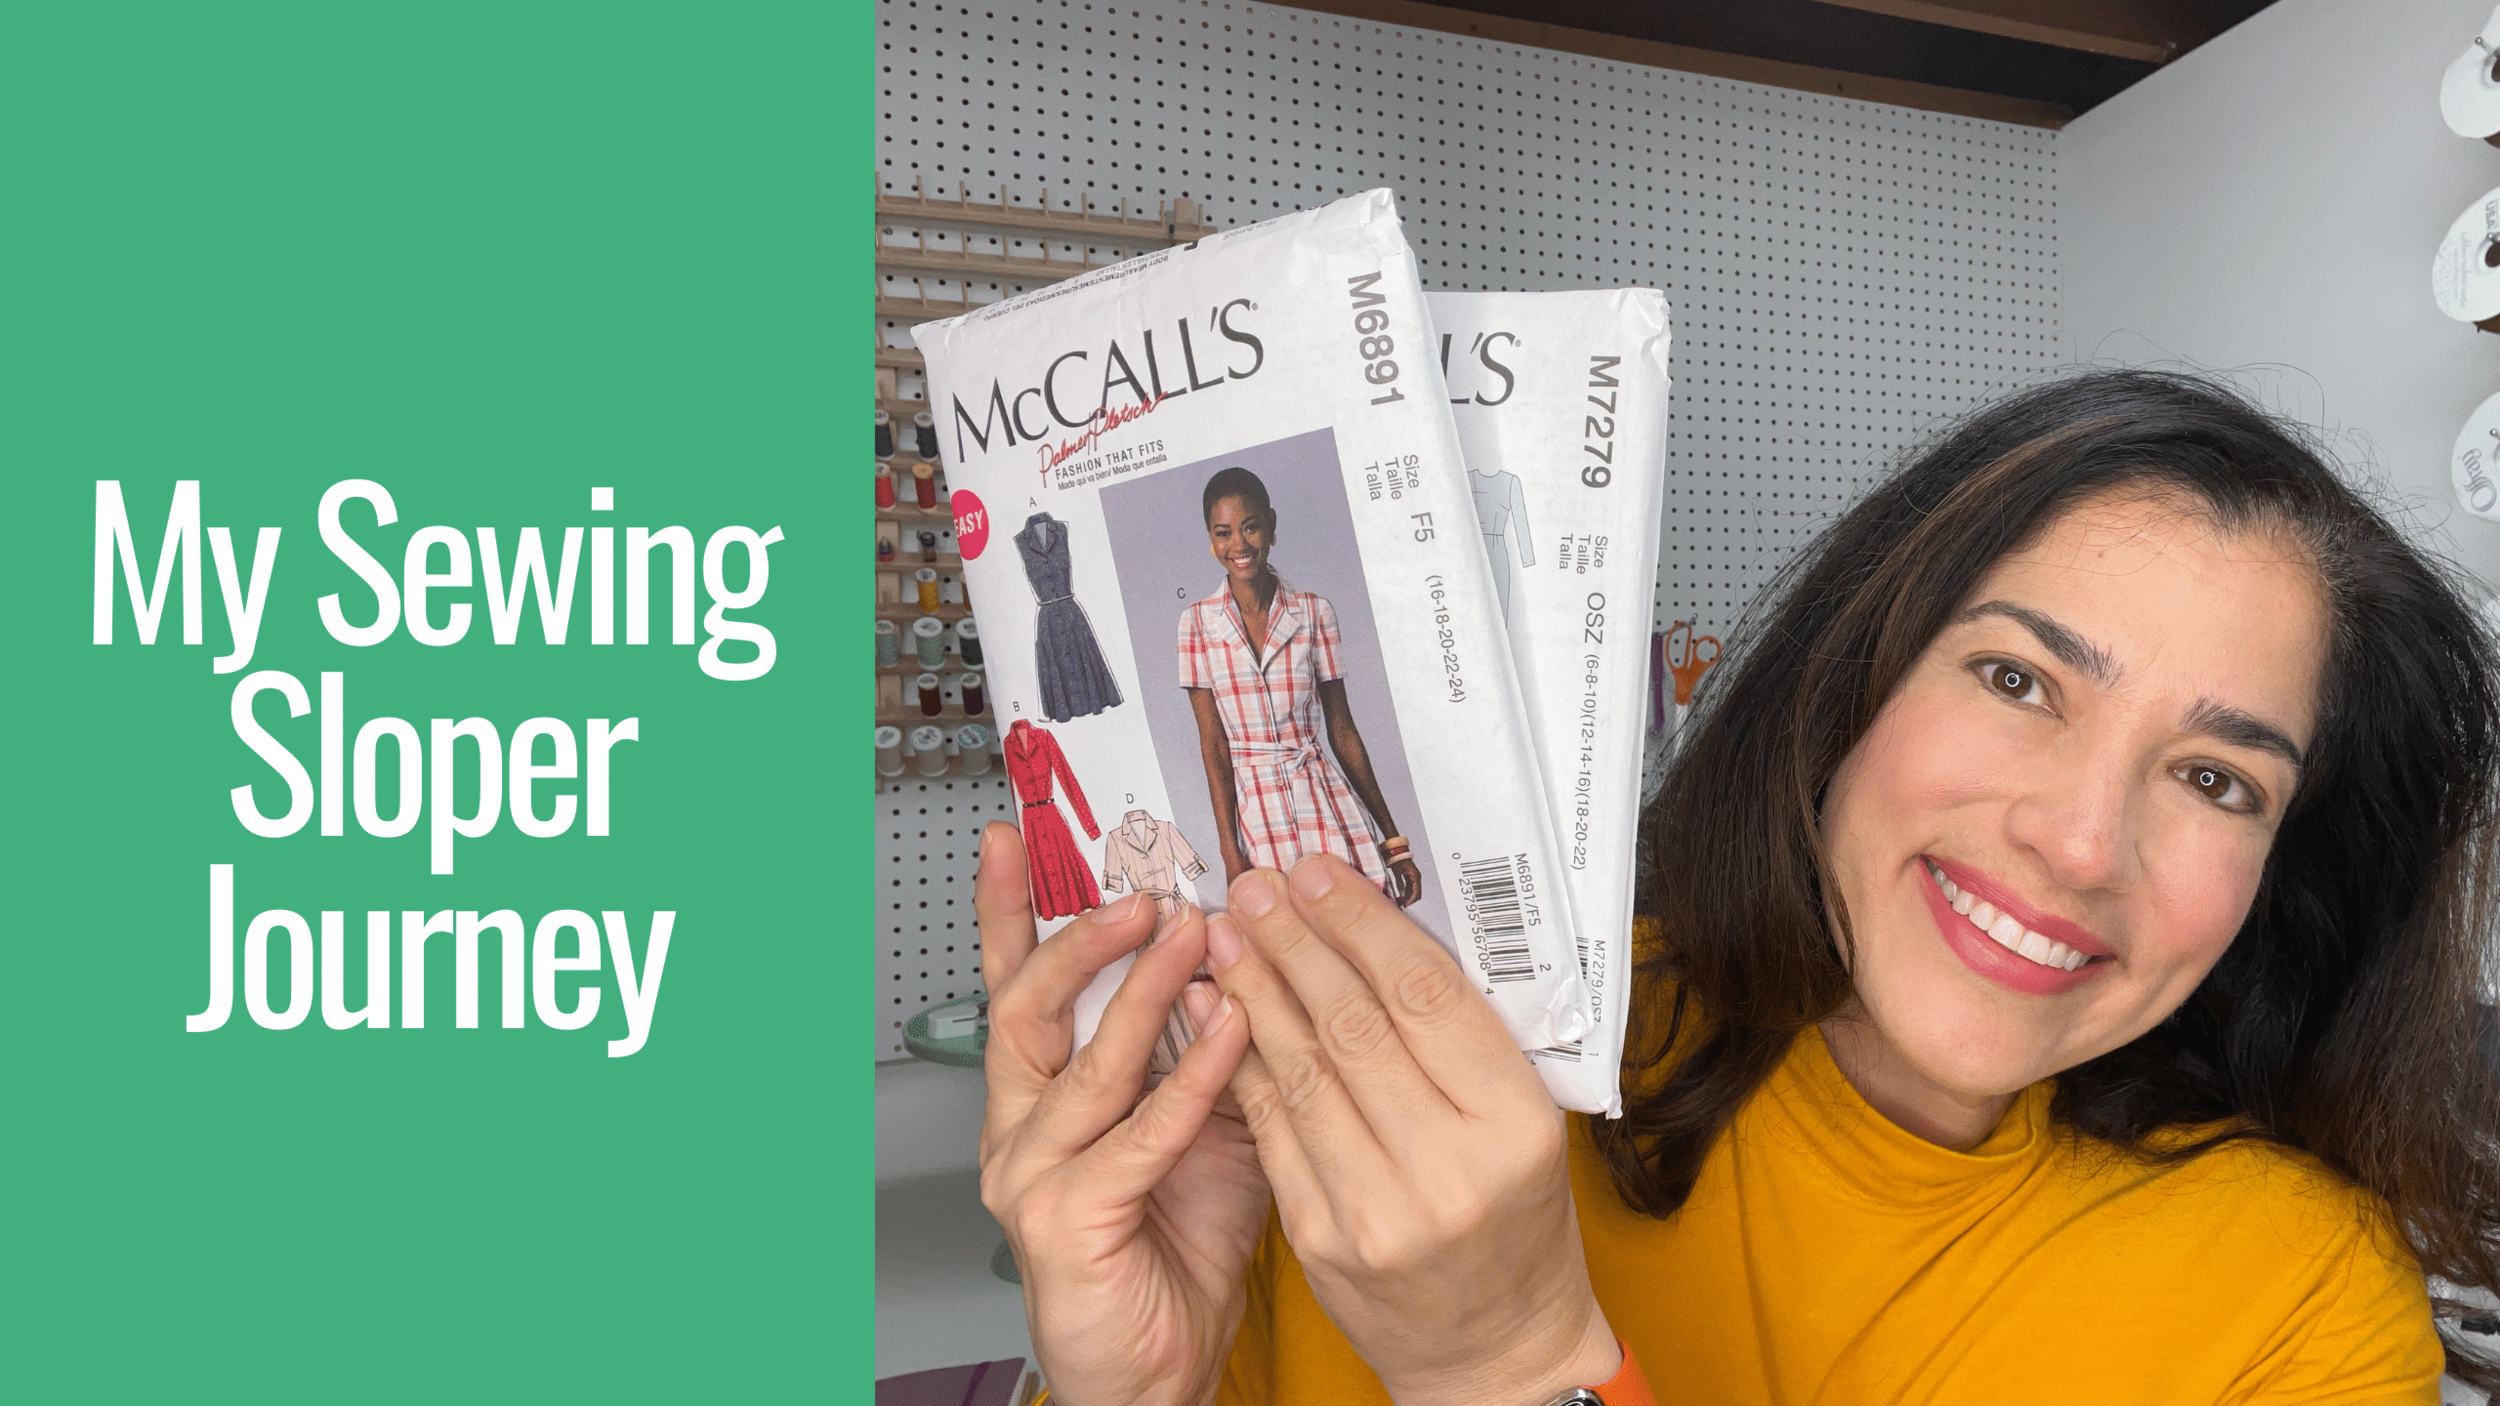
I have briefly touched on this topic before but I was just starting a journey making a sloper. If you are new to sewing you are probably wondering what the heck is a sloper to begin with? A sloper is a fitted generic pattern based on your own measurements. There is zero ease on this so its fitted, there are no seam allowances (you can add those later on) and there is no style. So it’s like a tight t-shirt made out of woven fabric.
For a lack of a better word I have been dragging my feet on working on a sloper for a really long time because I KNEW that it is going to take forever. Its great if you have someone help you but I don’t. It’s just me, a pattern, muslin and some pins. Guys it takes time. I’m not gonna sugar coat it! It takes some SERIOUS time and patience some that I have little of at times. You have to start, make adjustments and then you have to make a muslin and then get it fitted. BUT I will say its awesome!
All of the big four patterns have fitting shells patterns, they call them a fitting shell instead of a sloper. BUT my only issue with those patterns is that it is ONE size, not multi size so if you are like me size 20 for the bust, in between sizes for the waist and 18 for the hips then a once size pattern is NOT gonna work! I mean it can but I’m trying to make this less painless than it already should be. You need something that is multi sized. So instead of using a fitting shell pattern from the big four. I used a Palmer Pletsch pattern. I used Mccalls 6891 which is no longer in print BUT re-issued under a Butterick B6843. It is THE same pattern. So if you are looking for this pattern this is it. However, I will say if you are looking to do a sloper use M7279 or B6849 shown below. That is a TRUE fitting shell pattern, plus its multi-sized so you can grade away.


Another fitting pattern is McCall’s 7279… which has now been re-issued as Butterick 6849. Their patterns are AWESOME and I actually love their tissue method because it just makes sense. Their patterns walk you thru every single adjustment that you might need and they have lines to guide you on where to make those changes in the tissue. So its easy.


Technical Drawings for B6849 and M6891
So I painstakingly did all the adjustments and made a muslin and adjusted and tried different things. Some things I didn’t need, others I did. It took an entire weekend because I had to give myself little breaks in between PLUS you have to also sew this stuff. BUT I was able to make myself a sloper after it was all said and done using M7279.
You might ask yourself WHY you made a sloper? Well, the beauty of a sloper is that you can grab any bodice pattern and compare it with your sloper. You will see right away what needs to be changed. What kind of changes? It can be as simple as lowering a dart, lowering a neckline, adjusting the shoulders, adjusting the arm holes aka armscye, increasing the length of the bodice, adding width to the waist. You can grab a sloper for your sleeves and change the sleeve pattern rather quickly with just a sloper. for the sleeve. Remember I told you guys I have to do a bicep adjustment EVERY Single time. You can do all of those things right away and know that the bodice or sleeve on the pattern will fit! It will fit as long as the sloper fits your measurements. '
This is the way that I got my sloper done. However, there are other ways that you can get a sloper. You can do a little bit of math and take an online class with Tricia Camacho from Creative Costume Academy and she will walk you on how to draft a bodice sloper. BODICE only! Remember a true full sloper (aka fitting shell) is not only the bodice (front and back), but also sleeves, skirt and pants. She is an excellent teacher. I have seen Tricia teach a class and she’s excellent.
The Sew it Academy also has a class on bodice slopers and dart manipulation. They teach you how to sew from the very start. Great if you are a beginner and they have a ton of courses on a bunch of other things. there is a monthly fee, I was part of it for a while and it is great, and they teach you a lot of things in addition to how to create a sloper.
You can also attend You Tube University and draw a sloper with videos online. That is always something you can do, its free and here is a good one by Christopher Sartorial.
Lastly, Mimi G and Tricia Camacho who owns Creative Costume Academy JUST started an online school that is called Pattern Making Academy it is BRAND spankin’ new. They will teach you how to create a sloper, dart manipulation and what is the best part of creating a sloper.
In the video I also mentioned that Palmer Pletsch has in person workshops using pattern B6849 in different locations thru out the United States. I have never had a chance to attend with all the COVID restrictions and I may hold off on any traveling for a while but I would love to go because its a chance to work alongside another person on fitting.
Slopers have another use, and its actually the best reason why you make yourself a sloper. I will talk about that next week!

December Sewing Plans

Its going to be December before the week is done! Where did the year go?! I feel like once summer was done it has all gone way too quickly for me. But alas, its end of November and December is here. I feel like I have less and less time to sew lately and I suspect that December will be the same way. So I’m trying not to take on more projects so I don’t get overwhelmed. Between you and me, some of those fall projects are still not finished but its ok. There is always next year!
So here are my plans for December:
I found this beautiful flannel fabric from Robert Kaufmann, its under their Mammoth Junior Flannel collection. its called Nectarine. I have seen it sold in numerous fabric stores. It has a plaid pattern of aqua, hot pink and orange. I’ll be making myself another flannel shirt with Butterick 6841. I told you all about this pattern before and besides my rant about it not having finished garment measurements on the outside of the envelope it is actually a GREAT pattern if you are looking for a classic button shirt.

I will say this picture doesn’t do this flannel justice. The color way is bright and just perfect.
McCalls 6696 with a stretch denim from Melanated Fabrics. I got this denim fabric from Melanated when they opened their online store back in November or was it October 2020? It was a while ago. I remember the post office was a mess and lost my package but the gals at Melanated had some extra fabric and were able to fill the order. I’m so glad they did. I have also made a skirt with this fabric and it is amazing. Really soft, didn’t loose any of the indigo dark color when I washed it a couple of times and its perfect when I want just a little bit of stretch. So making myself a button down dress with McCalls 6696. I have to find some buttons for this but one thing at a time. Sadly the fabric is now sold but they have some great denim fabric in their store.
Butterick 6858 with a double brushed navy blue knit from Joanns. I’ve mentioned numerous times that I wear a lot of dresses, skirts and boots. Just like the pattern cover I plan on wearing a pair of knee high boots. This dress is perfect for fall, and I suspect that I will be making it a few times in different fabrics. Perhaps some heavier knits and lighter weights.

Making view A with the knee length dress.
Sewing for my daughter I talked about this in my video about how to get that Free People RTW look with sewing patterns… and its happening! The overralls that she wanted are now available in her size but the price went up. Go figure! But its ok because Simplicity 8615 is it, and the fabric which is a 8 wale in a chocolate brown corduroy from Minerva is already here.
My daughter also wanted a long sleeve t-shirt. Using a Double Brushed Knit from Joann’s in Coconut Milk (yup that was the color name) and its a perfect for fall creamy color hue. It will go well with that set of overalls. I’ll be using Simplicity S8376. I love these hacking patterns, they are what I call the classics. I usually buy two of these patterns and I use one for my daughter and one fore me. Make the adjustments needed to each one and store them away.
Lastly, after testing the Joy Jacket from Chalk and Notch I mentioned I wanted to make the Fringe Dress and its going to happen. I got this Everly Twill fabric from Melanated a while ago! About six months ago. I worked on another Simplicity pattern using this fabric, and I still have two more yards to go! So I’m putting it to good use. I’m sure summer will be here before we know it!

This is the Fringe Dress from Chalk and Notch.
After testing their Joy Jacket earlier this month I loved the drafting and the instructions… so I’m making another one of their patterns. Double bonus it comes in a printed pattern… but I couldn’t wait and just downloaded this one.

Pattern Review - The Joy Jacket by Chalk and Notch

It is no state secret that I’m not a huge fan of PDF patterns. The printing, taping and gluing always stop me in my tracks. I will even go off and say that at times I see all these free patterns and I’m like “I’m gonna take a pass on that, thanks”. But when Chalk and Notch sent out a request for pattern testers for their Chalk and Notch Joy pattern I decided to take a chance and sign up. I have tested for a few others (and I’m picky for what I sign up for!) and just like the patterns from Jennifer Lauren Handmade Patterns, I was pleasantly surprised in a very good way. The Joy Jacket is described on their website as a fully lined, relaxed fit, mid-weight jacket. The front zipper is exposed, View A has a wide collar (which is the one I made) and View B has a hood. The pattern has sizing for A/B cup and C/D Cup.
You can get the pattern in a print at home format or you can get AO copies that you can send to a print shop. The turn around we had for the pattern testing was two weeks so off to print, tape and glue it was, and yes I growled my entire way thru it. But what I loved is that Chalk and Notch gave me a sizing chart, it also had a listing of what pages I needed to print for my size and jacket view I wanted to make, so I didn’t have to print ALLLLLL the pages. I loved that the pattern gave me a description on the amount of ease in the finished garment measurements and how it is meant to fit. I wished I would get that with every single pattern I purchase!
I made View A size 20 A/B cup…As usual I went rogue with the main fabric and used a cotton sateen that I had in my stash (and that I was hoping to use for another jacket) but this seemed like the perfect fabric for it. I also used a printed satin for my lining.

The Joy Jacket from Chalk and Notch Patterns
If you are looking to start making jackets, and have been hesitant to try… this is a perfect pattern to start out with. It is an easy pattern, and the instructions are clear in addition there is an easy to follow sew along on their website with pictures.
The pattern is drafted for a 5’-7” tall person, hence I took 2” off the length of the bodice on the pattern and I also adjusted the side seams on the sleeve to give me a little bit more room on the biceps. You know me and my bicep adjustments… we go hand in hand. I opted not to do the drawstrings at the collar or at the hem because I know I will not use them and my fabric is a little bit more stiff than what is called for in the pattern so if I had added them it would have been more for decorative purposes, which you can certainly do. I also waited to finish putting together my main fabric outer shell because I wanted the zipper to go all the way from the hem and zip up all the way to the collar. So that is another change I made.
This will be my third lined jacket/ coat this season, and this jacket is by FAR my favorite one. In terms of how long it took me to make the jacket… I worked on it for 30 to 45 minutes every night for a week once I had all the pieces cut and did all the pattern assembly. So it’s fairly easy and quick to make. The Joy Jacket is labeled as intermediate most likely because you have to know how to set a zipper but honestly it is a very easy and straight forward pattern. I highly recommend this pattern, and NO this is not an ad or am I being paid in any way to give my opinion.

I decided not to do a drawstring around the collar. I just know I wouldn’t use it. But I saw other testers and theirs looked beautiful, so perhaps for my next one.
Chalk and Notch is having a holiday sale and it ends on November 30th, 2021.
Their Holiday Sale coupon codes are below…..
All patterns, PDF & Printed, are on sale through Nov 30th!
hol20 for 20% off any purchase⠀
hol25 for 25% off when you spend $25
hol30 for 30% off when you spend $50
If you are like me you and you like the printed pattern option there is a gift with any printed pattern purchase. They will add a Tailor's Chalk to your printed pattern order as a small gift. Which I have to say, I could use tailor’s chalk any day because it gets used.
The Joy Jacket is not offered as a printed pattern (which is a bummer but I’ll get over it) however it is available in sizes 0-30 with two bust cup options. And heck if you don’t want to print and cut glue like I did… they have a bunch of other printed patterns on their website. I’m currently looking at the Fringe Dress and the Marcel Dress. Both are offered from sizes 0 to 30.
I can see myself making this jacket lined with sherpa fleece, which I will have to go up perhaps one size and make one adjustment to the lining to reduce bulk (and of course you can’t line the sleeves with sherpa unless you are going for the Michelin man look!), you could also use faux suede (gosh that would look beautiful) AND you could also use this jacket pattern as a raincoat. I would have to seal the seams but that is no big deal. So that is my review!

It is a great pattern and beautifully drafted.
⠀
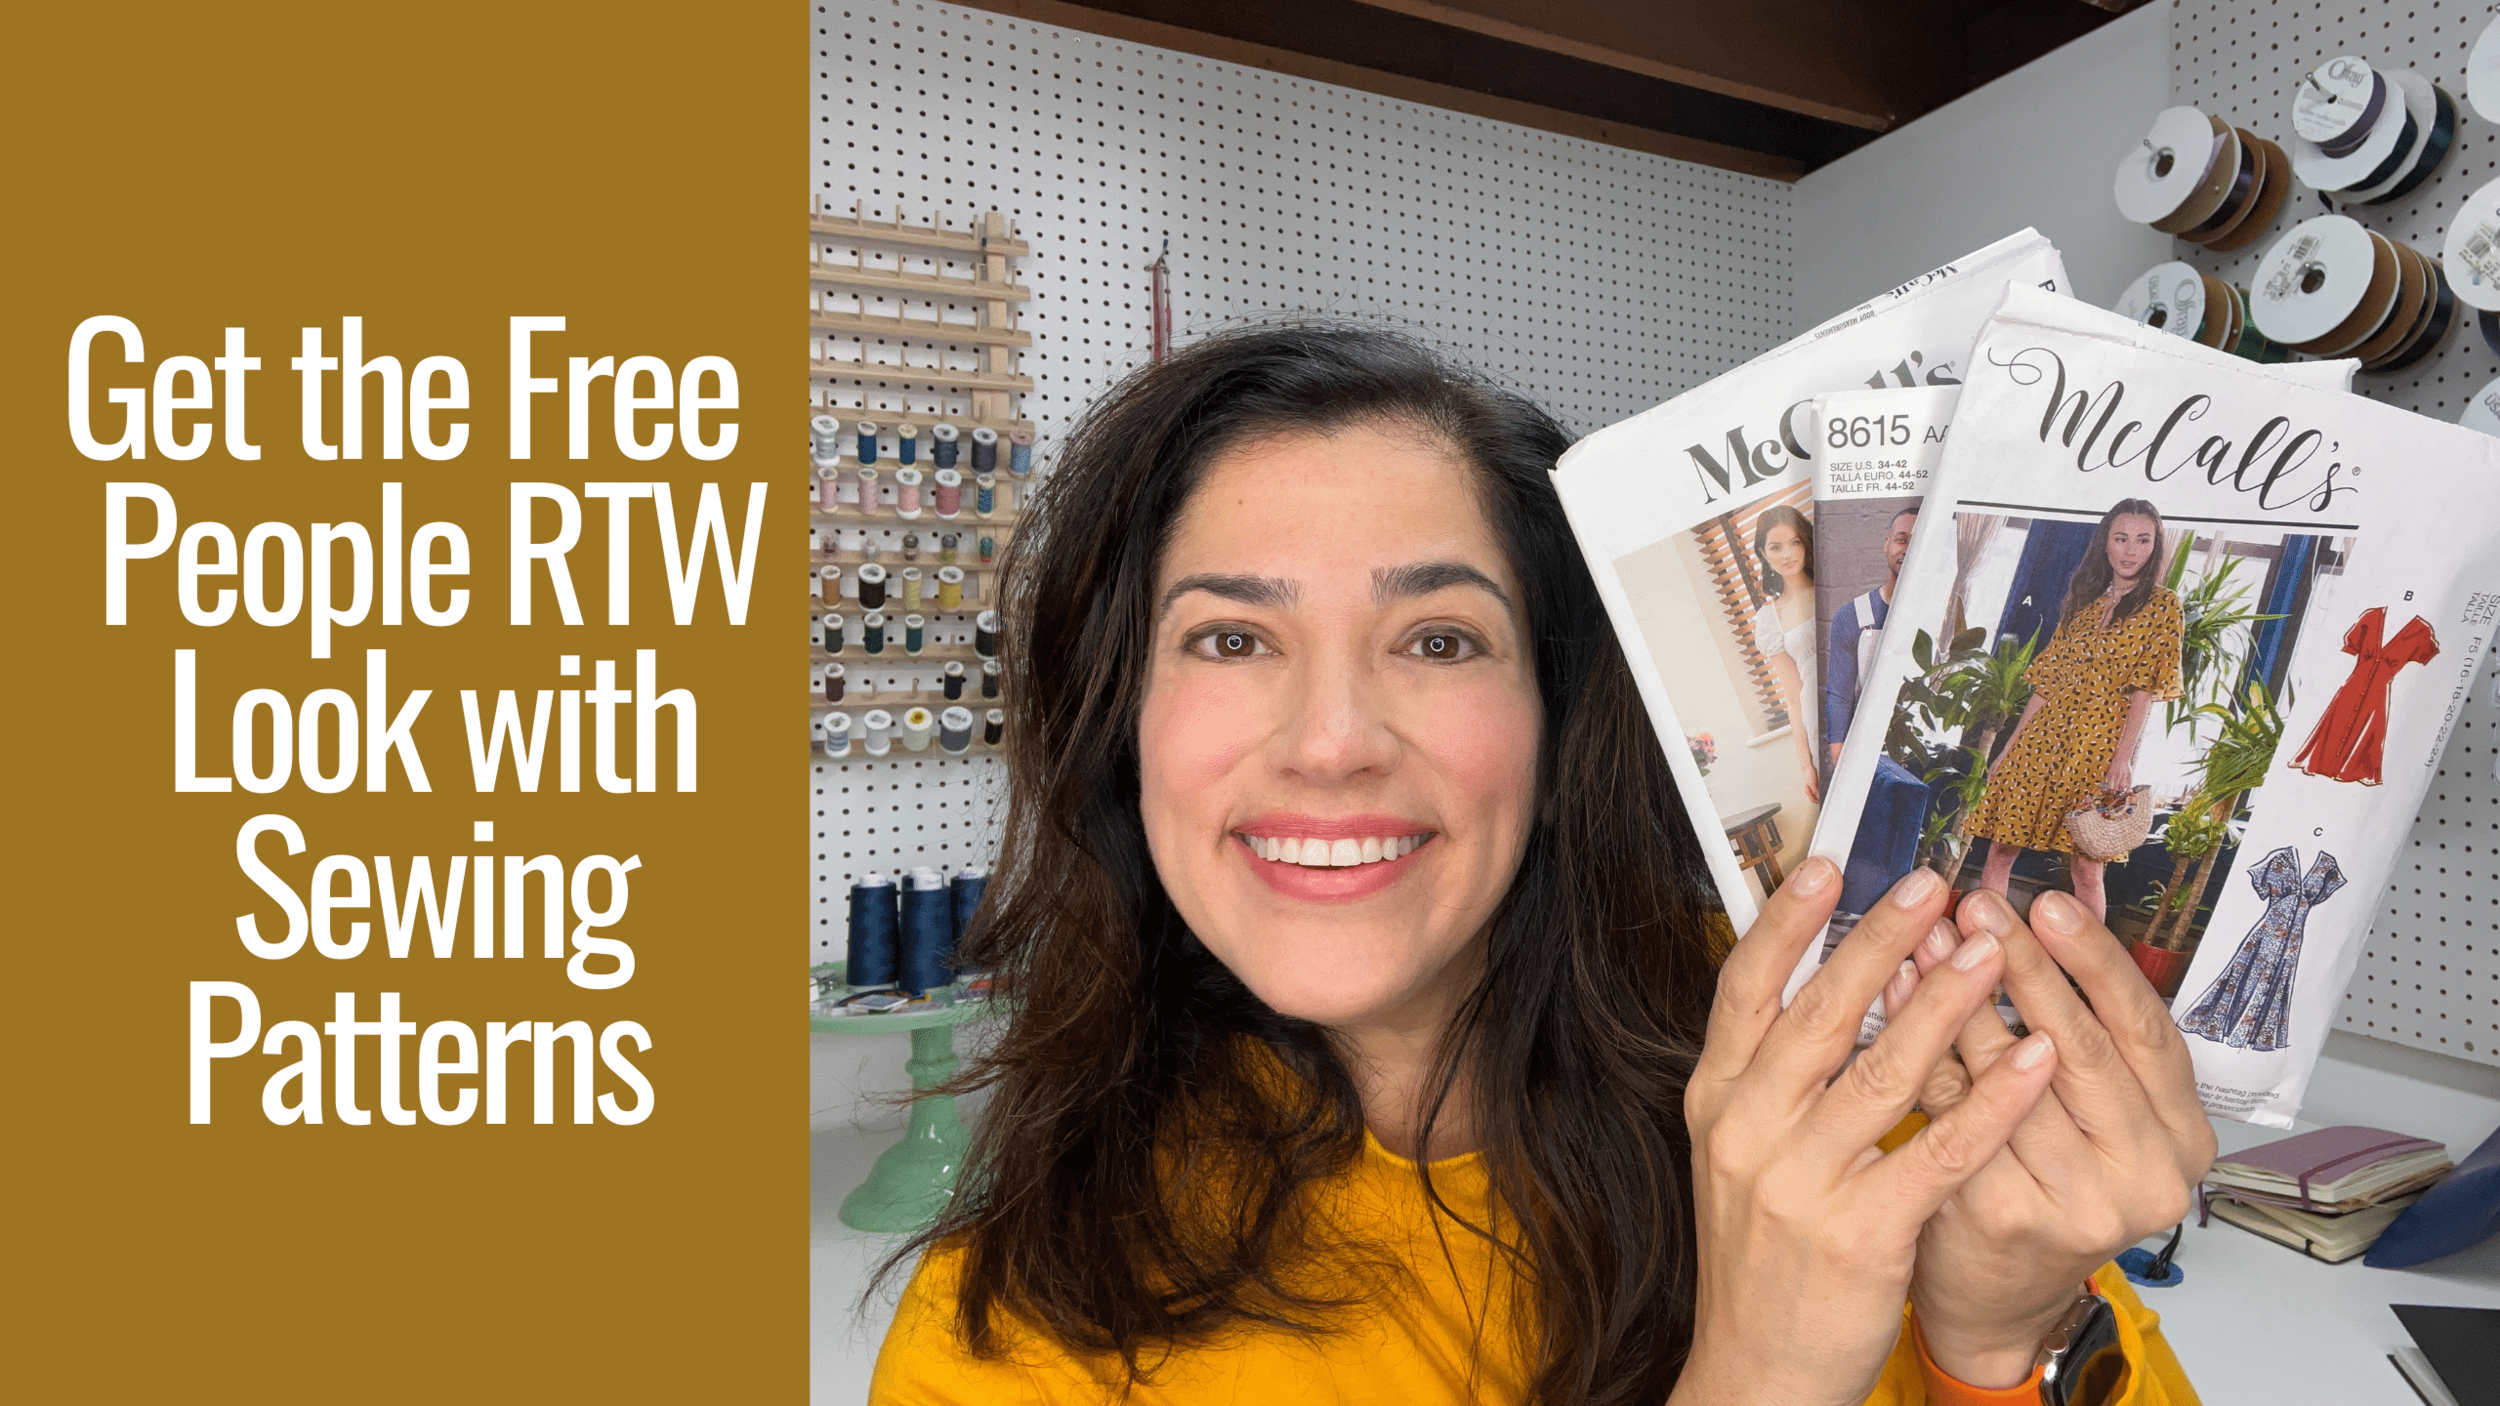
Get that Free People RTW Look with Sewing Patterns

I went to the mall this past weekend we had some errands to do so I tagged along, and I will say this I’m not one to go to a shopping mall because its just not something I enjoy to do so I don’t go. BUT while we were there my daughter asked me to go check out a few stores she likes, sure why not?! We stopped by Madewell they had some nice things and then we went by Free People. I have to say its clearly geared for young market like my daughter. I’m for SURE not part of their target market because all I see is oversized, bohemian style. However, my daughter loves it all and runs from place to place inside the store trying to find styles to show me. Sadly a lot of the things she liked were out of stock in her size. She loved this pair of corduroy overalls but they are sold out online and in all stores. And then she asked me…. can you make these? I’m pretty sure I can!
So here are a few patterns that you can use to get the Free People look.
I loved this cardigan and they actually had quite a few of these cardigans all over the store in different lengths. Some were hand knitted and others were just stitched in a knit fabric. But this one Jessie Intarsia Cardi stuck out and its beautiful. Sold out in Small but you can use True Bias Marlo Sweater to get a similar look. I love the bright colors on the Free People cardigan because she can wear it with a pair of jeans, leggings and a t-shirt under it.


Next up is this Yoko tunic. Its oversized and she loved this ochre color in it. Perfect for fall. But you can also try using Simplicity’s S8551. I will have to extend the panels on the top for this pattern but it does the job. I will say this pattern is now out of print but you can find it on Etsy or Amazon. Some Joann’s stores may still have it. Thankfully I have it in my stash because I’m looking to make myself an orange long dress with one of these styles.


I saw this dress, it has this plum / violet color on the website. Its called the Violet Mini Dress, it has a square neckline and also a square back with gathered puffy sleeves and a tie in the back. I thought you can use M8197 or M8108. For M8197 you may have to square up the neckline in the front and back in addition to adding a tie in the back but that is fairly easy to do.


Another option is M8108 view C but I also saw another dress in orange. On the website its called the Gretchen Pinafore Convertible dress with ties at the shoulders, midi length and a ruffled hem. However the website says that you can use the ties in this dress and wear it as a maxi skirt which I thought was interesting.


Luci and I saw this dress The Shayla Velvet Mini made out of velvet at the store, and sure enough I remembered a pattern I have in my stash. The sleeves are longer and i was somewhat unsure of how the patterns was supposed to fit as I thought it looked a little big on the pattern cover. Its one of those patterns that can be made in different ways. Perhaps velvet for that bohemian look or a nice crepe de chine or poplin for a more put together look, It happens to be pattern M8237, it has gathers in the front button band. I was very surprised to see the dress there. Sewing with velvet is an experience in itself but perhaps that is a video for some other time. I don't wear velvet because I just don’t love the fabric and the way it feels also it feels like something I can only wear during the cold months out of the year so I just don’t sew with velvet but you can make this dress with other fabrics.


I can’t write this blog without mentioning the Ziggy Cord overalls that my daughter liked. The store did a great job styling the overalls along with a buttons down shirt and a flannel shirt tied around the waist. It is exactly what my daughter would wear along with a pair of doc martens boots. But of course they are out of stock in the store and online. So we decided we would make them using either using M8162 or S8615


They also had this Daria Shirt dress on their site and it reminded me of the Dawn McCall’s Dress. The dress retails on the site for $228 and it is 100% poly. I still have the fabric waiting for me because last summer I was hoping to make the dress… perhaps now I’ll just make it for my daughter and using the pattern. The dress from Free People was just a maxi length with long bishop sleeves.


This Charlie Bustier dress is perfect for those upcoming holiday parties, you would have to find the right fabric for it but McCalls’ M7946 with a few modifications to the spaghetti straps and also length would fit the technical drawings for this.


Of course, they had a Cassie shacket RIGHT by the front window. I still can’t see myself wearing one of these because it is in the 20’s which is a pretty low temperature for November but I’m pretty sure my daughter would be all for wearing one of these with leggings, her boots and a t-shirt under it. So enter the pattern that I just returned but that I will be getting yet again! S9388, I suspect that pattern will be in popular demand for quite some time. I know Fiber Mood also had the Rya shacket pattern if you are looking into Indie patterns for this.


Last but not least, my daughter loved a faux suede Diogo coat which is an oversized jacket with dropped shoulders and sherpa fleece lining. It doesn’t look like a hard jacket to make (or so I think!) but I’m thinking that I could potentially use V1563 for it. If you can think of a better pattern for this coat …. I’m open to Indies too would love to hear all about it.


Next time you go shopping perhaps put the garment on and take a picture, you never know what pattern you may find that is pretty darn close. I always tell myself if I can make it for less then perhaps its not such a bad idea to take on some sewing projects on my own.

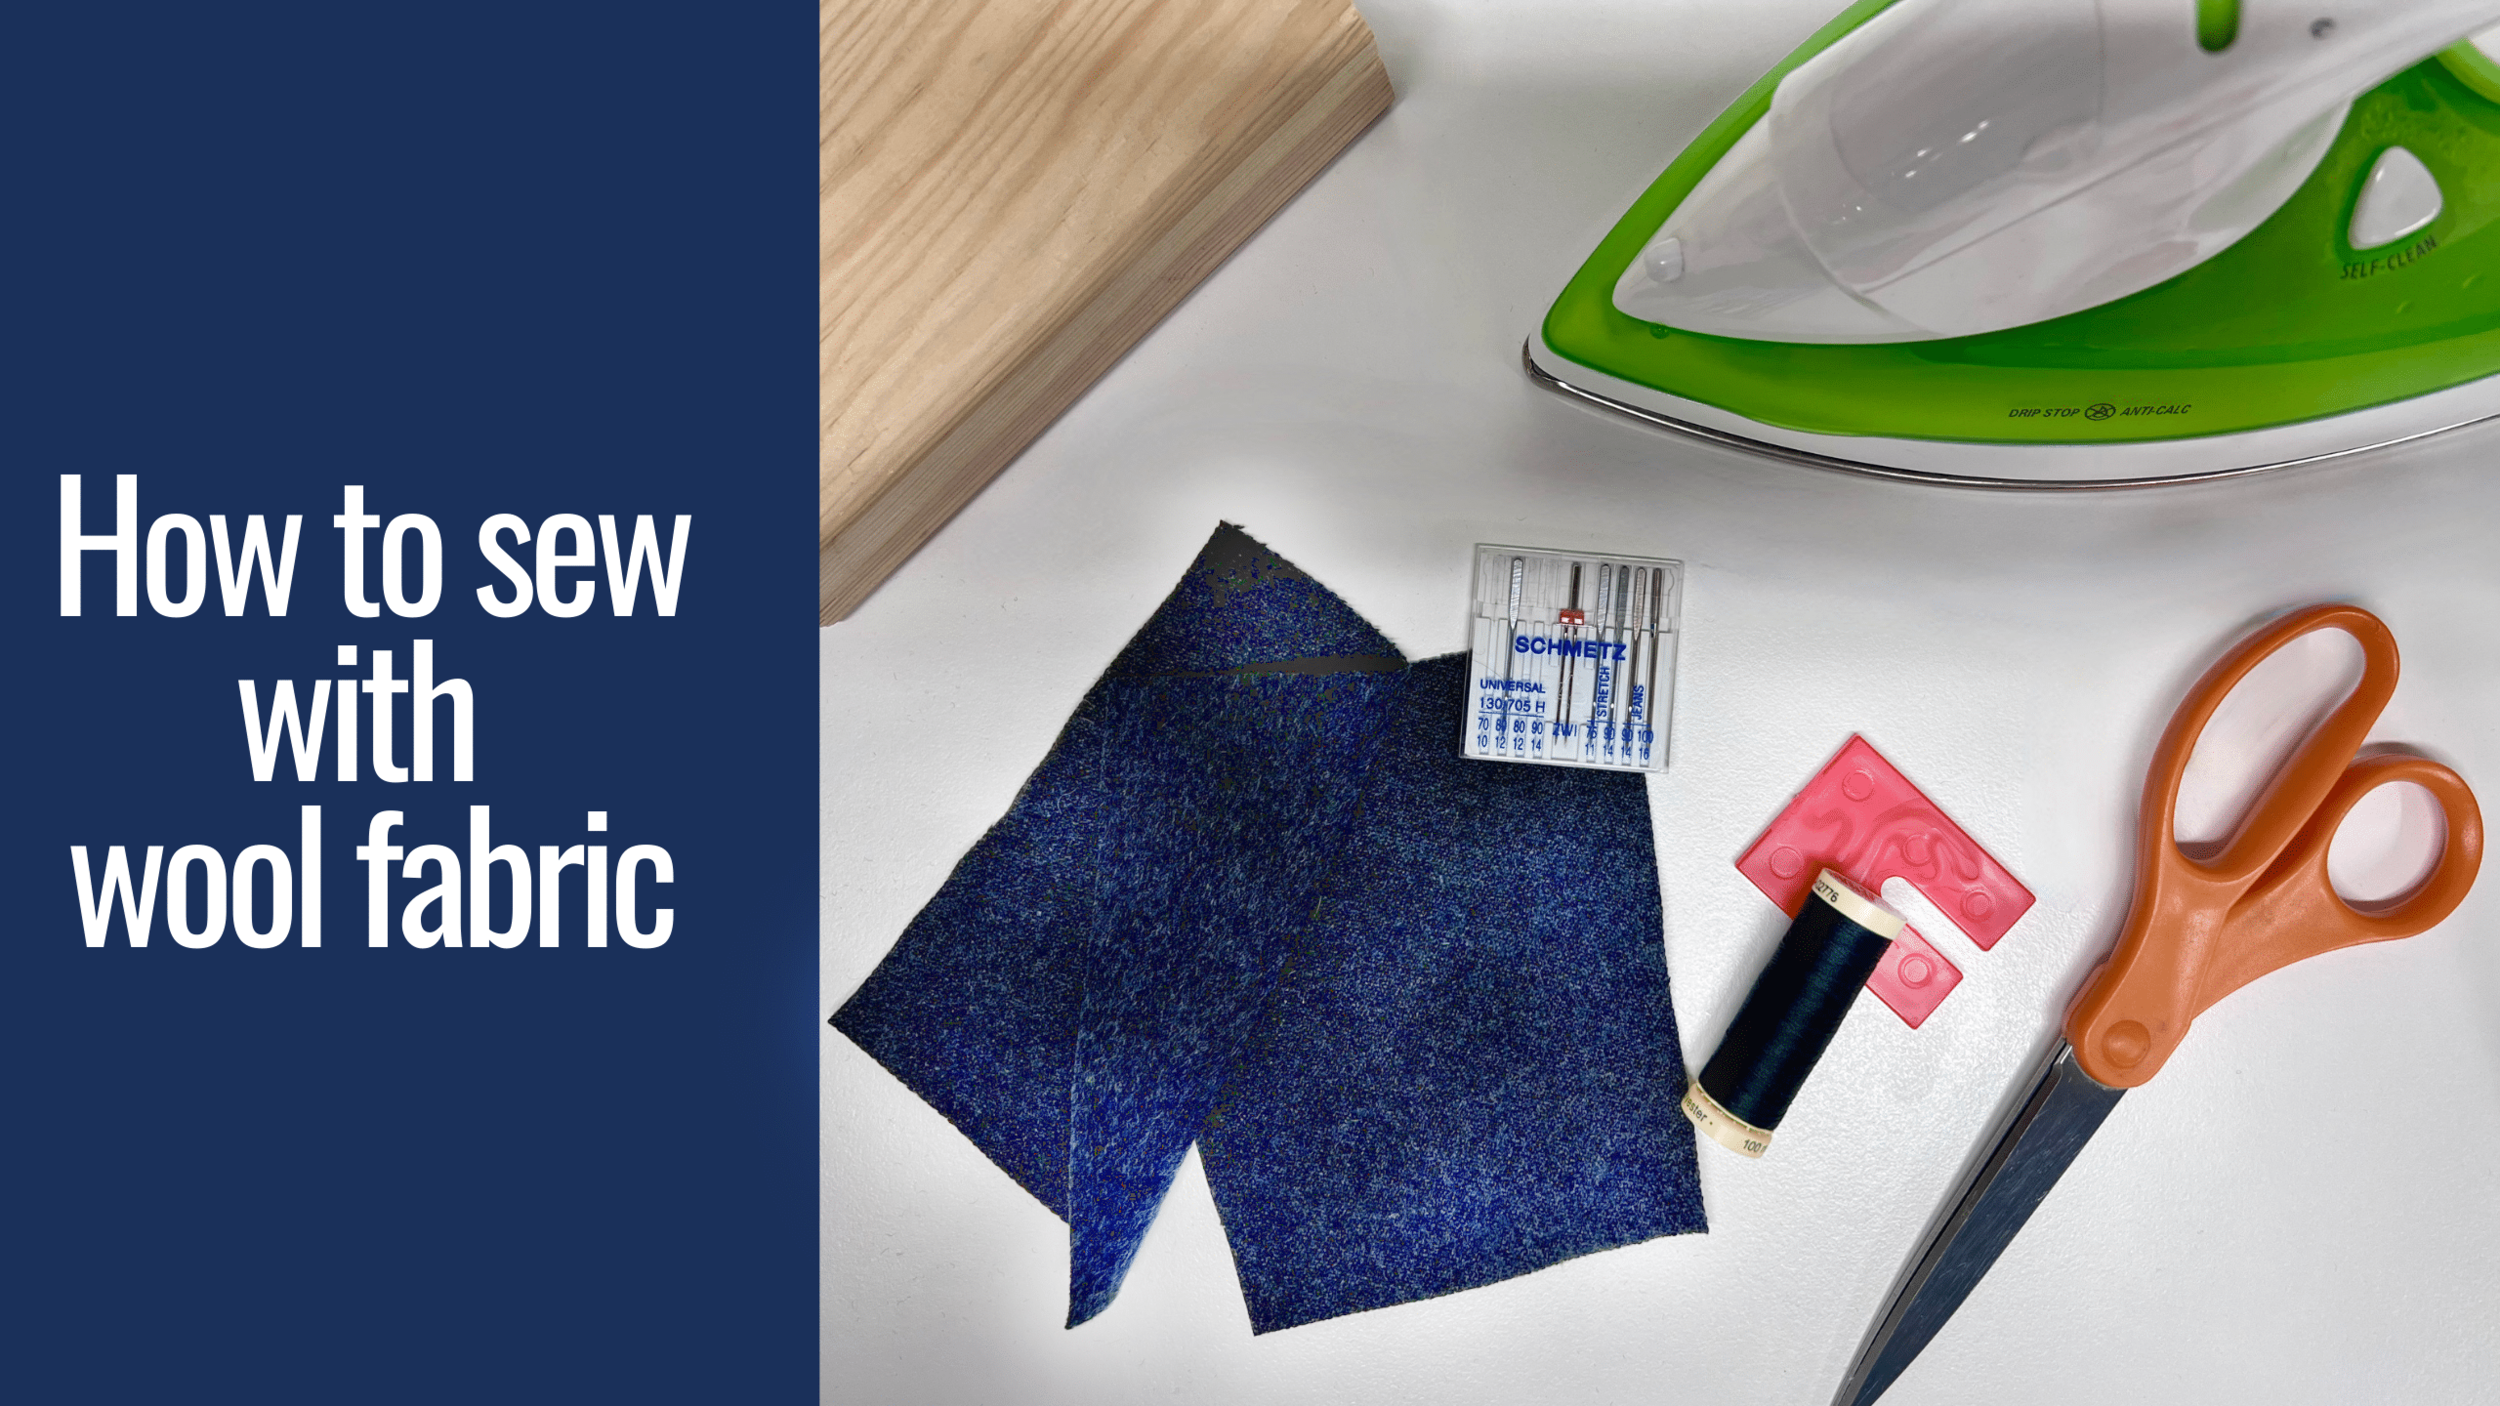
How to how to sew with wool fabric?
How to sew with wool fabrics
I’ve been seeing this questions asked again and again on Instagram within the sewing community…. How do you sew with wool? How do you pre-treat wool? Do I have to wash wool? It seems like everyone is working on those winter coats and they’ve never worked with wool before and there are some things you do need to do before you event cut your pattern pieces.
First off, wool is a natural fiber and great for cool weather clothing such as sweaters and coats. Many people are afraid to work with it, but its actually really easy to work with wool. You just have to remember a few key things.
Before you begin working with wool you have to pre - treat the fabric. You can NOT skip this step! Again for the people in the back that don’t pre-treat their fabric (trust me I’m usually one of those), you HAVE to pre- treat your wool and there are Three ways you can do this. Any one of them works!
PRE - TREAT YOUR FABRIC AKA. SHRINK IT!
Put it in the dryer on the highest drying setting with another garment that is wet for 30 minutes.. You want that other garment to be wet because the dryer will steam up with the heat and water from the extra garment. Your wool fabric will shrink in the process in there.
You can put your iron on the highest setting. Most irons have a wool setting and make sure the water reservoir is full. You will hover (key word HOVER) the iron over the wool fabric about 1/2” and this will also help you pre-shrink the fabric. Depending on how much fabric you have this can take a long time. Its also a great way to test the fabric if you want to do option 1 above.
Take it to the cleaners and ask them to dry clean it for you. That is third option but also depending how much fabric you have can also be pricey.
I usually prefer option 1. Its the quickest, cheapest and easiest way to pre-treat your fabric.
SEWING NEEDLES
You can use a universal sewing needle for wools. So 80 / 12 with light wools (thinner needle), 90 /14 for medium wools and 100 /16 for heavy wools… and this is like bag making wools. So for garments stay with 80/12 or 90/14 sewing needles.

STITCH LENGTH
If you are sewing with a thick coating fabric I suggest you lengthen your stitch to around 3mm to 3.5mm. If its a lighter fabric then 2.4 to 3mm will do. Don’t forget to lower the pressure foot a little! Its always good to test it on a scrap piece of fabric. I stick with my regular presser foot for sewing with wools and polyester thread. I’ve never had any issues with either.
INTERFACING
Yes, you still have to interface those facings! So make sure you use a medium weight fusible interfacing.
GRADE THOSE SEAM ALLOWANCES
Don’t forget to grade your seam allowances! It reduces the bulk in the seams and it will be easier when you press those seams and it will give you an overall nicer look.

Grade your seam allowances. Perhaps cut one side to 1/8” and the other to 1/2” so when they are pressed together they don’t form an indentation on your garment.
PRESS THOSE SEAMS
Once you stitch a seam, press those seams open and make sure you use a wooden clapper. I’ll be honest after all these years I still don’t have a fancy wooden clapper and I have no intention of getting one any time soon. I should invest in one, but guess what a flat piece of wood does the job! So I go au natural with a 8” long 2 X 4” Chunk of wood. Avoid the shiny look on your wool. So make sure you set your iron to a medium setting, I always use a pressing cloth and lots of steam for wool.
LASTLY,
Use a jean-a-ma-jig, (if you don’t have one handy…you can also fold a piece of wool a few times) if you need to for any bulky starts to your stitching or a walking foot on your sewing machine if you need a little help moving the fabric. Sometimes I use it when a coat starts getting a little heavy, most of the time I stick with my regular presser foot.
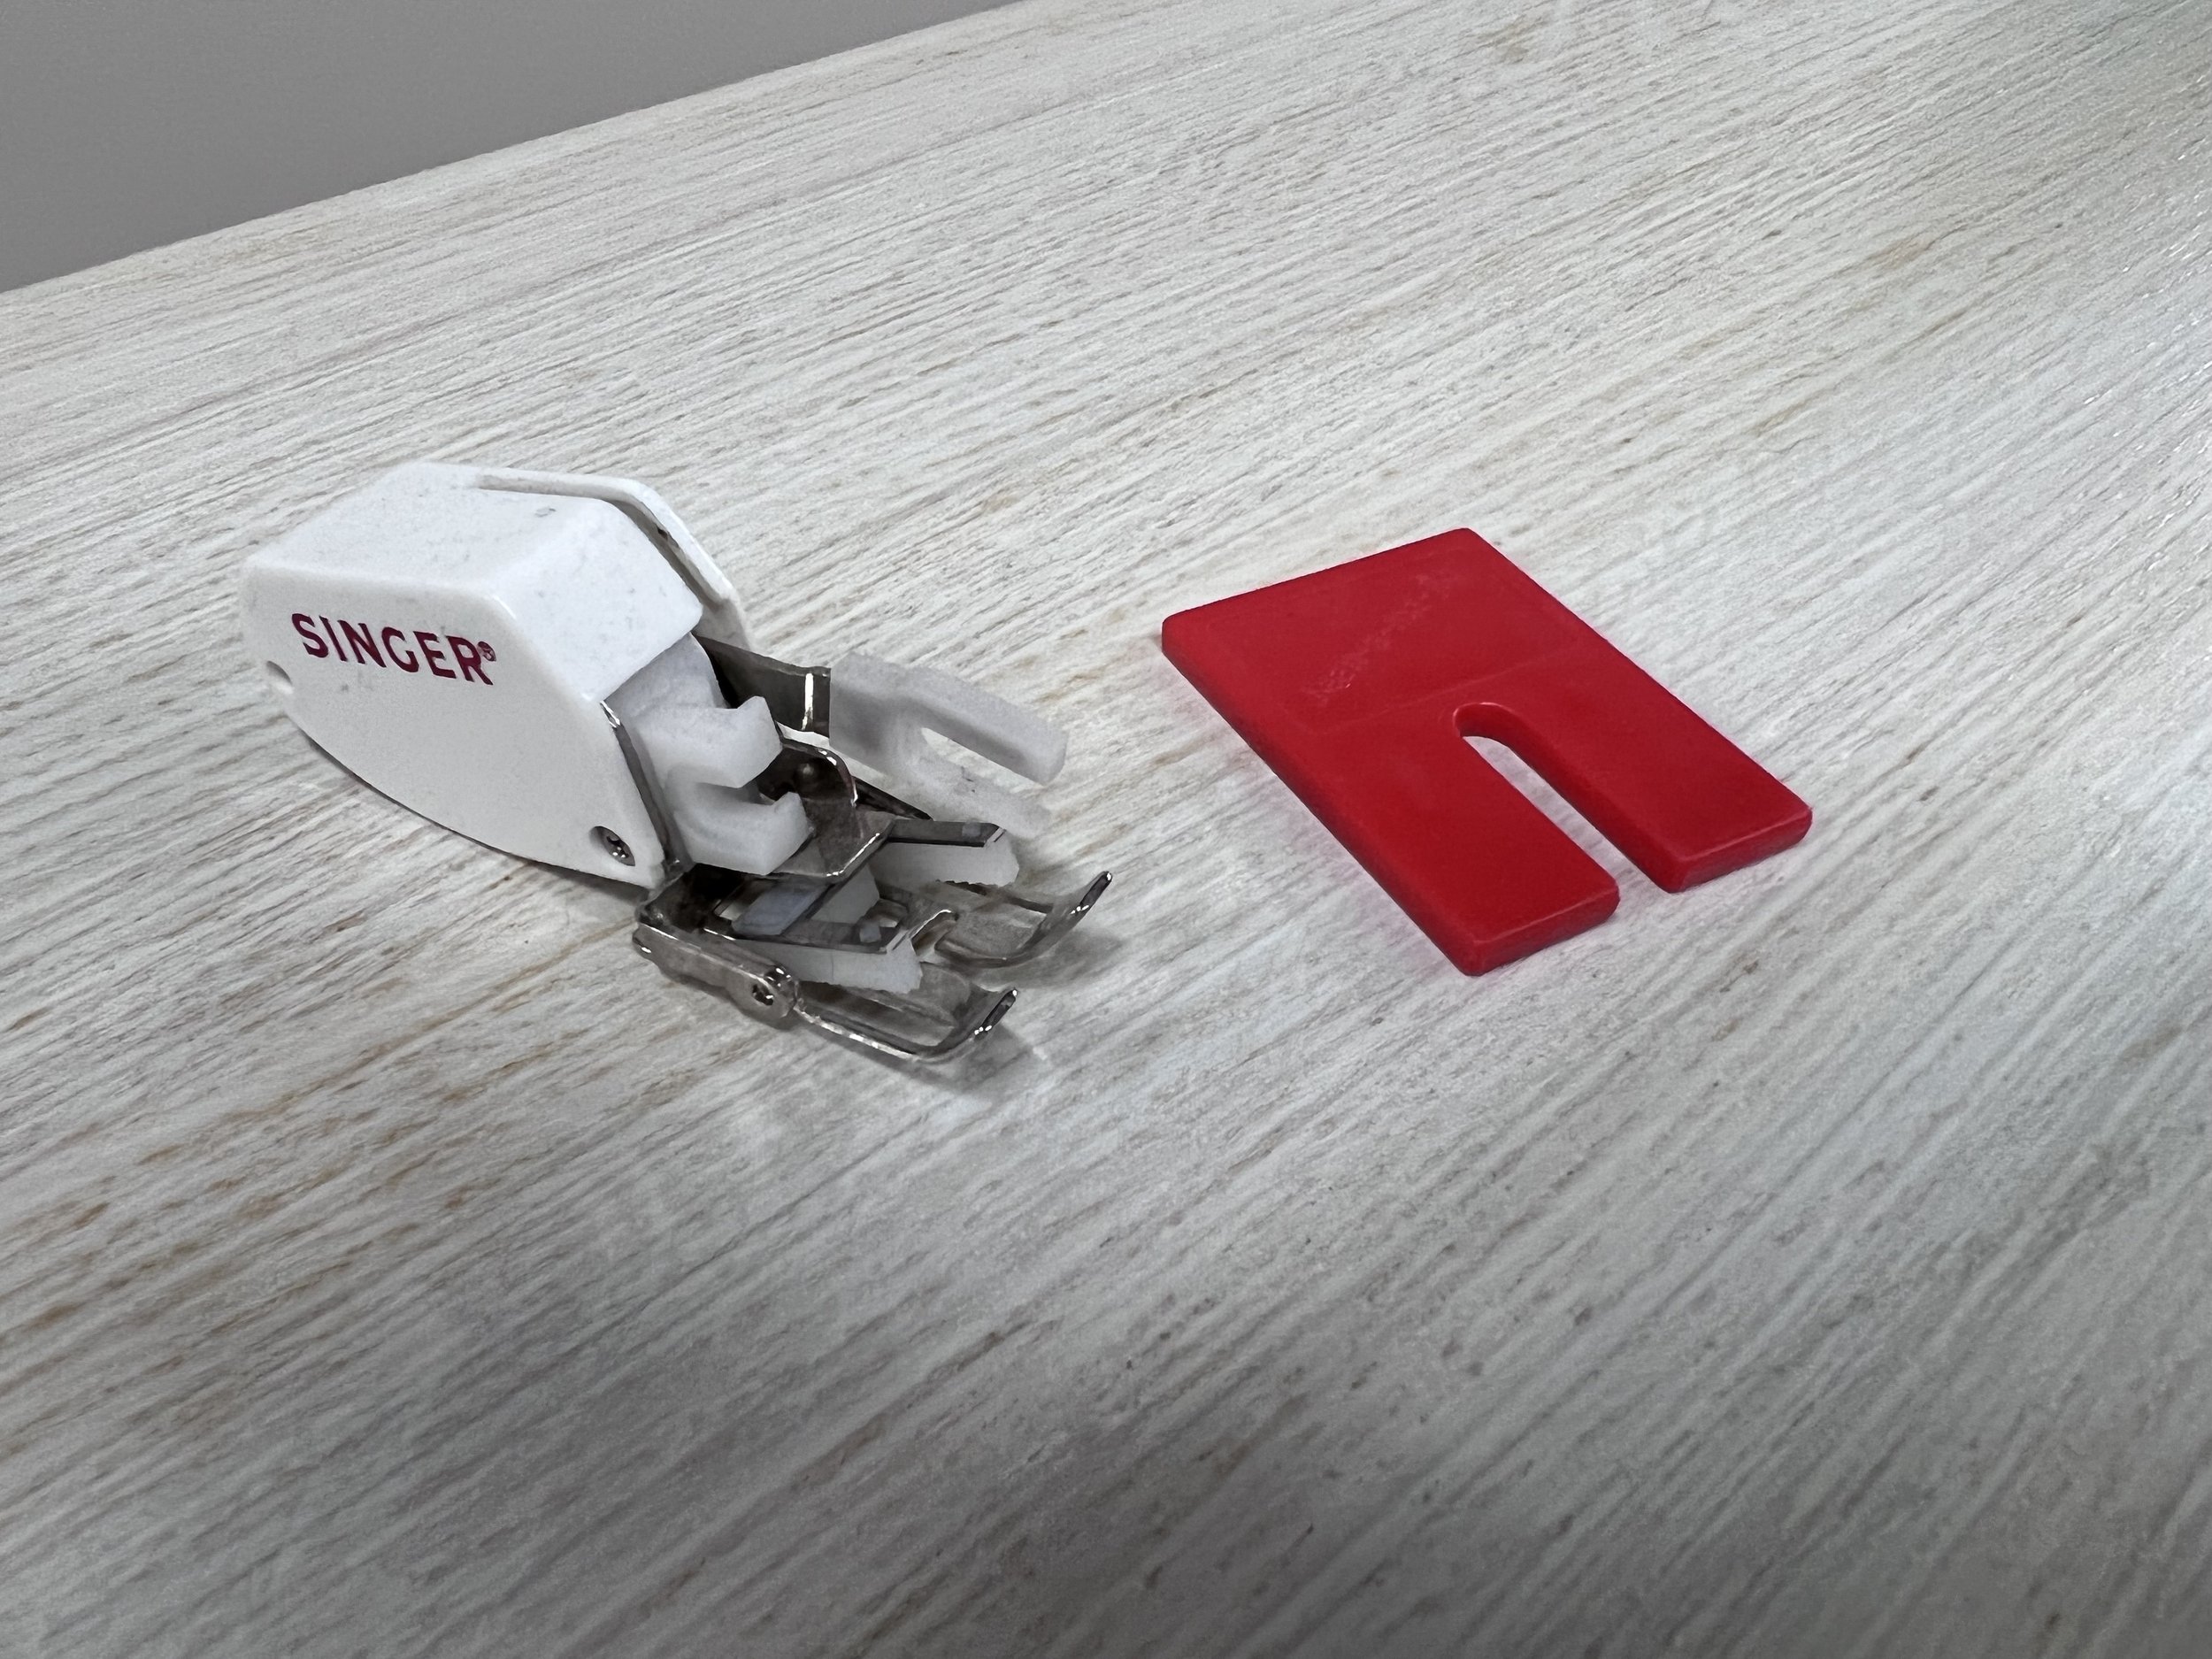
Walking foot (left) and Jean a Ma Jig (right)
STORING WOOL GARMENTS
It is good that you store your finished garment in a safe place because moths and carpet beetles LOVE wool. So at the end of the season store (make sure you get it dry cleaned first) in a plastic big and set either some sprigs of lavender or fragrant pieces of cedar. I stay away from the moth balls because those don’t smell so nice.

Five Questions One Take

I had a completely different video for this week, it will just have to wait for next week. I watch other YouTube channels. How can you not!? Some of those other channels are so good, and you learn so much. As I watched Whitney from Tom Kat Stitchery on Tuesday, she talked about sharing these five questions in one take. One take as in no editing. Yes we have to edit our videos. The dog barks, the plane sounds like its about to land on top of my roof (I live close to an airport) or I goof up some instruction during a sew along and I have to edit the videos. So this was just answer five questions and do it all in one take. I’m game for a challenge.
I said I was going to post pictures of my former life as an event designer or event florist. Just so you get an idea of what my former life and what it involved…. yes I made curtains for this job, I made more pillows than I would care to tell you about. I even sewed a couple of tallits for a chuppah (jewish friends you know what those are)…. by hand. So I sewed but not to the degree that I do now. I will say this, I have purchased enough fabric to last me for a lifetime.


So I was a little busy with another creative endeavor, now that it’s done and I’m sewing full steam ahead I was able to save a few things from my old studio like my design table. I love that thing and we have been together almost 15 years. My husband had it made and I just had it refinished, so it looks like new. Its also on wheels so it can move anywhere within the space.
I also saved some of my satin ribbons on which I can use for bias tape or my green jadeite collection that holds a lot of my notions. I try to keep a fairly clean sewing studio. If you can’t find what you are looking for then you are wasting time.

All of my patterns and fabric are behind that wall to the right hand side. I try not to keep a lot of fabric. One… it becomes overwhelming and two if you buy too much fabric you may have a lot of waste if you don’t pair a pattern to it. So I try to limit that as much as possible. I do need to take some time and start cataloguing all my patterns. I just haven’t had time or have a found a good way to keep track of all of them.
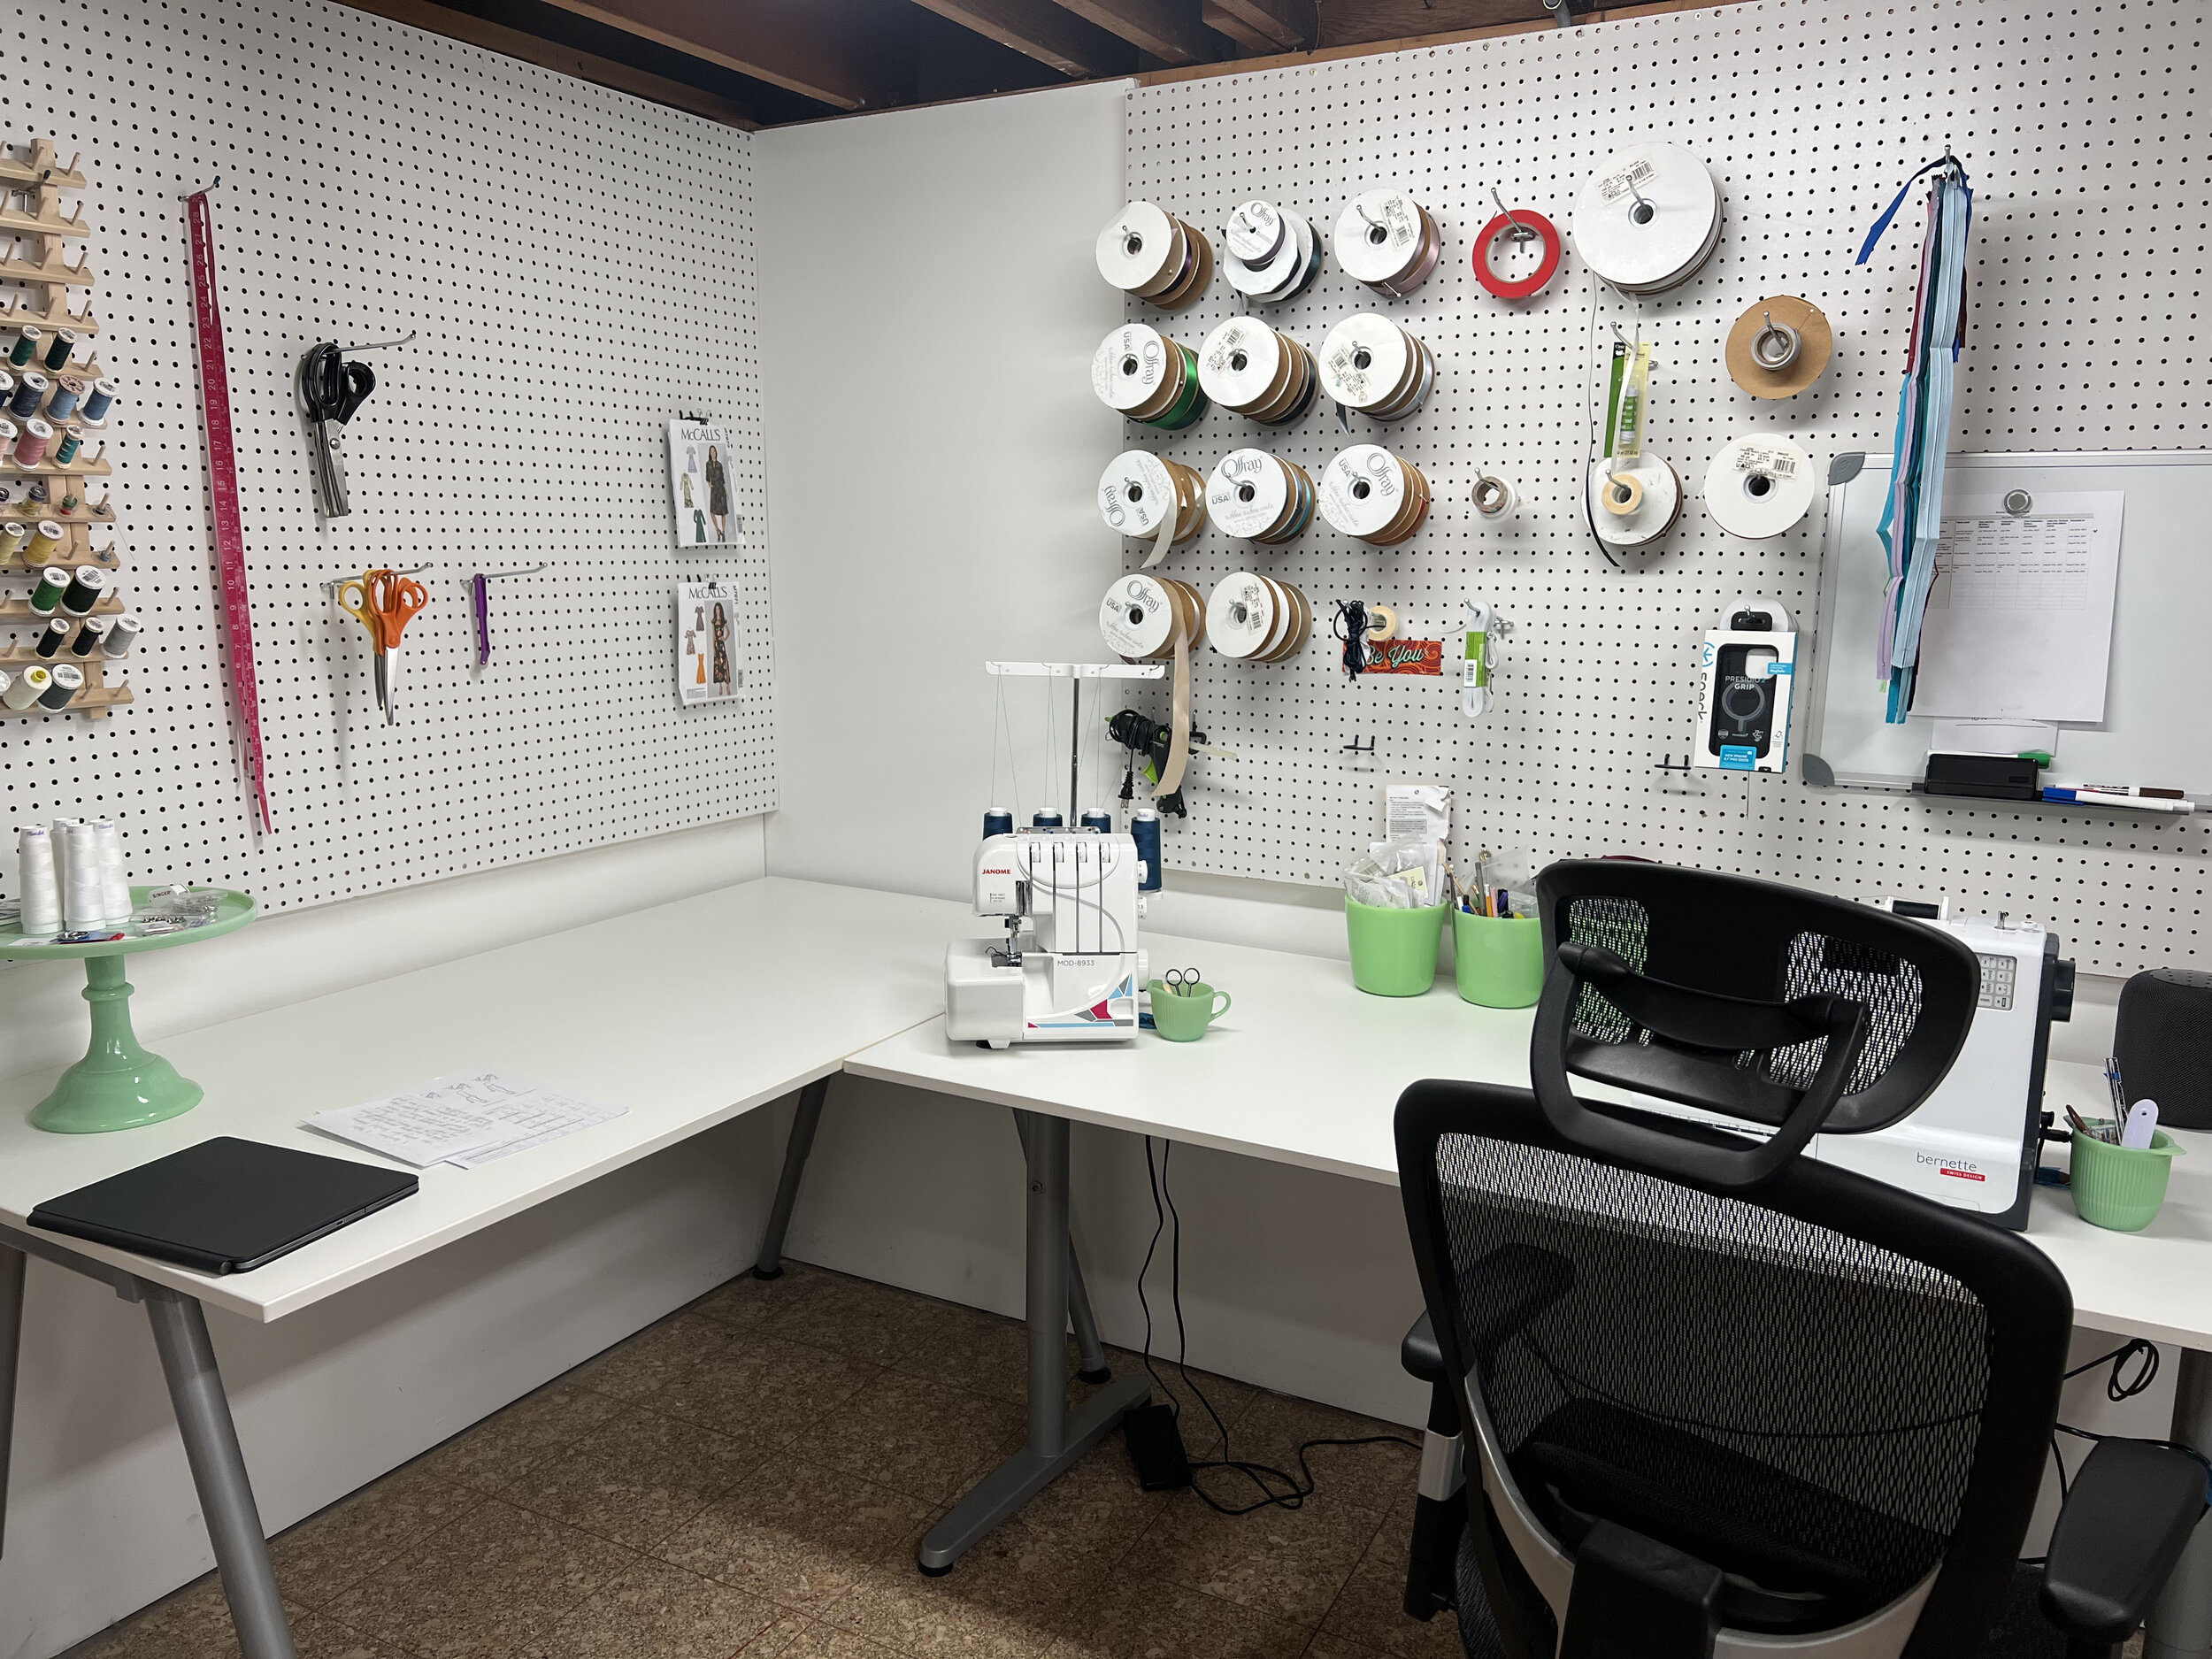
Everything must have a place! I love having lots of empty areas so I can lay my patterns after I’ve cut them or put projects that I’m working on at the time. I have a sewing machine and one serger. That’s it. My first sewing machine is tucked behind the wall in its original carrying case. It was a good starter machine. Now I use it to do some topstitching or use it for not so great things like …. sequins were I don’t want to use my Bernette.
Thanks for stopping by!

Simplicity S9368 Sew Along

Who knew I would take a good look at those fall Simplicity crafting patterns with a fine tooth comb to find a great pattern for hats! This coming from someone who doesn’t know where the heck is her hat. So why not make one! You can purchase S9368 pattern on Simplicity’s Website
Some thing to note especially if this is your first time making a hat, there is a correct way to measure the circumference of your head so you get the correct fit for THIS pattern. Most adult heads are 23” but we all know there are some folks with smaller heads and others with bigger ones, so make sure you grab a measuring tape and measure your noggin’.
Instead of measuring your head with the measuring tape level, you have to make sure you place the measuring tape at a slight angle. The beanie hat that we are making sits at an angle (and the rest of the hat views on this pattern do too) so make sure you measure your head with the measuring tape at a slight angle.

The measuring tape is at a slight angle and NOT level!
Make sure you measure your head correctly, too small and the hat will not fit or be too tight, too big and it will fall over your eyes!
I used a wool blend of Wool and cashmere from Minerva You can also use fleece (if you are making this hat for kids… use a fun fleece print!), which I actually think it will be quite nice. I just needed something that is warm and will be water repellant (we get lots of snow!) which wool surprisingly is. Remember if you use wool you have to pre treat the fabric, what does that mean? You have to pre shrink it before you cut your pattern pieces. You can pre-shrink your wool by using lots of steam from your iron, or throw it in the dryer with another garment that is wet (a little more wet than just damp… you want it to steam in the dryer).
For the lining I used a soft cotton lawn fabric with lots of colors. Have some fun with the lining, you can go classic with a silky lining or you can even use a sherpa fleece for pattern piece number 2 on your lining, that will keep your ears rather warm.
One thing to note on the pattern, it calls for interfacing all pieces on the pattern. I interfaced my pattern pieces, HOWEVER when I turned my hat and tried it on, it was a little stiffer than I would have liked, so I removed the interfacing from pattern piece number 3 and 4 ONLY. I kept the interfacing in pattern piece number 2. Again, this depends on what fabric you use for this pattern.
Have some fun with this one. This is a great pattern and perfect for the holidays if you want to make hats for your family or give them as a gift. You can make all different views for everyone in the family or friends. Lastly, you need very little fabric for this one, so all those remnants and fabric scraps that you have been saving…. this is the pattern to use them on! Happy Sewing!


September Pattern Haul and Sloper Draping Class

So I mentioned in my video that earlier this week I attended a sloper draping class with Joe Vecchiarelli. He was excellent and very knowledgeable in draping fabric to create slopers for a bodice on a dress form. I don’t own a dress form and I won’t be getting one any time soon, if you follow my You Tube channel you know I love my sewing patterns. BUT I do think having a sloper for yourself is a useful thing to have because you can always take out a commercial sewing pattern and check it against your sloper. You can see what things you need to change in the commercial pattern so it fits you. For example if you constantly have to move the bust darts, adjust the sleeves, change the shoulders or even adjust the armholes to go higher or lower a sloper could be really beneficial to you. Although I can’t share videos from the class (yes we were allowed to take videos) they are for personal use only BUT Joe does have a You Tube video, see a link here. Where he shows you how to drape a sloper for a pair of pants and he explains it in detail so you can follow along, using your own measurements so you can create your own.


I also mentioned in the video that the big four Pattern Companies have fitting shell bodice patterns, but buyers beware they are sold by size individually so its not multi size like their patterns. So heads up and if you get them, make sure you are buying the correct one!
For Butterick it is B5627, Vogue is V1004, McCalls is M2718 and for Simplicity it is under their Amazing Fit Collections. You can also learn how to do a bodice sloper from the Sew It Academy (and I will say you can’t beat their monthly price to learn how to sew) OR you can also have Creative Costume Academy to make one for you or teach you how to draft your own. So lots of options for this!
Lastly, lots of great fall patterns in my September sewing pattern haul. At first glance they look ok but upon further inspection there are some great fall patterns like a trench coat, a pleated skirt, a knit dress with a shrug, and a big cut dress. The one that I couldn’t find is the pleated skirt pattern. I would have to find fabric for it, so I’m not in a hurry just yet.

Get the fall RTW Looks with Sewing Patterns

This blog post is all about sewing the high street trends also known as Ready to Wear with sewing patterns. I could go on and on about this because there is a lot of good stuff out there. Especially after another fashion week in New York City and the Met Gala that took place this year on the First Monday in September…. away from the usual first Monday in May.
So let’s begin with McCall’s and Simplicity Fall Patterns. They are brand spankin’ new! Well, if you can call those patterns two weeks old babies as of mid September 2021. But I have to be honest, I liked a handful of them at first glance and I passed up a few things, actually a LOT of things. Crafting a yoga mat or making curtains anyone… Not this girl! I usually have to go back two more times to really look at the line drawings and take it all in. That’s when the creative sewjo gets going… and then I spend a little time on Instagram and Pinterest (yes I do go down that pinning rabbit hole every now and then), but once I do that I get inspired, and I want to make all the things.
With that being said, let me tell you about some great fall sewing patterns and how you can use them to make those expensive Ready to Wear styles that I have no way to afford.
McCalls M8246 - This is a trench coat pattern by Melissa Watson from the Palmer Pletsch group. So its a fitting pattern. I will be honest when I saw the pattern cover I wasn’t thrilled…. a fitting pattern and it was really large on the model. So I passed it up. BUT as I glanced on Instagram Banana Republic posted a picture of this model in a deep fall red trench coat. It stopped me in my tracks. I love bold colors, especially for fall. I will say I went back to that trench coat pattern and its one to get. That coat at Banana its actually really well priced but I know I can make my own and fit it to my body.


McCall’s M8248 - I’m actually still surprised I like this pattern. This comes from someone who wore a pleated plaid skirt Monday thru Friday for Catholic School for quite a few years. So when Sezanne posted this picture of a model in a boho print pleated long skirt and a light sweater with fall boots… I was hooked! In comes this pleated skirt pattern in different lengths pattern. What is not to like about that? Seems like the stylists talked to each other for this one… and I’m here for it.


Hold on to your patterns because I got some more..
McCall’s 8099 and Vogue V1828 - They are jogger pants, and of course you can put your sneakers and go out for a run or you can make them in silk and take a page out of Tom Ford’s Net- a- porter silk jogger pants! You will need 2.5 yards of fabric, elastic and some aglets so you can make that draw string cord look a little nicer than usual but with some heals and a cute top you are ready to go AND be comfortable too.


Simplicity S8845 -I will say there are so many great styles at Banana Republic this time around that what I really want to do is go over there and purchase them all so I can keep sewing but alas…I better keep sewing because right now that’s not in the budget. What do I mean by that? Check out this gorgeous faux suede jacket. Swoooooon!!!! But at $498 I just can’t swing it, and I know from sewing leather its not for the faint of heart… one wrong needle mark and you have a hole that you can’t take back. But back to the pattern, Mimi G drafted this great jean jacket pattern but guess what? Nobody said we have to stick with denim fabric, we can make that in a heavy weight fabric and faux suede fits that category as far as I’m concerned. The similarity is spot on.


Simplicity S9381 -Talking about Mimi G, she sure knows what styles we should be wearing. This pattern has a jacket and a pair of pants… not loving the styling on the pants but I can quickly get over that, like REAL quick. Especially when the jacket is a Balmain Jacket that retails north of $1,000. Double bonus she always makes a sew along to go with her patterns. So you KNOW she is going to be making that jacket.


Lets keep going and I have some things for the fall weather folks that live on those southern states or down under in Australia… those places were there is no chill in the air right now and there will never be like back home in Puerto Rico. I haven’t forgotten about you. I got some good stuff here for you too.
McCall’s M7948 - Perfect pattern for a beginner, there are no buttons (well there is one but you can omit that with a hook and eye) and no zippers. What it does have are a gazillion gathers, ok I’m exaggerating. But look at these two looks from Ann Taylor and Banana Republic, a few small hacks to the neckline and you are in Ready to Wear business.


Simplicity S9326 - I love this pattern, you can get rid of that ruffle and sew up that slit if you are in the modest don't want to show no upper legs, its a great pattern. In comes this Ann Taylor style with this beautiful madras plaid print. I have to say S9326 is pretty spot on if you want that Ready to Wear Look.


One more to go!!! You getting inspired in sewing a few of those fall patterns? There is some good stuff out there, and I have to add that half the fun is finding the right fabric for it.
McCall’s M7971 - This is a great dress pattern with a slit on the side, and an semi open back. There are for sleeve variations and its actually a really nicely drafted dress, have you ever heard of Reformation? Its a great apparel online shop and they even have a few stores in major cities. They have some beautiful dresses but this one comes to mind and if you love this dress you will love M7971.


Sew Along for M7991 and Pattern Review

M7991 is a knit dress with a wrap top and a knit skirt, it is a great pattern if you are a beginner or just want a quick sew. I have now made it twice, and both times I have used 2 yards of fabric. This would be a great pattern to make with a knit print and it will need a belt (at least I feel like mine will) and a great pair of boots.
Pattern Sizing: Pattern has one size range from Small to XL. I cut an XL and had to take it in, so perhaps next time I will be cutting a size L and going from there!
Did it look like the photo/drawing on the pattern envelope once you were done sewing with it? Yes looks exactly like it does on the pattern envelope.
Were the instructions easy to follow? Yes the instructions very easy to follow.
What did you particularly like or dislike about the pattern? I like the pattern, great pattern as its a quick sew and you can change the color of the neck band or sleeve cuffs.
Fabric Used: I have made this pattern twice, once for myself in a mustard knit and also in a white, gray and blue knit print. I’m linking them both.
Pattern alterations or any design changes you made: I didn’t extend the bodice but I did add about three inches to the skirt.
Would you sew it again? Would you recommend it to others? Yes, already have and yes would recommend it to others. Its a great pattern for the pattern stash.
Subscribe to our newsletter.
Sign up with your email address to receive news and updates.