
M6696 Sewing Pattern & My Wearable Muslin
I’m working on creating a sew along for pattern M6696. This pattern has been around for quite some time. I know, I keep arriving late to all these pattern parties but some times I like to let others make the pattern way before I do and read the reviews before I take a “stab” at it. Sure enough there are plenty of reviews online for this pattern, and they all mention the same exact thing that was bothersome but some more on that later.
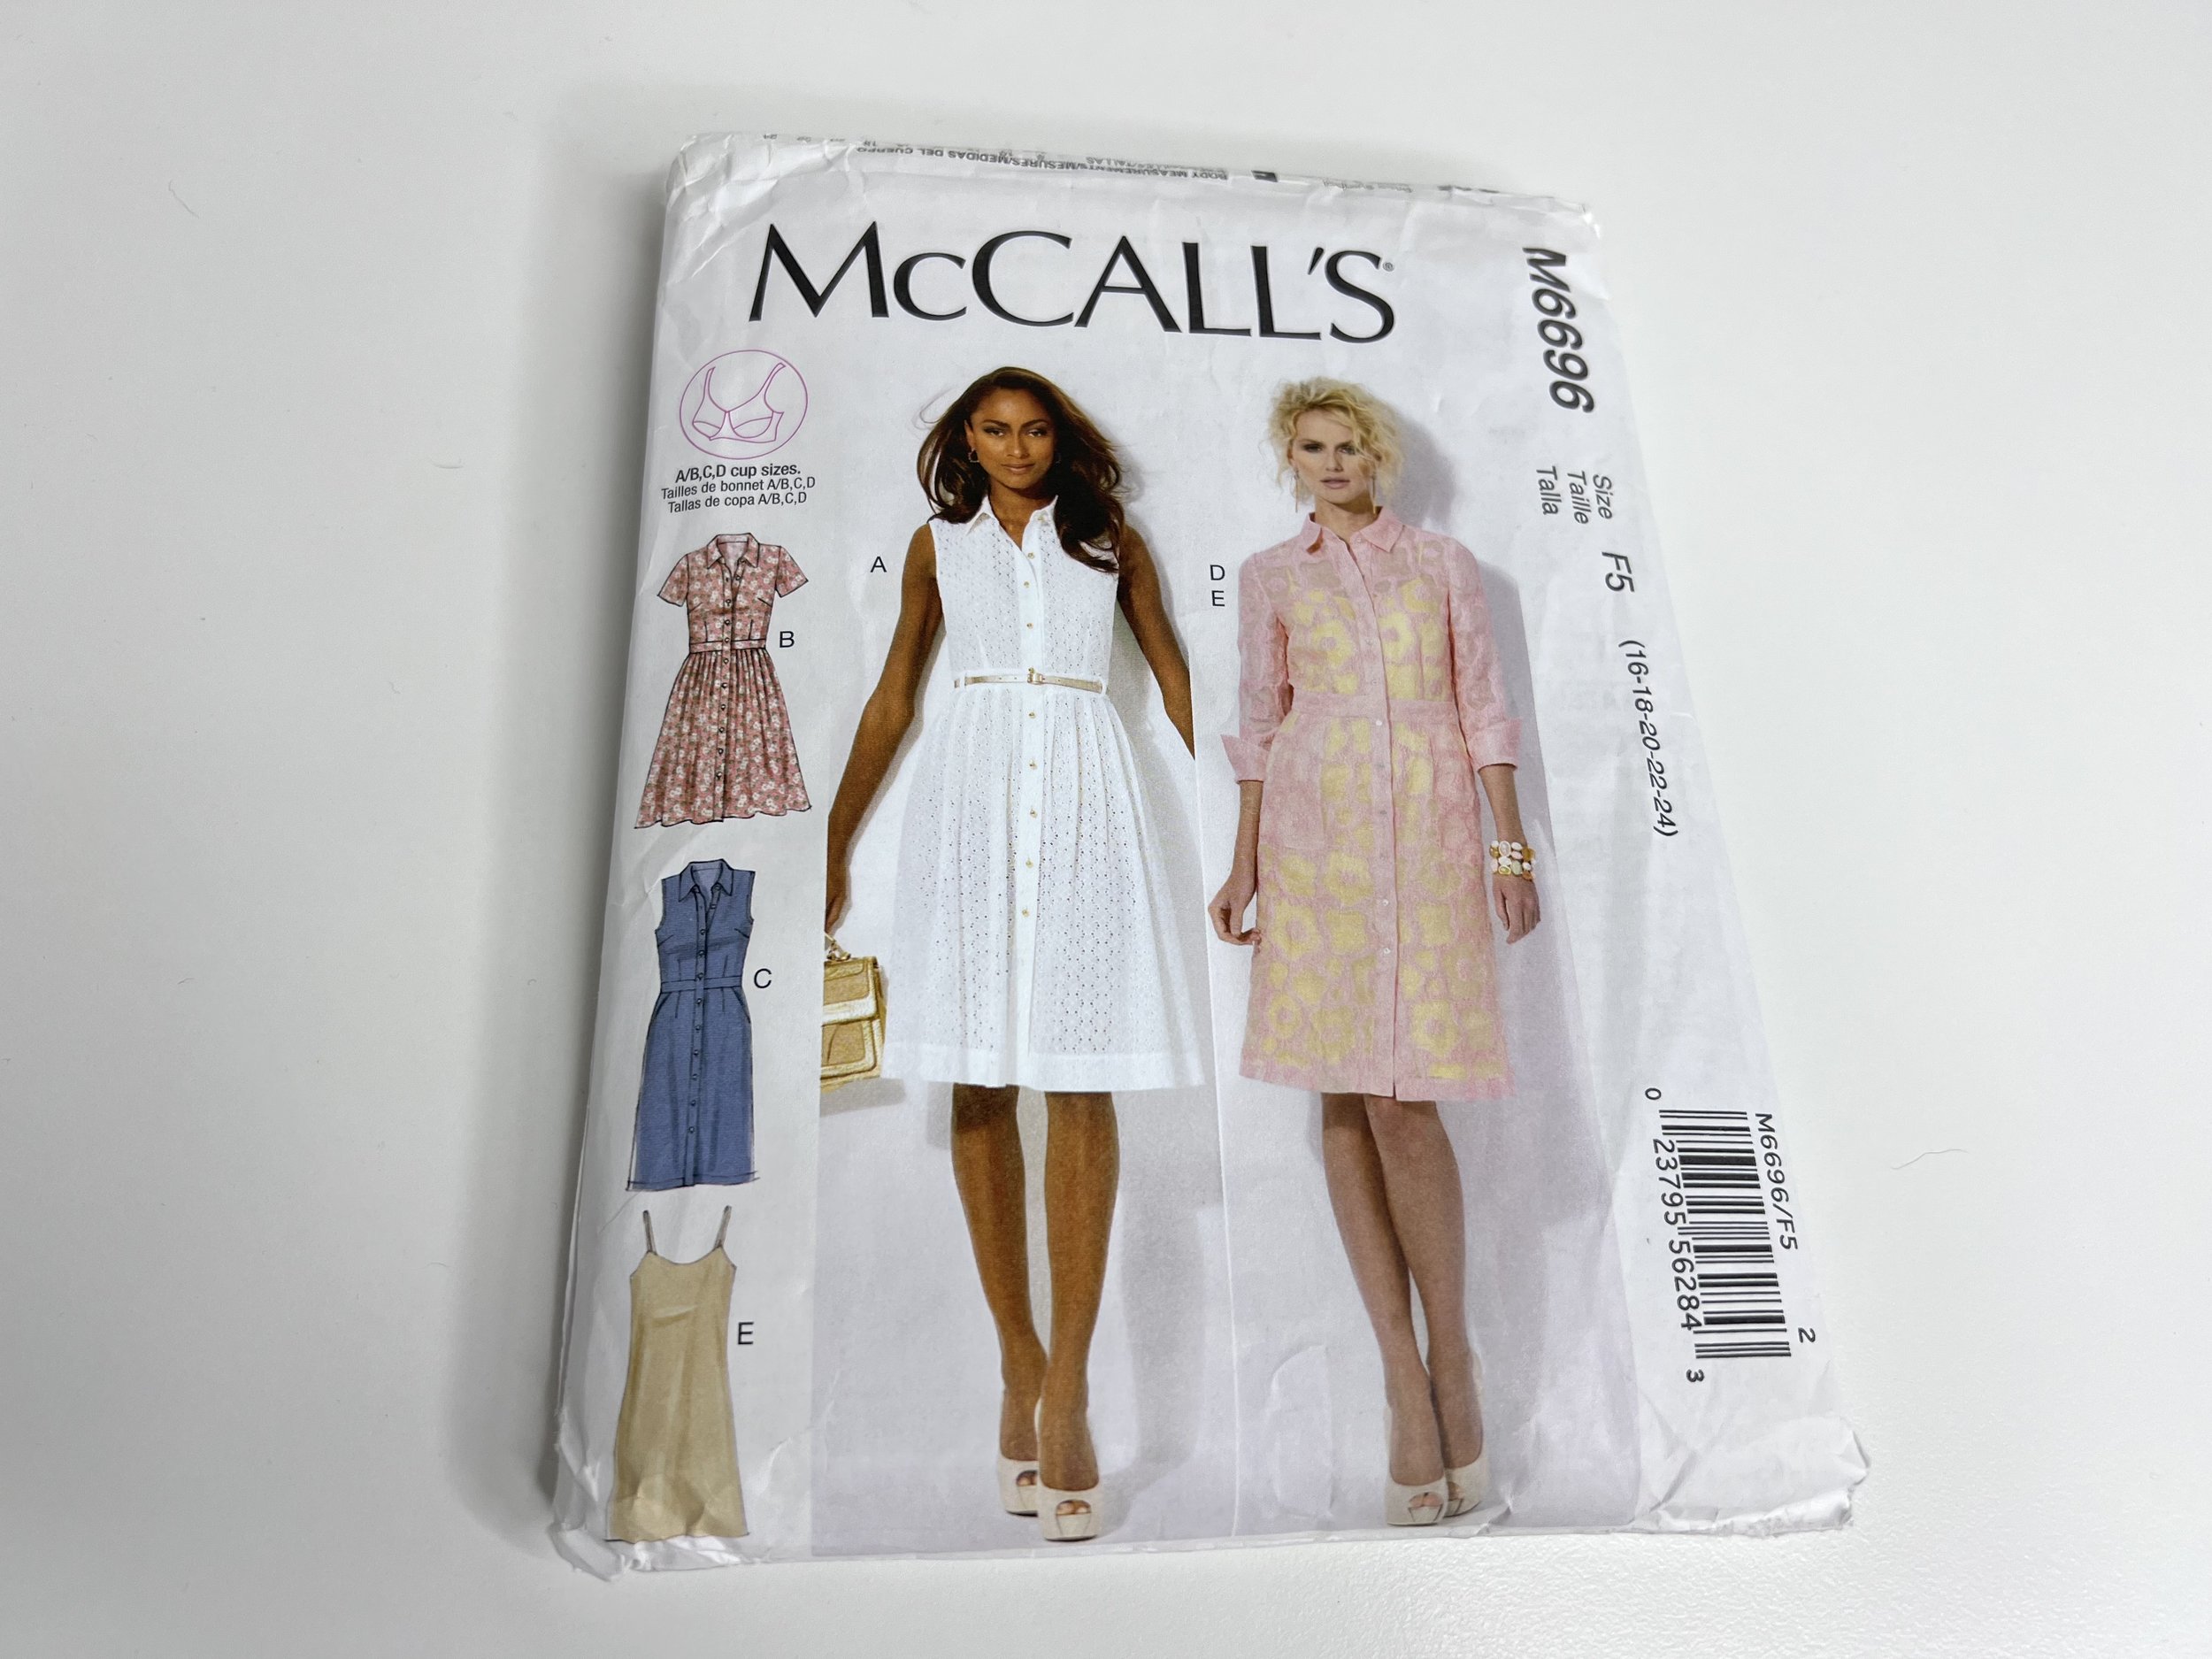
M6696 Dress Pattern
So here are some of the adjustments I made.
Bust darts - I lowered the bust dart around 1.5” - this is a standard adjustment I have to make for most woven patterns. Always. If you are wondering how you know when you have to lower or raise the bust dart? All darts must point to your bust apex. You can see mine in yellow highlighter below. I usually do a quick tissue fit on this and this pattern was no different. I had to lower it.
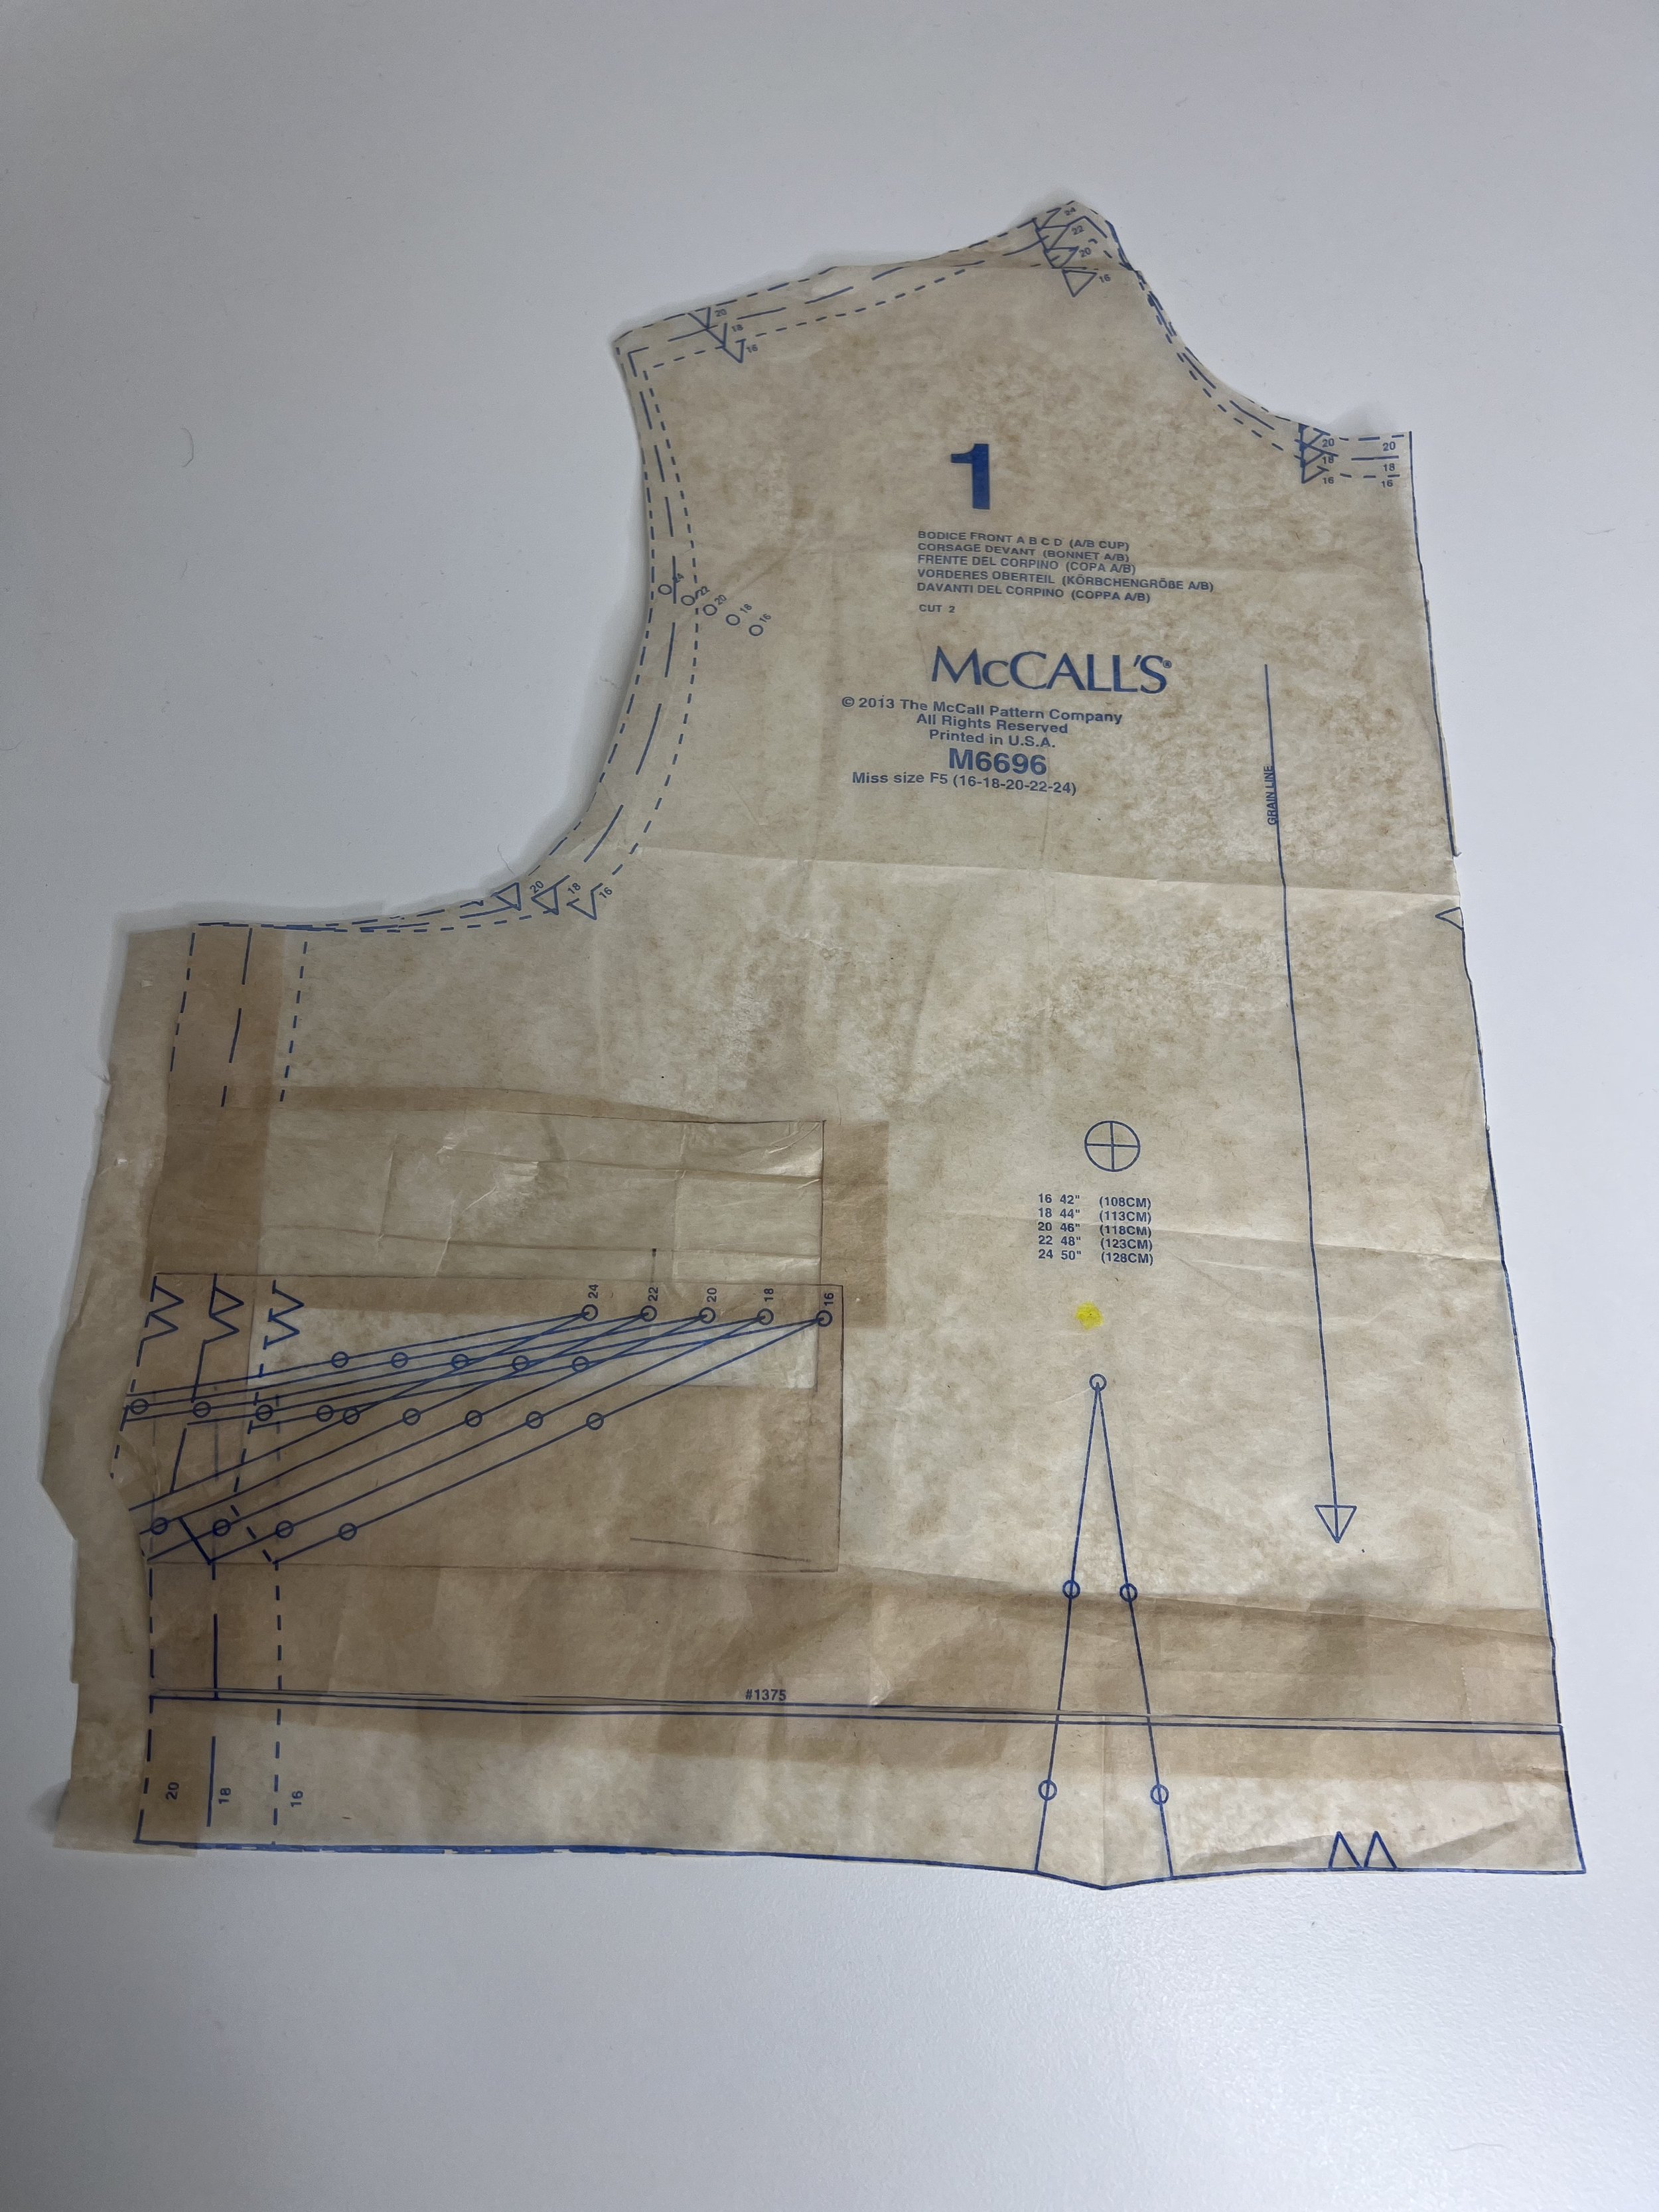
Lowered bust dart on the pattern piece, yellow highlighter dot has my apex that bust dart had to come down.
Size and taking fabric stretch- I cut a size 20 but I had to add 5/8” to my muslin for the bodice essentially making it a size 22. HOWEVER, the muslin that I made has zero stretch and the fabric I’m hoping to use for my final garment has stretch, so I will cut a size 20 and see how it behaves / stretches after one wear. I will also leave the bodice seams finished with a serger but I may have to open those side seams and take it in some more… we shall see after one wear. You can see the additional seam allowance in the picture above. I should have cut a size 22 but I know I’ll end up taking it in based on the stretch amount of my final fabric.
Waist width- I added 1/2” to the waist for the skirt front and back, which will get me to my usual waist size. I wonder once I make my final garment how much will it stretch naturally. I want the fabric to be fitted but not tight. I don’t want the buttons to be pulling on the fabric, so I rather have more fabric to play with than not enough.
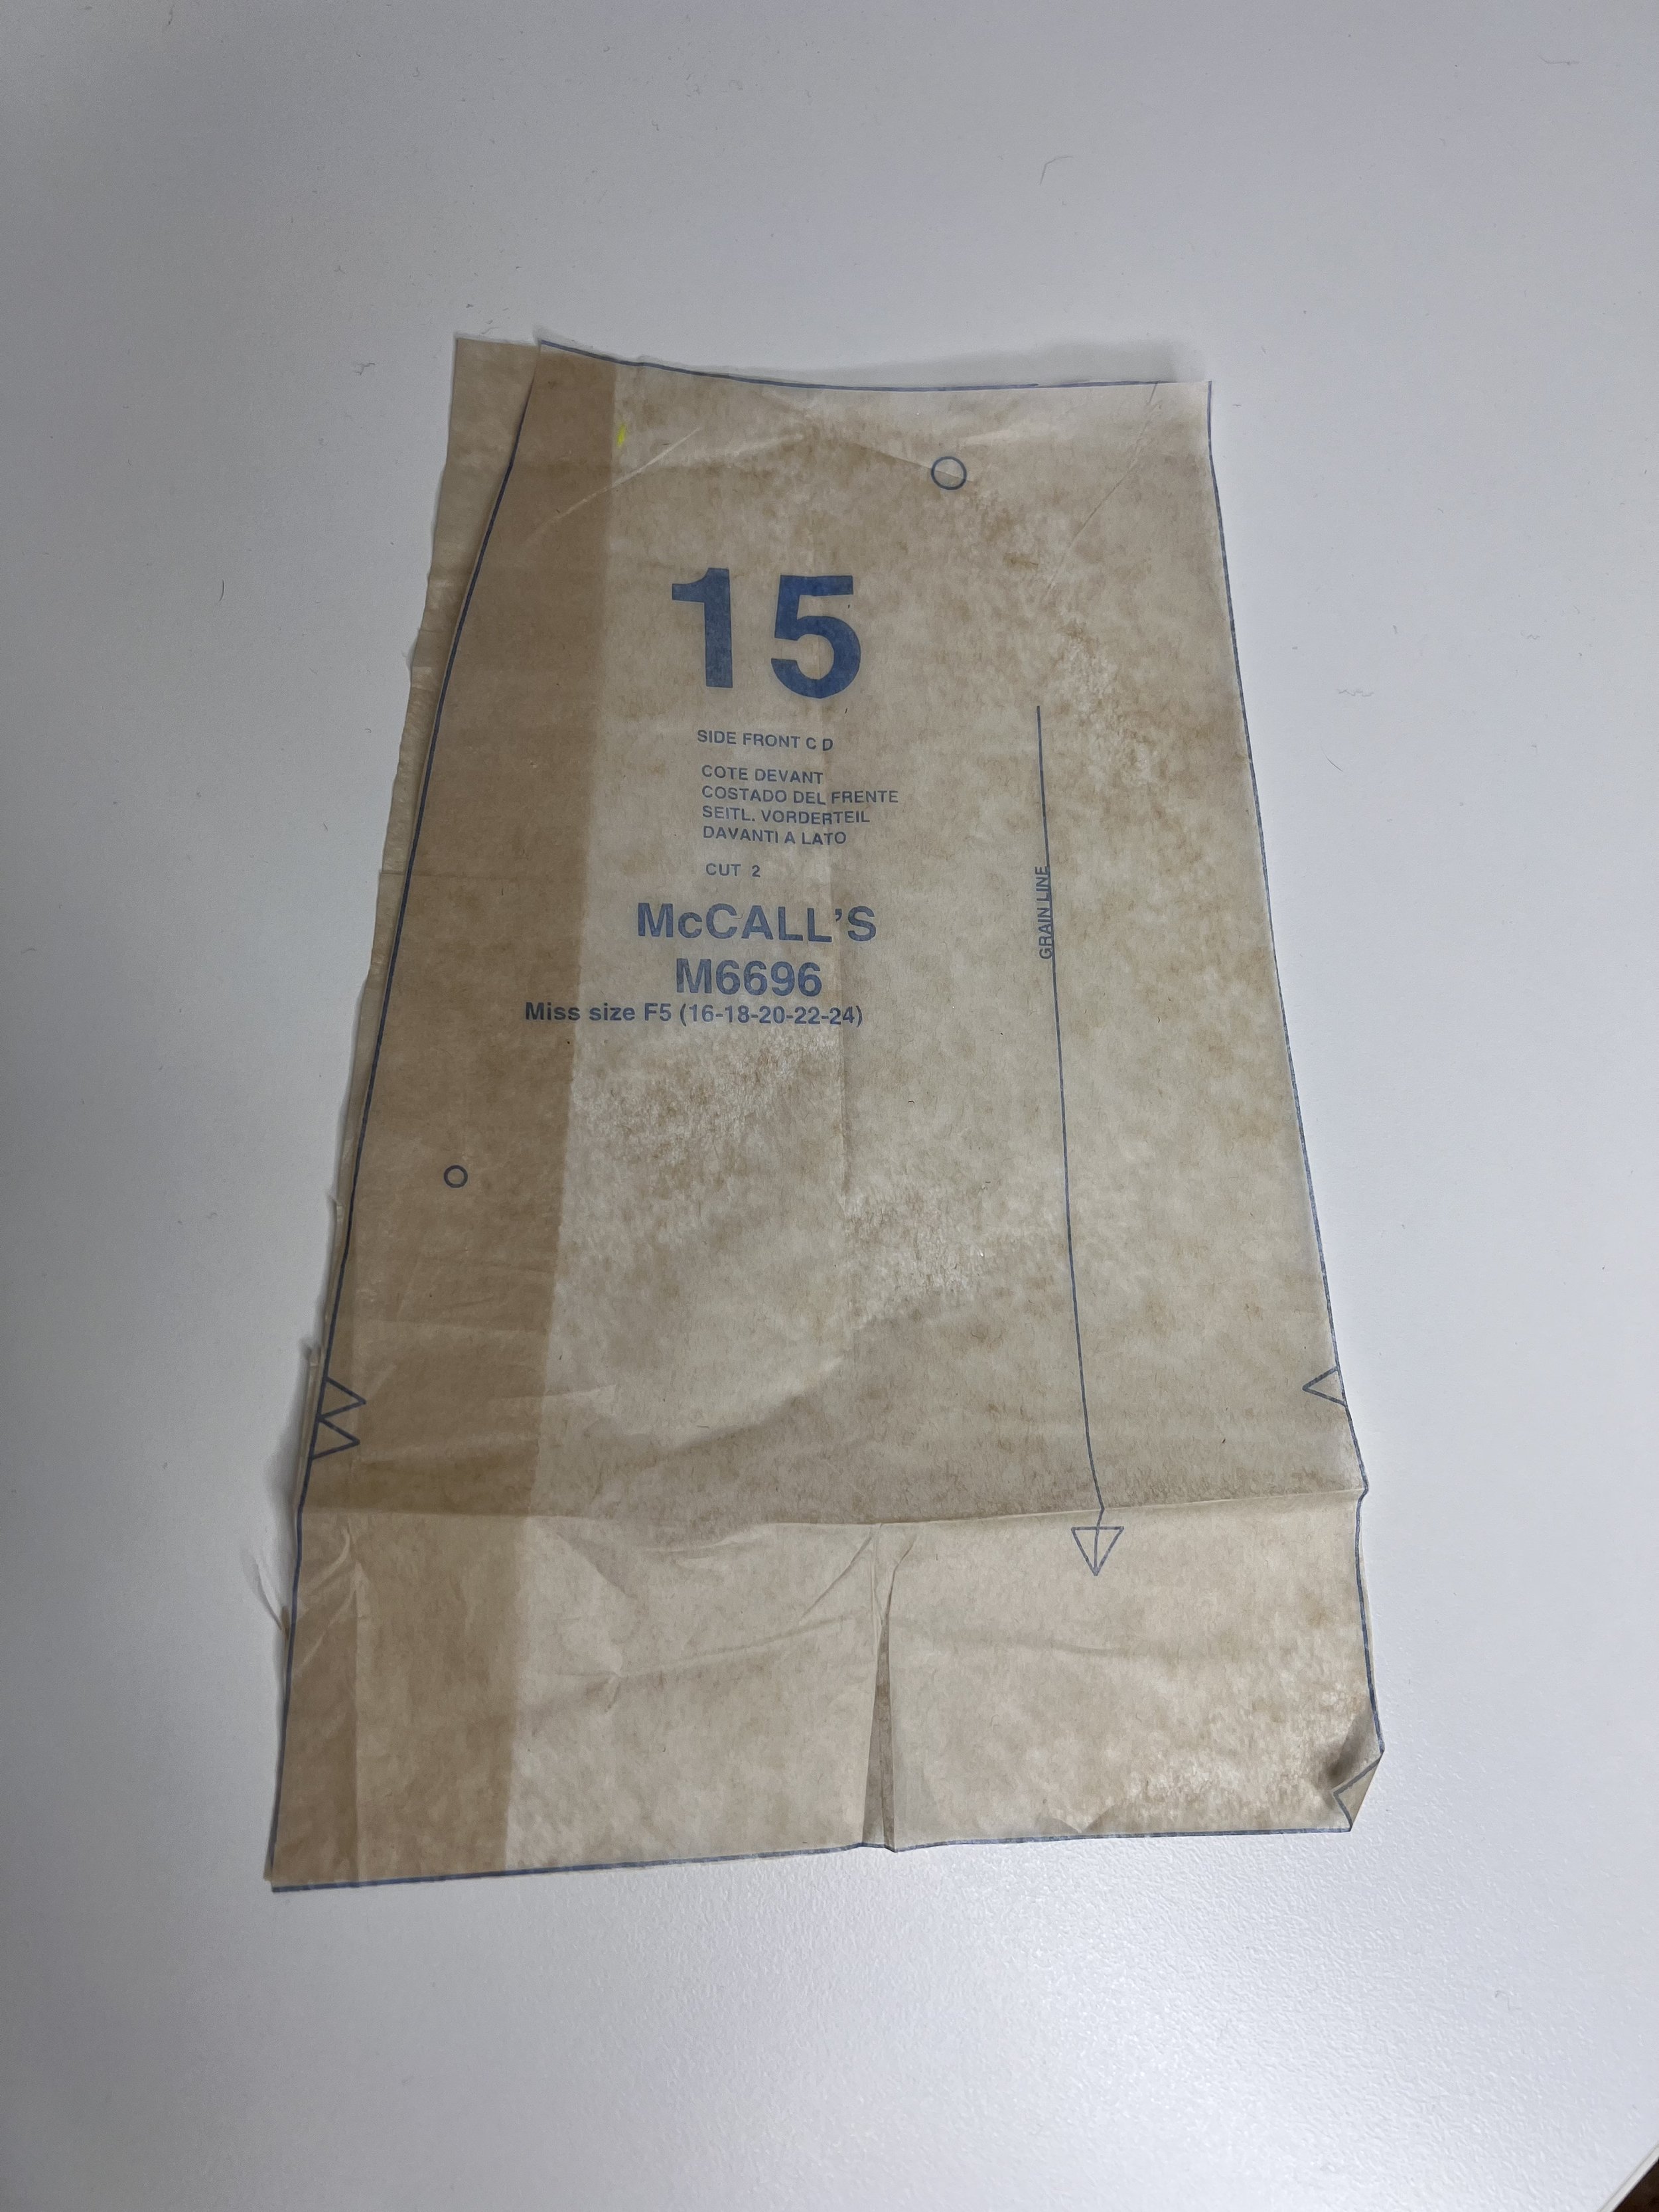
Added width to the side front pattern piece for the skirt portion. I already added width to the bodice so now it needs to match the bottom piece.
Pockets - I changed the pocket shape for the skirt. I don’t care for the cut of the pockets. They usually stay open when you wear this style of pockets and it is just ugly and unflattering so I changed that too. I used S9261 pocket pattern pieces for this, made a copy of the pattern piece, aligned the circles in pattern piece no. 14 and that is that. So an easy change.

Left pocket facing is my new drafted pocket facing piece with the rounded edge and the original piece with the 45 degree angle.
Bicep Adjustment - I had to do a bicep adjustment and if you haven’t watched the bicep adjustment video its a good one if you ever are in the need to make a bicep adjustment.
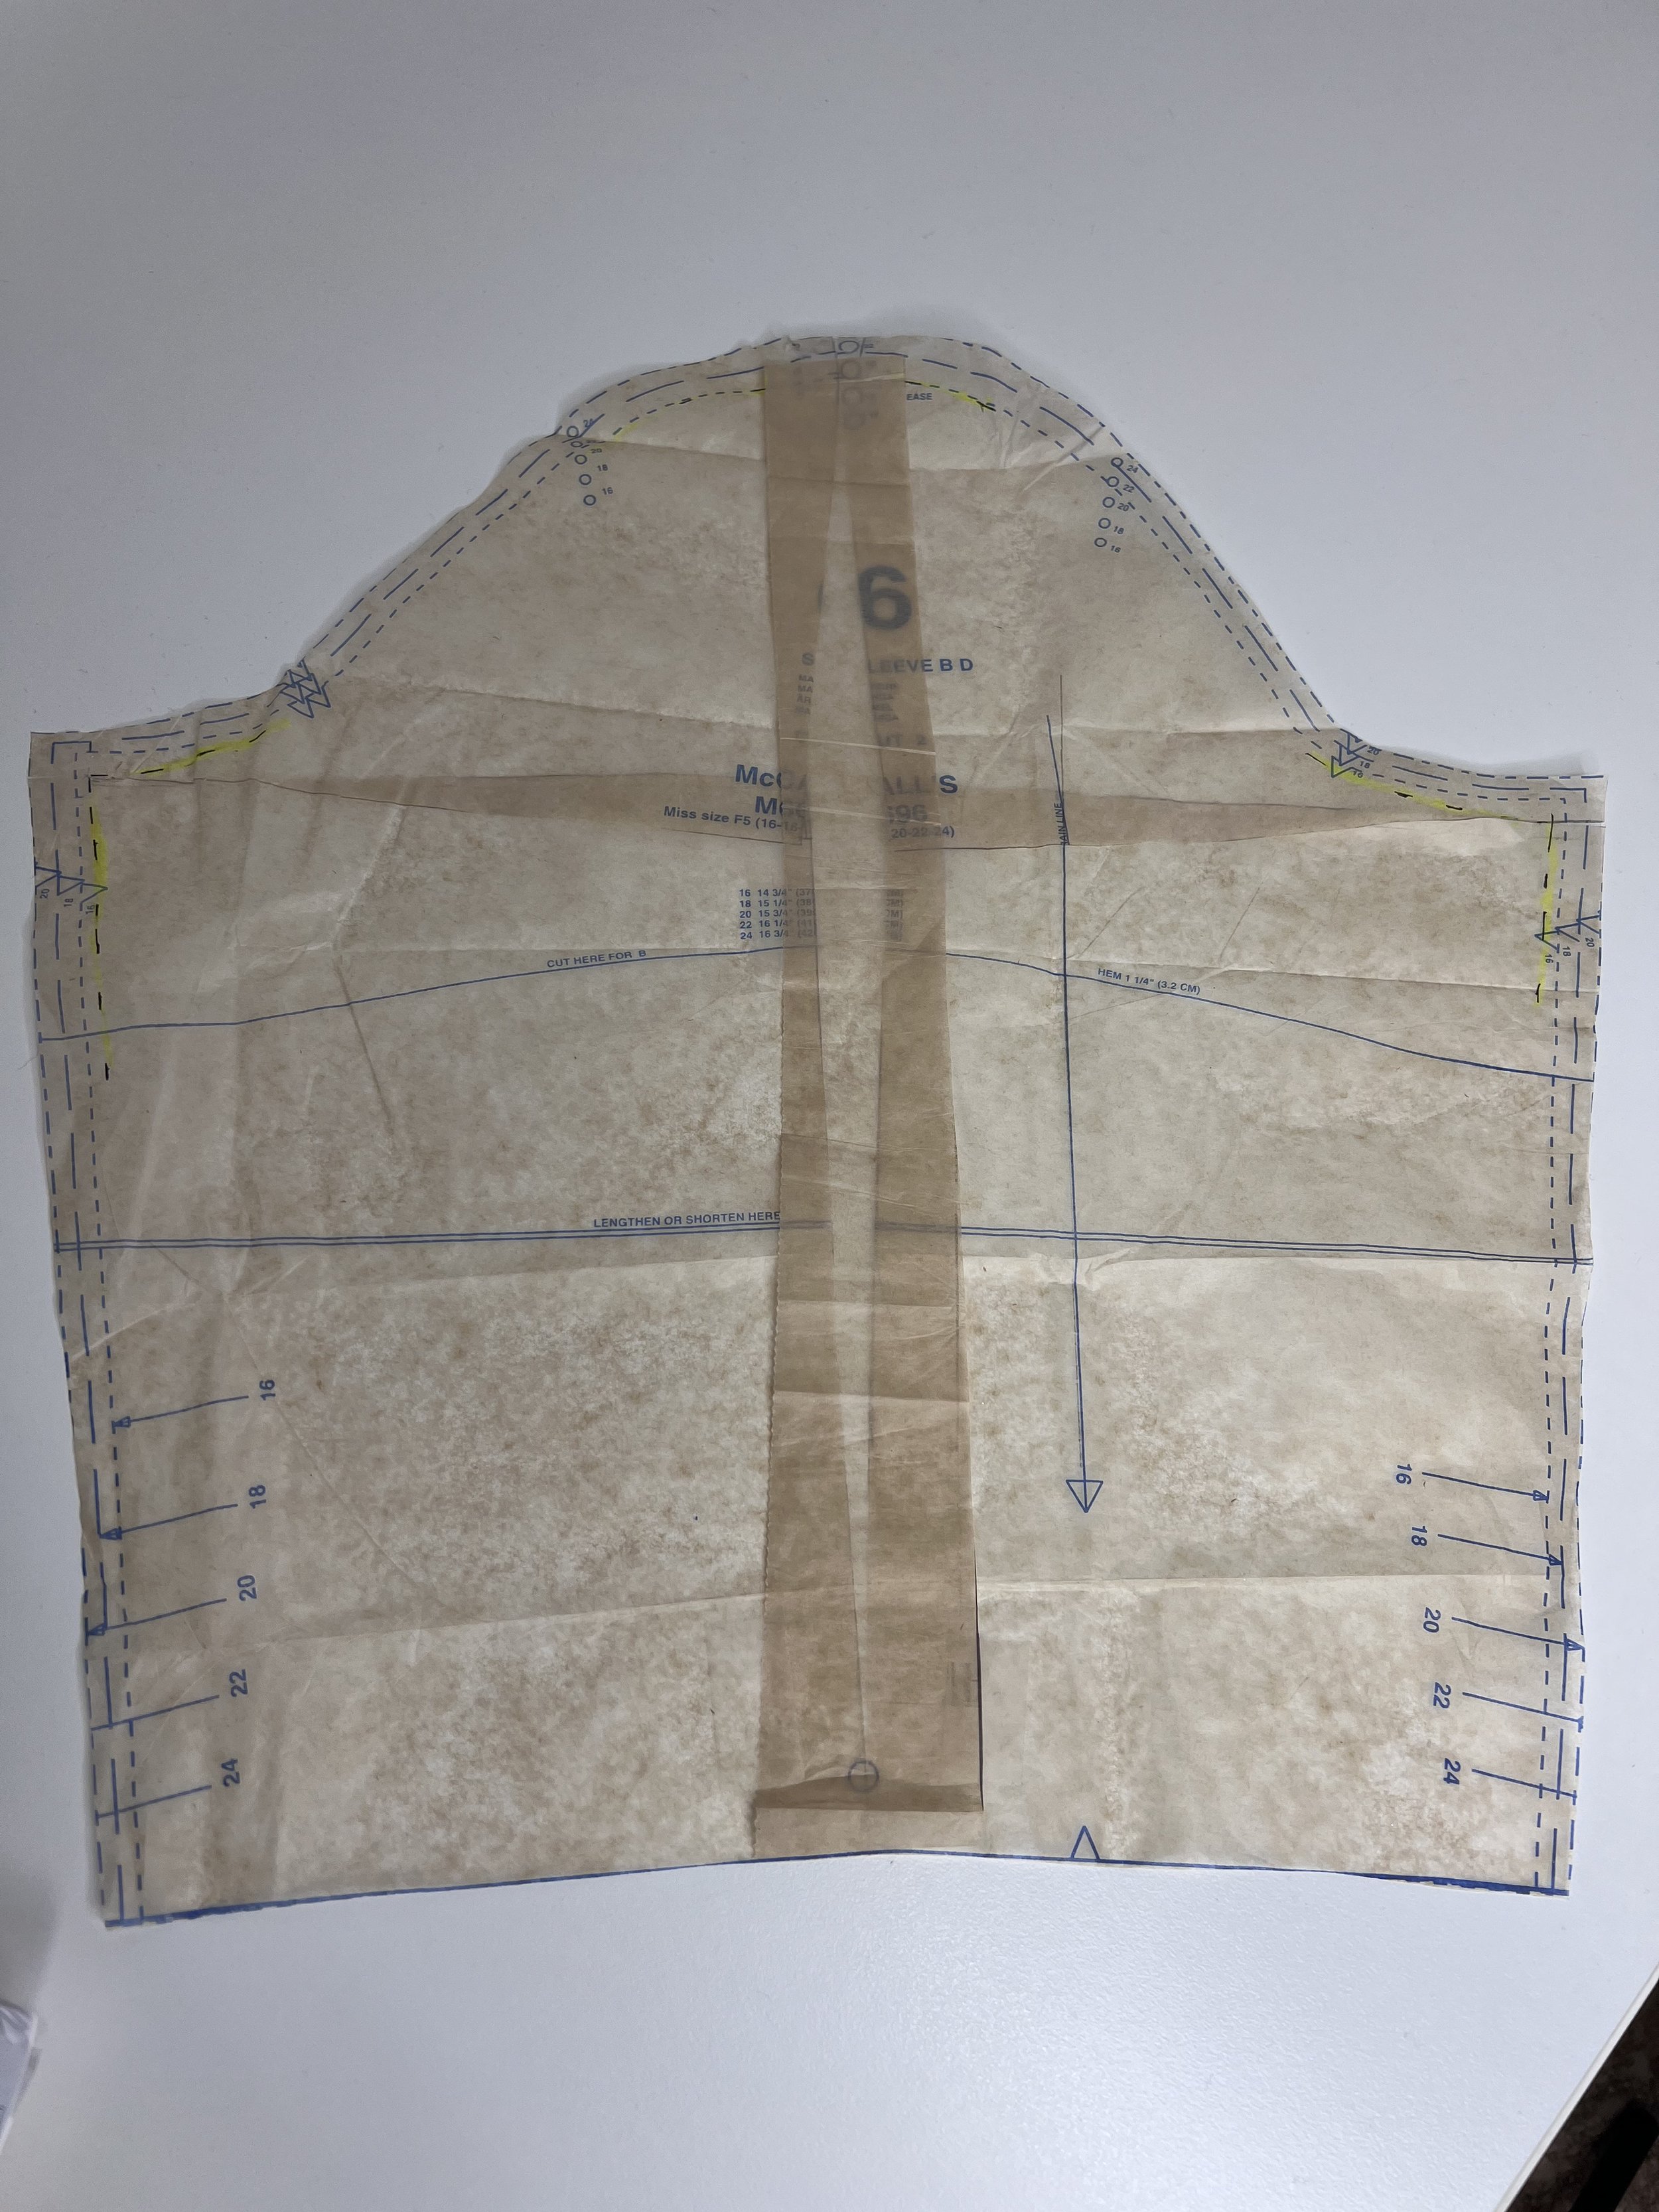
Bicep adjustment on M6696. I added an 1” to the overall width.
Sleeve Cuffs -Although my muslin is sleeveless I know I will be changing the cuffs on the pattern. I don’t particularly care for the cuffs on the pattern. There are a few options…. I can redraft the pattern piece so take out some of the pointy ends, I can use a regular cuff but that may be more work than I want to do, OR I can gather the sleeve a little, add a sleeve cuff and be done. I took off 1” off the pointy ends, I’ll try and see how I Feel about them once I put one in. The right picture is the original pattern piece for the sleeve cuff and the left one is the folded pointy ends folded 1”. It’s another quick change on this pattern piece.


Waist band - I kept the entire length of the waist band pattern piece, and it shouldn’t surprise me I used the entire length. I knew I would add some with to the waist and this was a safe assumption to make because once I joined the bodice to the skirt I could always cut away any excess fabric. So keep that in mind when you are cutting your pattern and if you are a rectangle shape like me, then perhaps this is a good way to give yourself a buffer on that waist band.
Back pleat - This was the number one item mentioned on all those pattern reviews. Sure enough when I made bodice muslin no. 1, I agreed with all those reviews. I took out that back pleat, not completely but I left about 1/2” in, and looking at my muslin it still feels like a lot but I want to be able to move a little. Those pleats in the back bodice are rather large and depending on the fabric you are using can look like a big bag of extra fabric. I just folded the piece almost 2” but its almost 4” worth of pleats depending on the pattern size you cut. So that had to be reduced considerably. I added width to my front bodice but notice how I didn’t add width to the back bodice piece… that’s because I knew there would be extra fabric in there to account for the waist width. The back bodice pieces are usually at an angle slanting down… Look at my pattern piece, its straight.

Eliminated around 4” inches of that back pleat at the top and at the bottom of the pattern piece. There is still a little left at the bottom but its an easy adjustment by just measuring and folding the extra tissue to eliminated it or decrease it.
I believe this pattern was released back in 2017. There is a reason it is still being printed (five years later) and it’s still selling quite well. It is a classic dress pattern to have in the pattern stash. I can see multiple iterations of this pattern. Sleeveless, or with sleeves, perhaps ditch the pockets altogether and do a button down shirt dress with the waist band. I can also see this as a beautiful lace (burnout fabric!) dress with a bias cut slip dress underneath… which by the way it has that pattern piece included. You can use linen, chambray, rayons, viscose… heck my second muslin is made out of quilting cotton and it looks great (hello wearable muslin!).
Don’t love the Big Four patterns and you want to look into an Indie Pattern that is similar to this one? Then try Megan Nielsen’s Matilda dress pattern. It’s pretty darn close, the only difference you have pockets in the front bodice and outside pocket detail in the skirt pieces.
So needless to say I’m excited to make it in my lightweight denim fabric. If you haven’t gotten the pattern, I highly recommend it. I would recommend this pattern for a confident beginner or intermediate sewist.

