
Sew Along for M8104-Neck band fix and Adjustments to McCalls M8104 aka “Dawn McCalls”

Click on the image for a YouTube video on how to Sew McCalls M8104
Didn’t want to make a toile, but thankfully I had some leftover ugly rayon fabric around here which is perfect for a muslin. You can purchase the pattern from Something Delightful Website M8104. I purchased this Telio Fashion Fabric from Melanated Fabrics. It is now sold out by you can find it Troy Bluestone Telio Fabric. Here are the changes I made:
Cut a size 24 for the shoulders but a size 22 everywhere else. I wanted lengthen the bodice as my apex is a little lower.
Graded the length on the back bodice piece as I want it to match the front bodice but I don’t want it sitting too low on the back waistline..

Took out 5/8” from the center back bodice piece and graded it to zero on the sides of the pattern so it meets the front bodice at the sides.
Raised the neckline on the front bodice.

Raised the neckline by adding one inch to the front bodice at the center front and graded it to zero at the shoulders.
I had to redraft the band neck band piece no. 10…. and woah. This is were Dawn McCalls M8104 goes from an easy slam dunk to sew pattern to a beast that is poorly drafted. See instructions below how to check the back band is too small and also how to fix it.
ABOUT THAT NECKBAND from hell…..
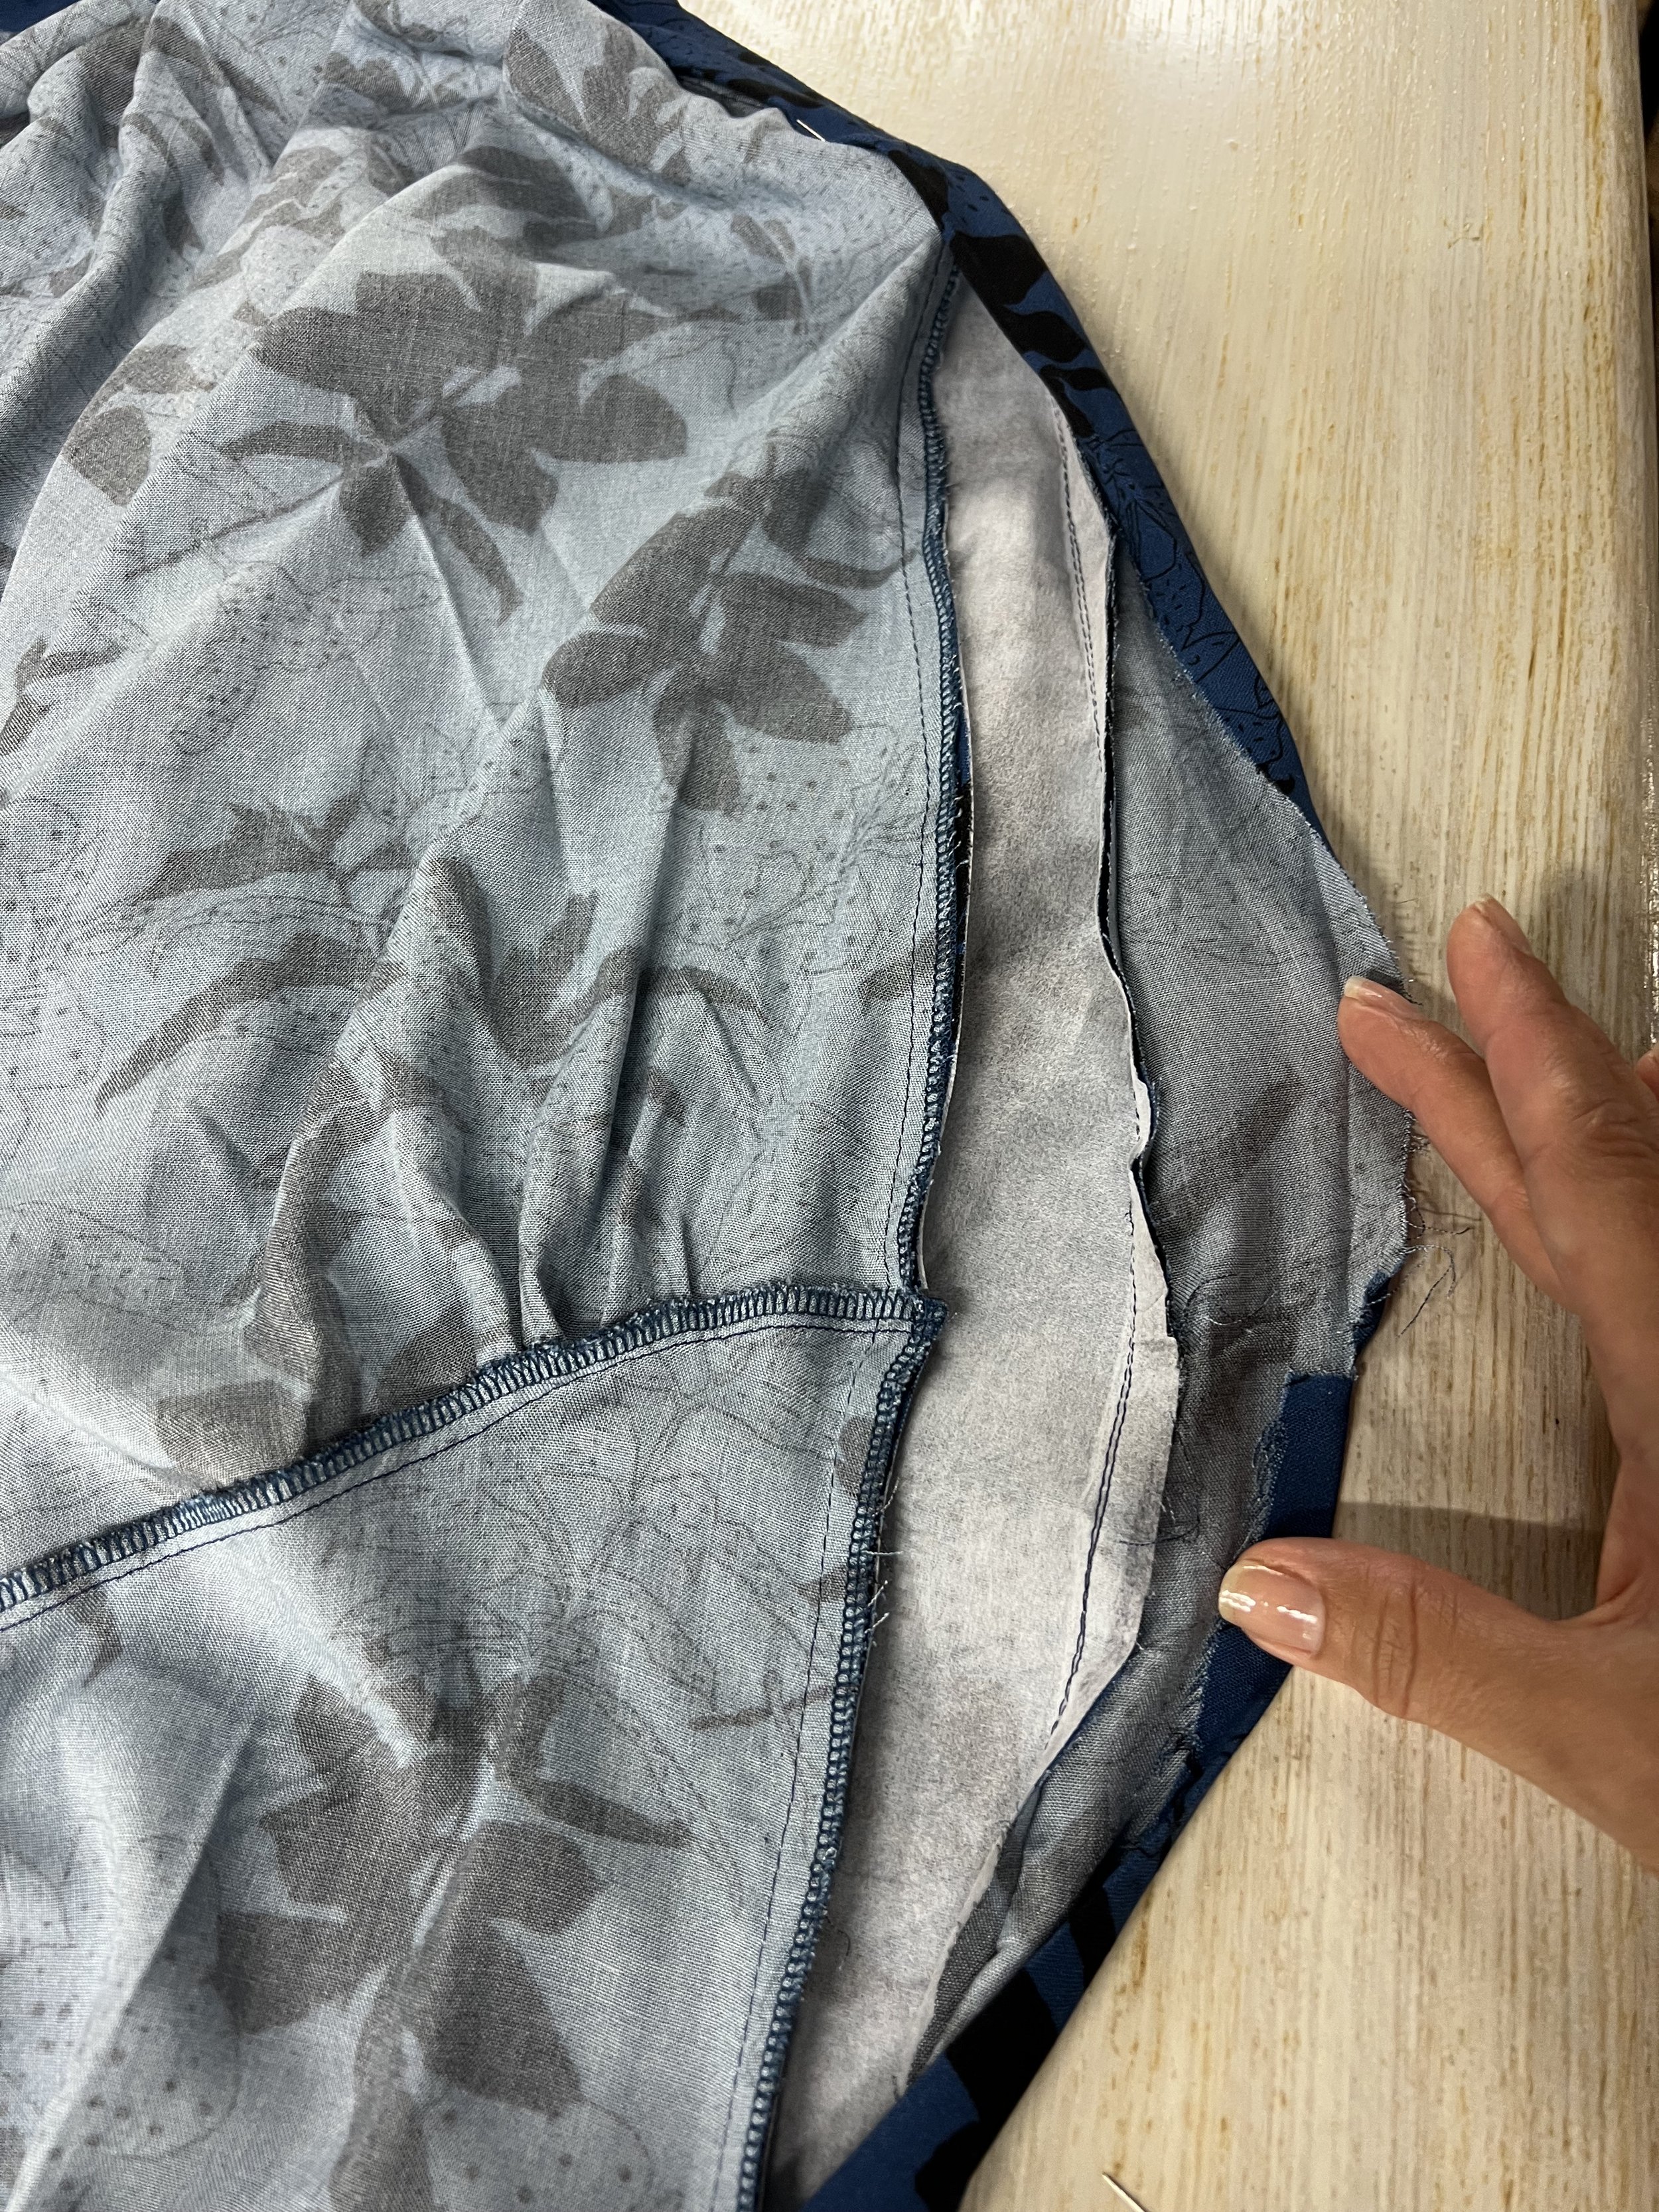
If you are here its because you are sewing M8104 and for some reason have been struggling with the neckband. Its not you, it’s the pattern. If you grab the back bodice piece and put the back neck band pattern piece you will notice it is not long enough. And this is where the saga begins.

See that… yup. The back neck band is not long enough! Great!
It just means that you will have to redraft that pattern piece. Use Pattern Piece no. 10 and extend it all the way to the size you will need. Remember once you extend it, this will already have a seam allowance of 5/8” included.

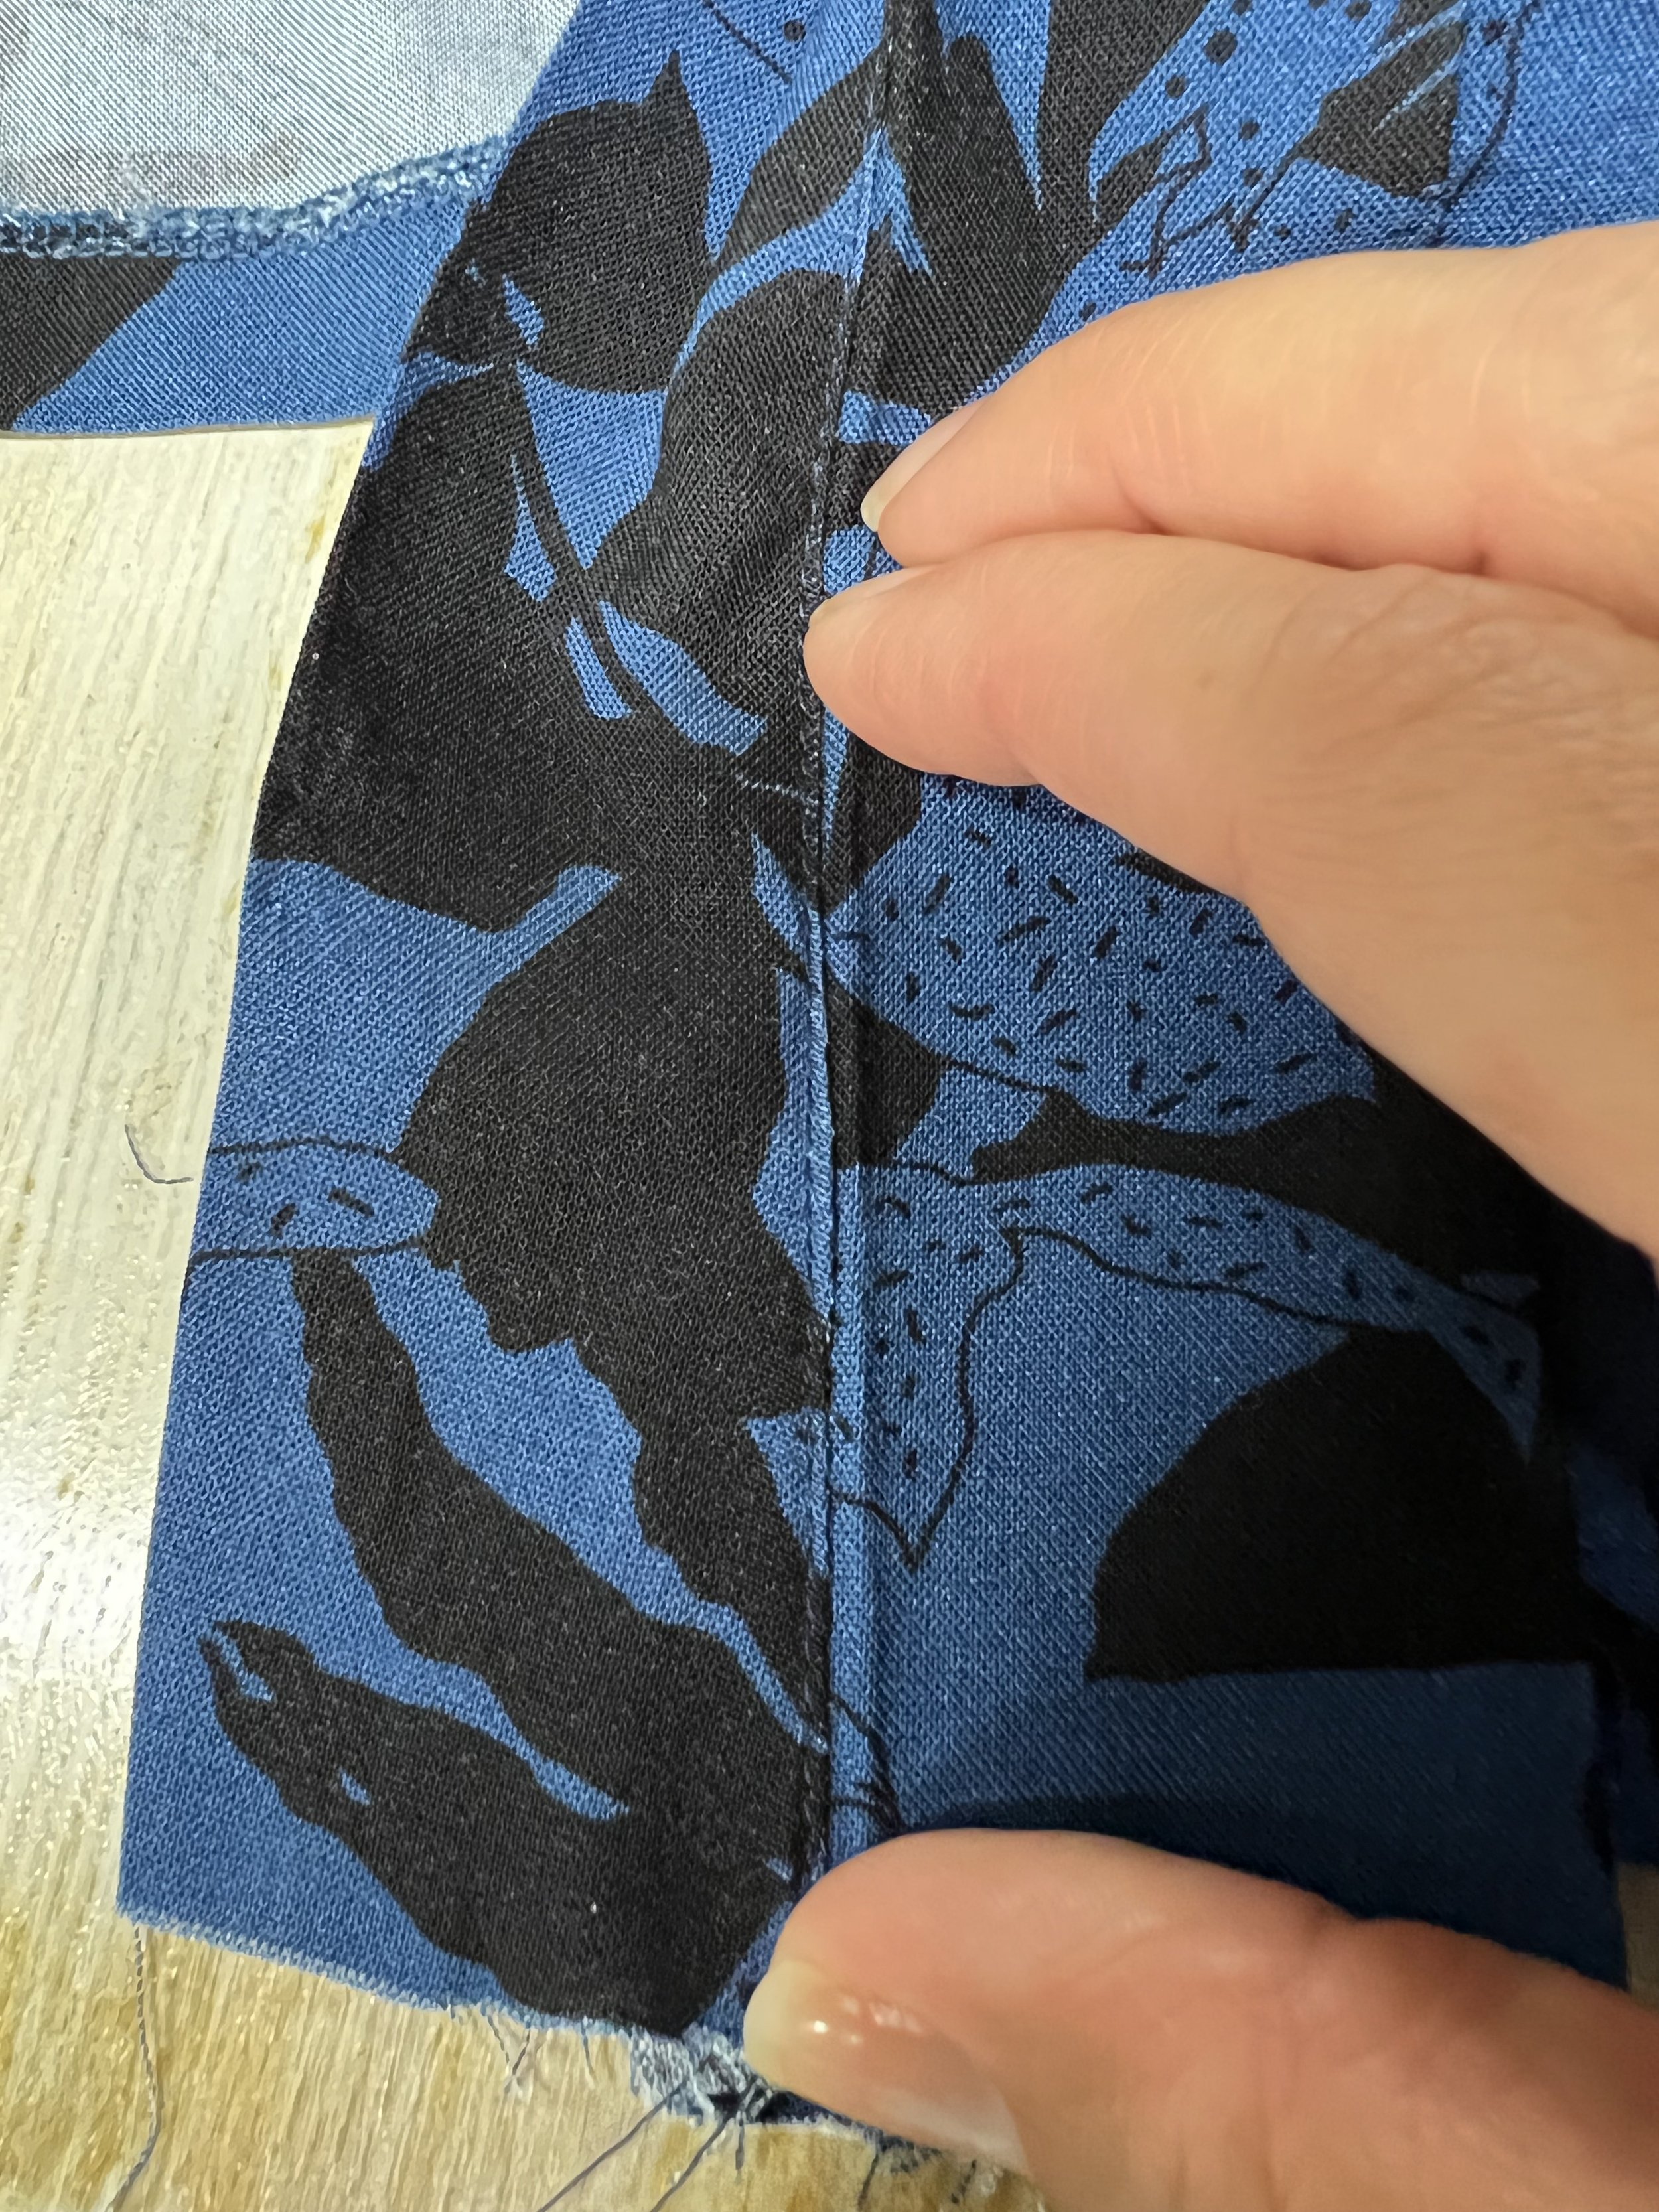
Redrafted back neck band piece. Seam allowance of 5/8” is already included.
So now that you redrafted the back neck band you can go ahead and cut your two pieces and one of them will be interfaced. This is were I want you to throw the instructions out the window.
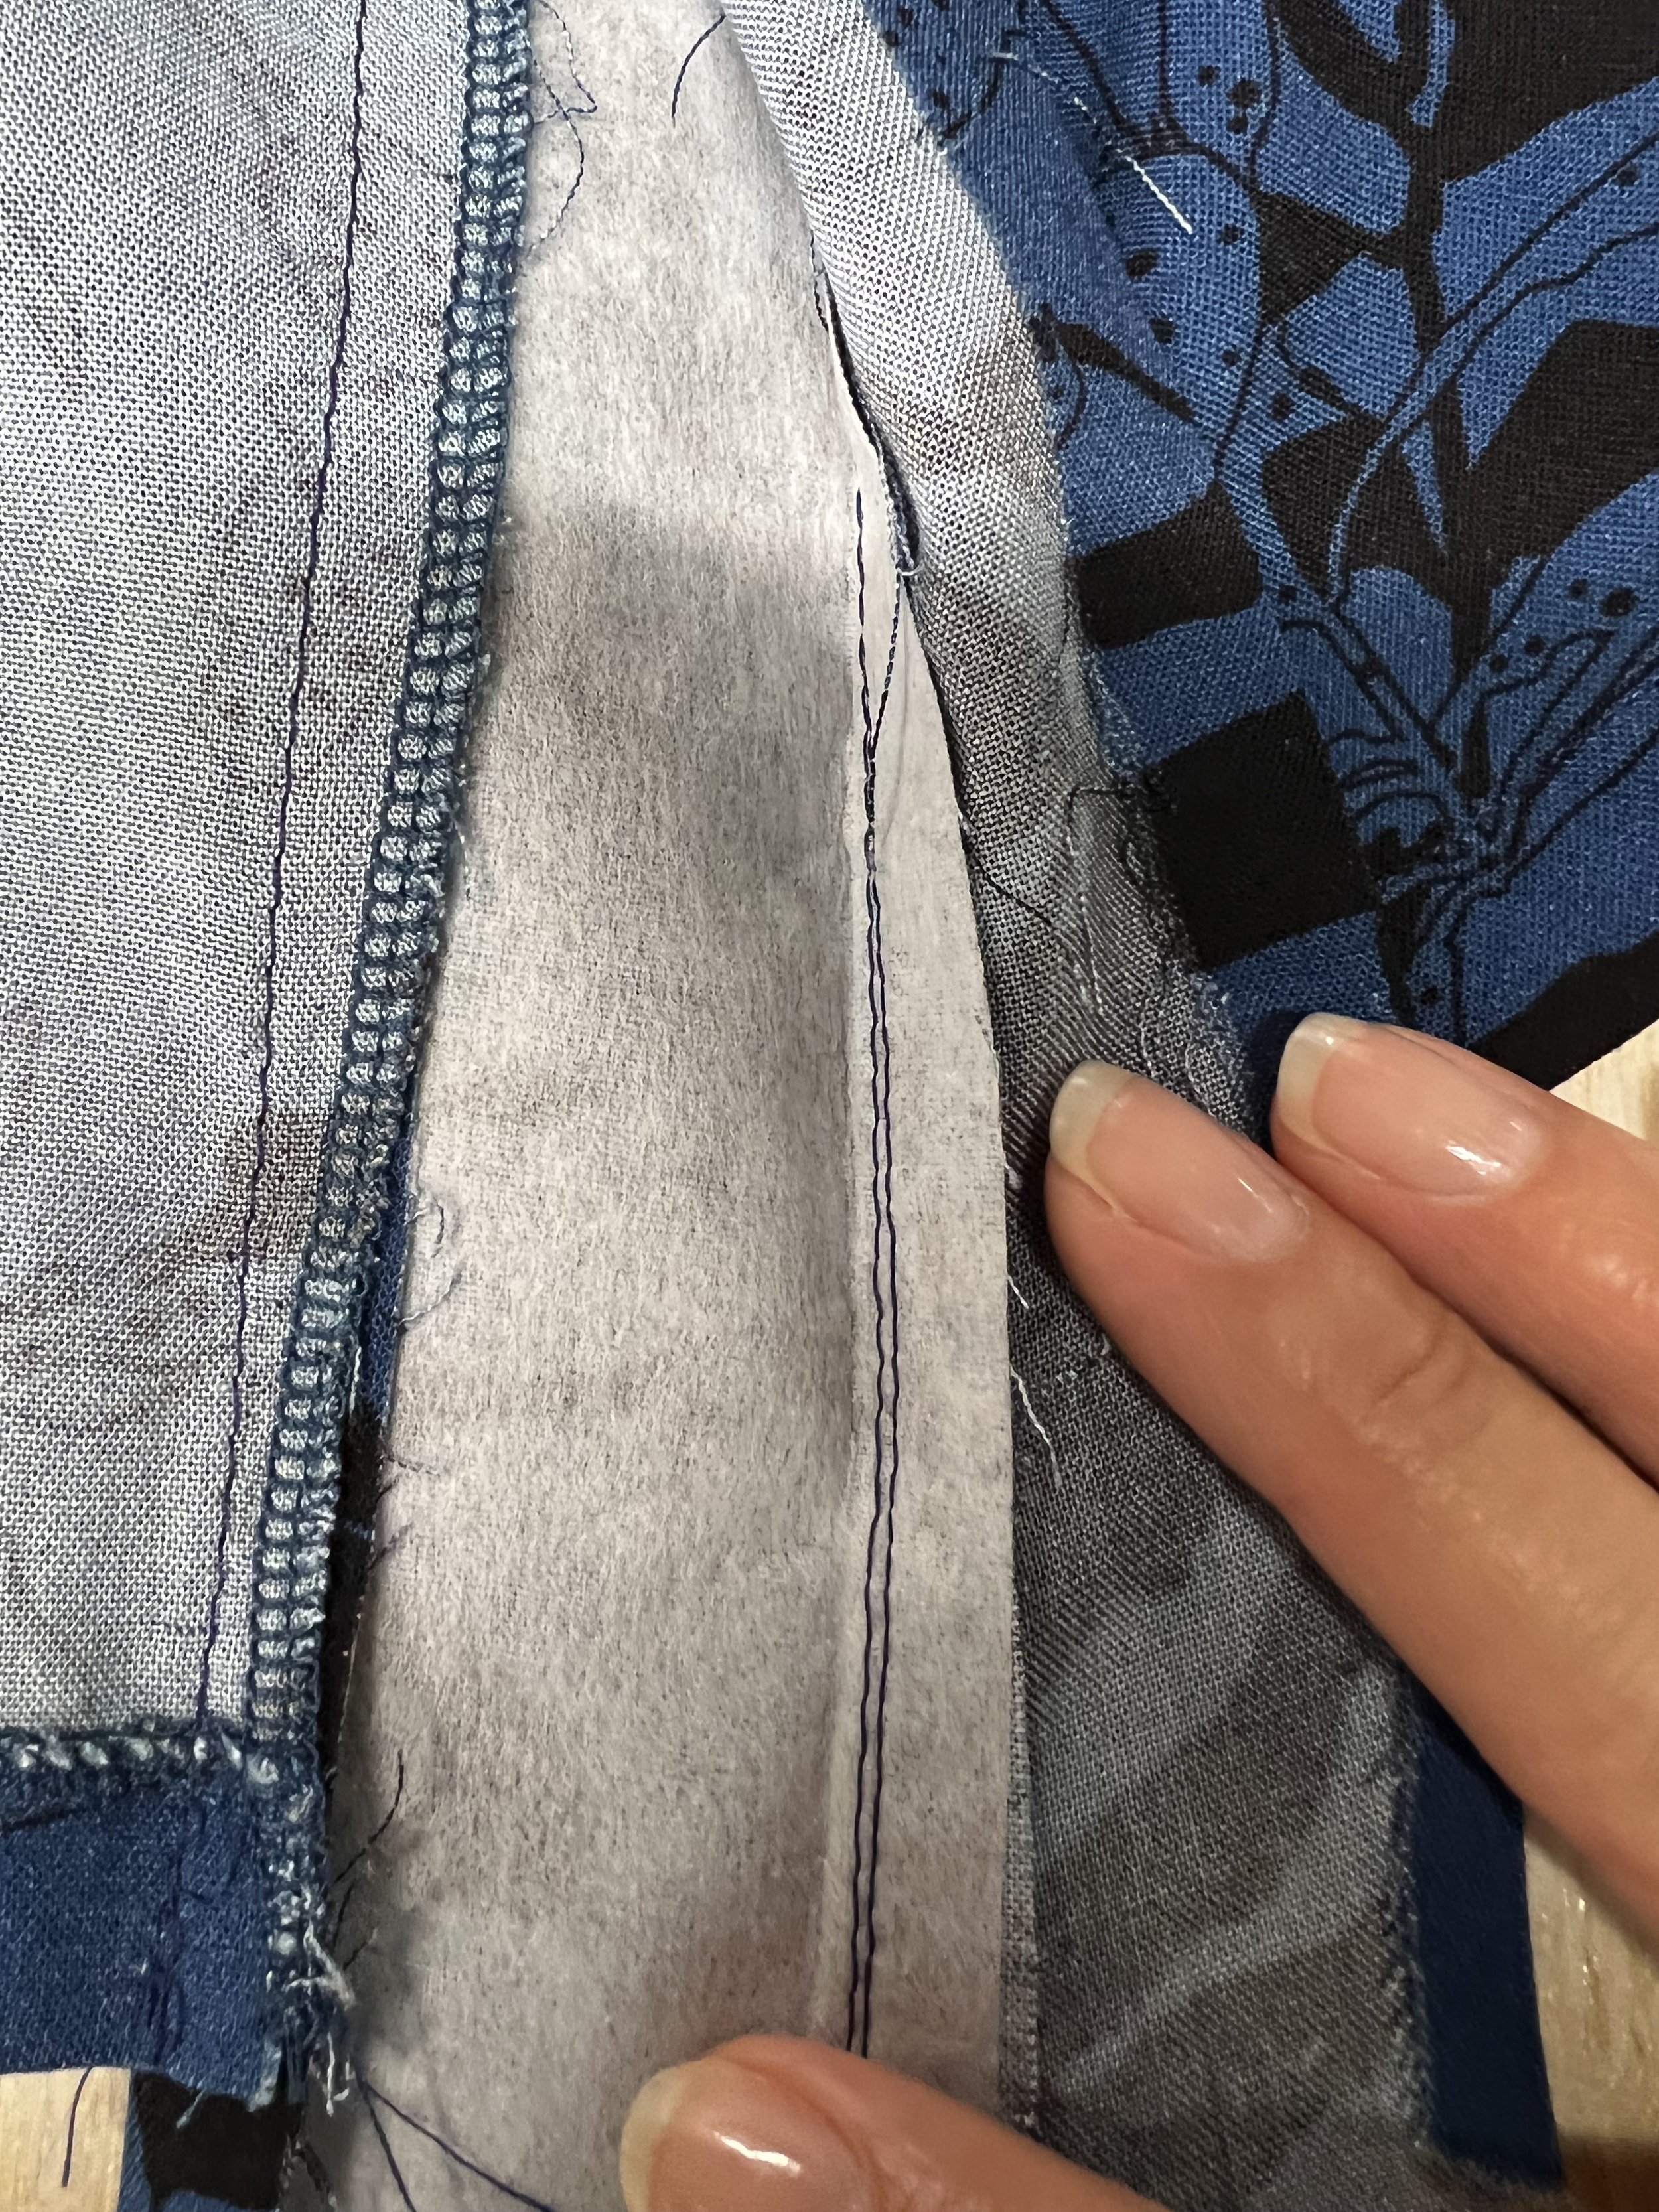
Attach the INTERFACED back neck band to the center back on the middle of the bodice back. Do NOT sew the front bands to the back bands just yet because guess what… those are too long so nothing is going to match. Stick with me! Pin the front bands (Piece 9) in starting at the notches go all the way down to the hem and then go back up from the notch where the front band and the back band meet at the seam. You will notice that the meet up point is now too long and you will have to sew the back bands to the back band (piece no. 10) at an angle. Just follow the seam line for the shoulder. Fun!!!!

Piece no. 10 (the interfaced piece) attached to the bodice. Notice how the seam allowance for the front bands and the back band is now longer much longer than the usual 5/8” seam allowance.
Now go ahead and attach the UNINTERFACED back band and front band pieces the same way with right sides together. This is different from what is shown in the pattern instructions.
Notice how I added the INTERFACED front bands FIRST and then added the UNINTERFACED band SECOND. I’m doing it this way so your fabric doesn’t stretch when you are adding in the bands, the fabric doesn’t stretch and your back band lays nicely against your neck.
Now trim that seam allowance to 3/8” and clip your curves! Now I want you to UNDERSTITCH so when you fold your neck band the seam were they meet stays towards the inside. See pictures below…
See the stitching line above, I’m stitching as close to the seam I just did and I’m catching the seam allowance towards the UNINTERFACED band. See picture below how it looks on the back!
See the second stitch closest to my fingers towards the right? That is my understitching. This is what it looks like from the back. I want to make sure that when I press the bands to the inside they stay there. Do this all the way around the neckband. Don’t skip this step!
Once you do that, you will need to press your seam allowance 3/8” towards the inside so you can stitch in the ditch.
Finish with your buttonholes and buttons! Or invisible snaps like I’ll be using.


Despite all the neckband “drama” I would sew this pattern again. Now that I know how to tackle it, I’m thinking next time it would look great in a linen fabric.