

How to sew curved pockets that look beautiful and match

Do you ever go, oh man these curved pockets look awful. They never seem to match, sewing that curve is like taking a sharp turn going 90 miles in your car… it gets done but it never looks pretty. I have a little trick for you….
First thing, first make a template out of the original pocket pattern piece without the seam allowance. I usually make mine out of cardstock or a thicker paper because I will be using this to press and also I can use it again and again.

Pocket Pattern Template use cardstock and take out the seam allowance… In my case 5/8”
Next do gathering stitches 3/8” away from the raw edge. Make sure to back stitch at the start, but leave your threads long at the end.

Do gathering stitches 3/8” away from the raw edge. Lock in your stitches at the start with a backstitch… but leave your threads long at the end.
Now set your pocket piece on top the cut pocket fabric piece. Gather those stitches. The fabric will encircle the pocket template… now its ready to be pressed!
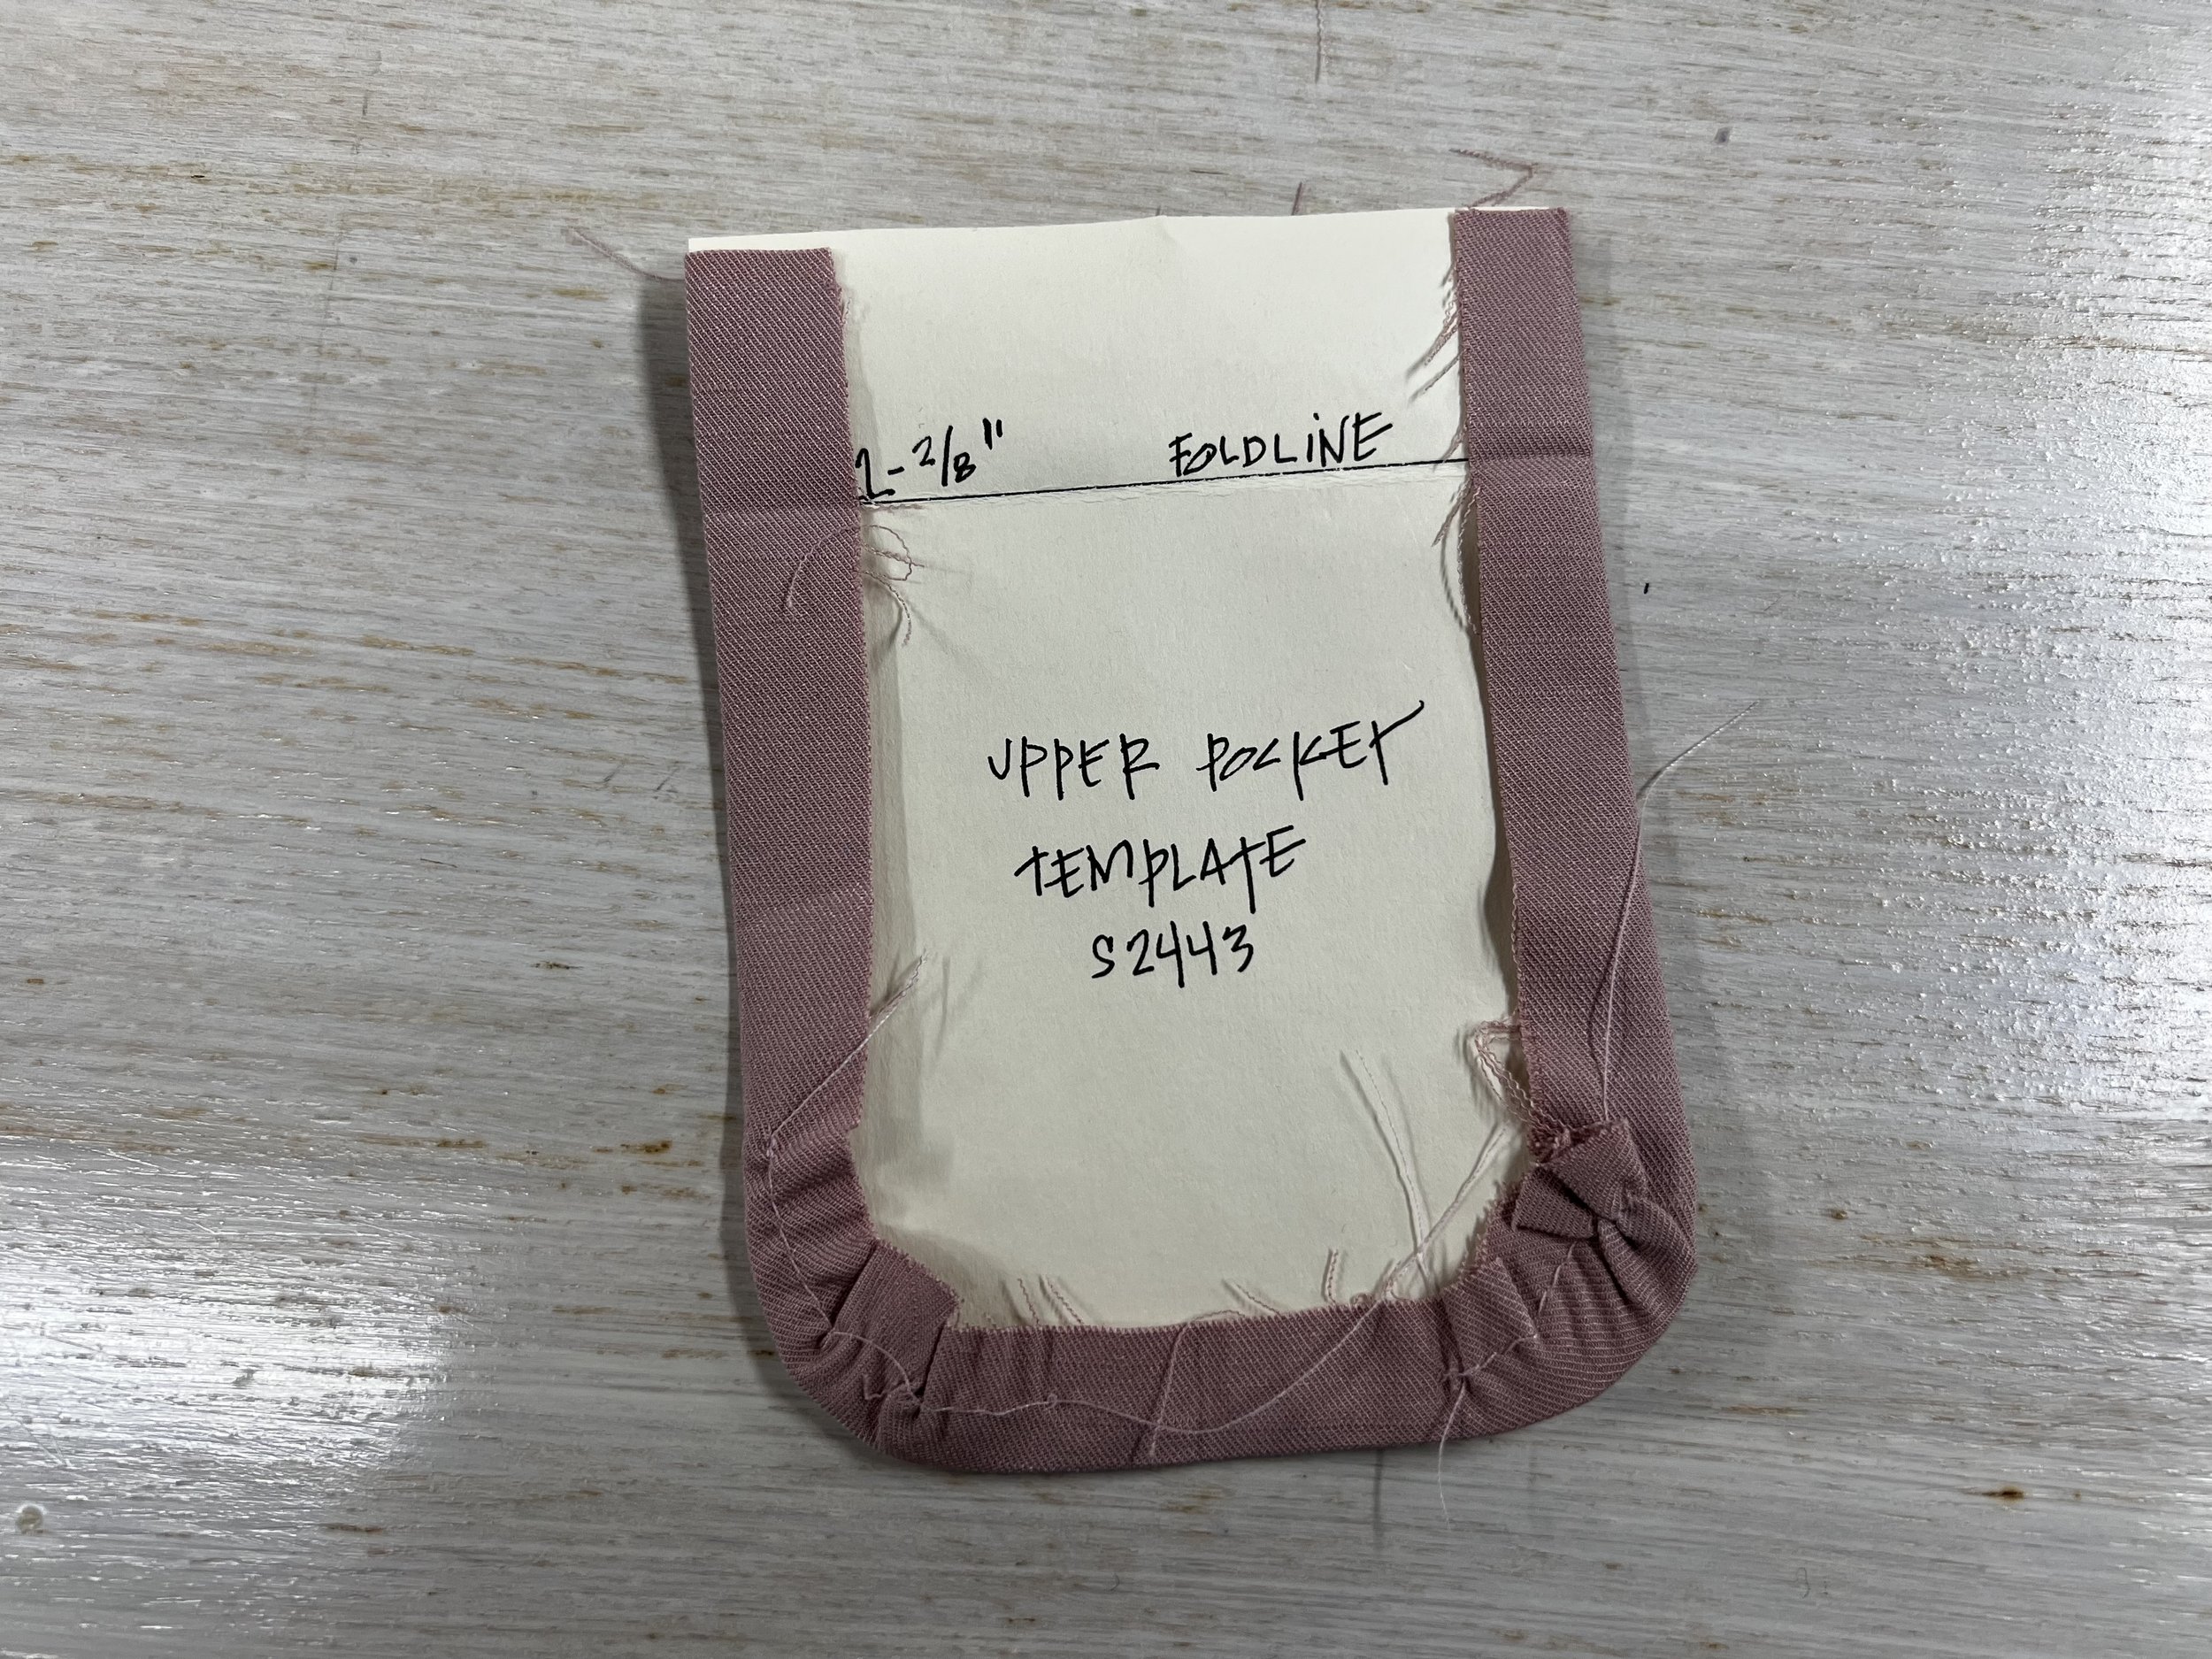
Now that you gathered the stitches, take it to the ironing board and press it
If you have a fold line, like I do in my pockets use the template to fold it at the same spot too. Fold the fabric and template… Press!

Voila! You have a beautifully finished curved pocket. Double bonus if you need to make more than one they will match!

You now have a beautifully finished curved pocket
Subscribe to our newsletter.
Sign up with your email address to receive news and updates.