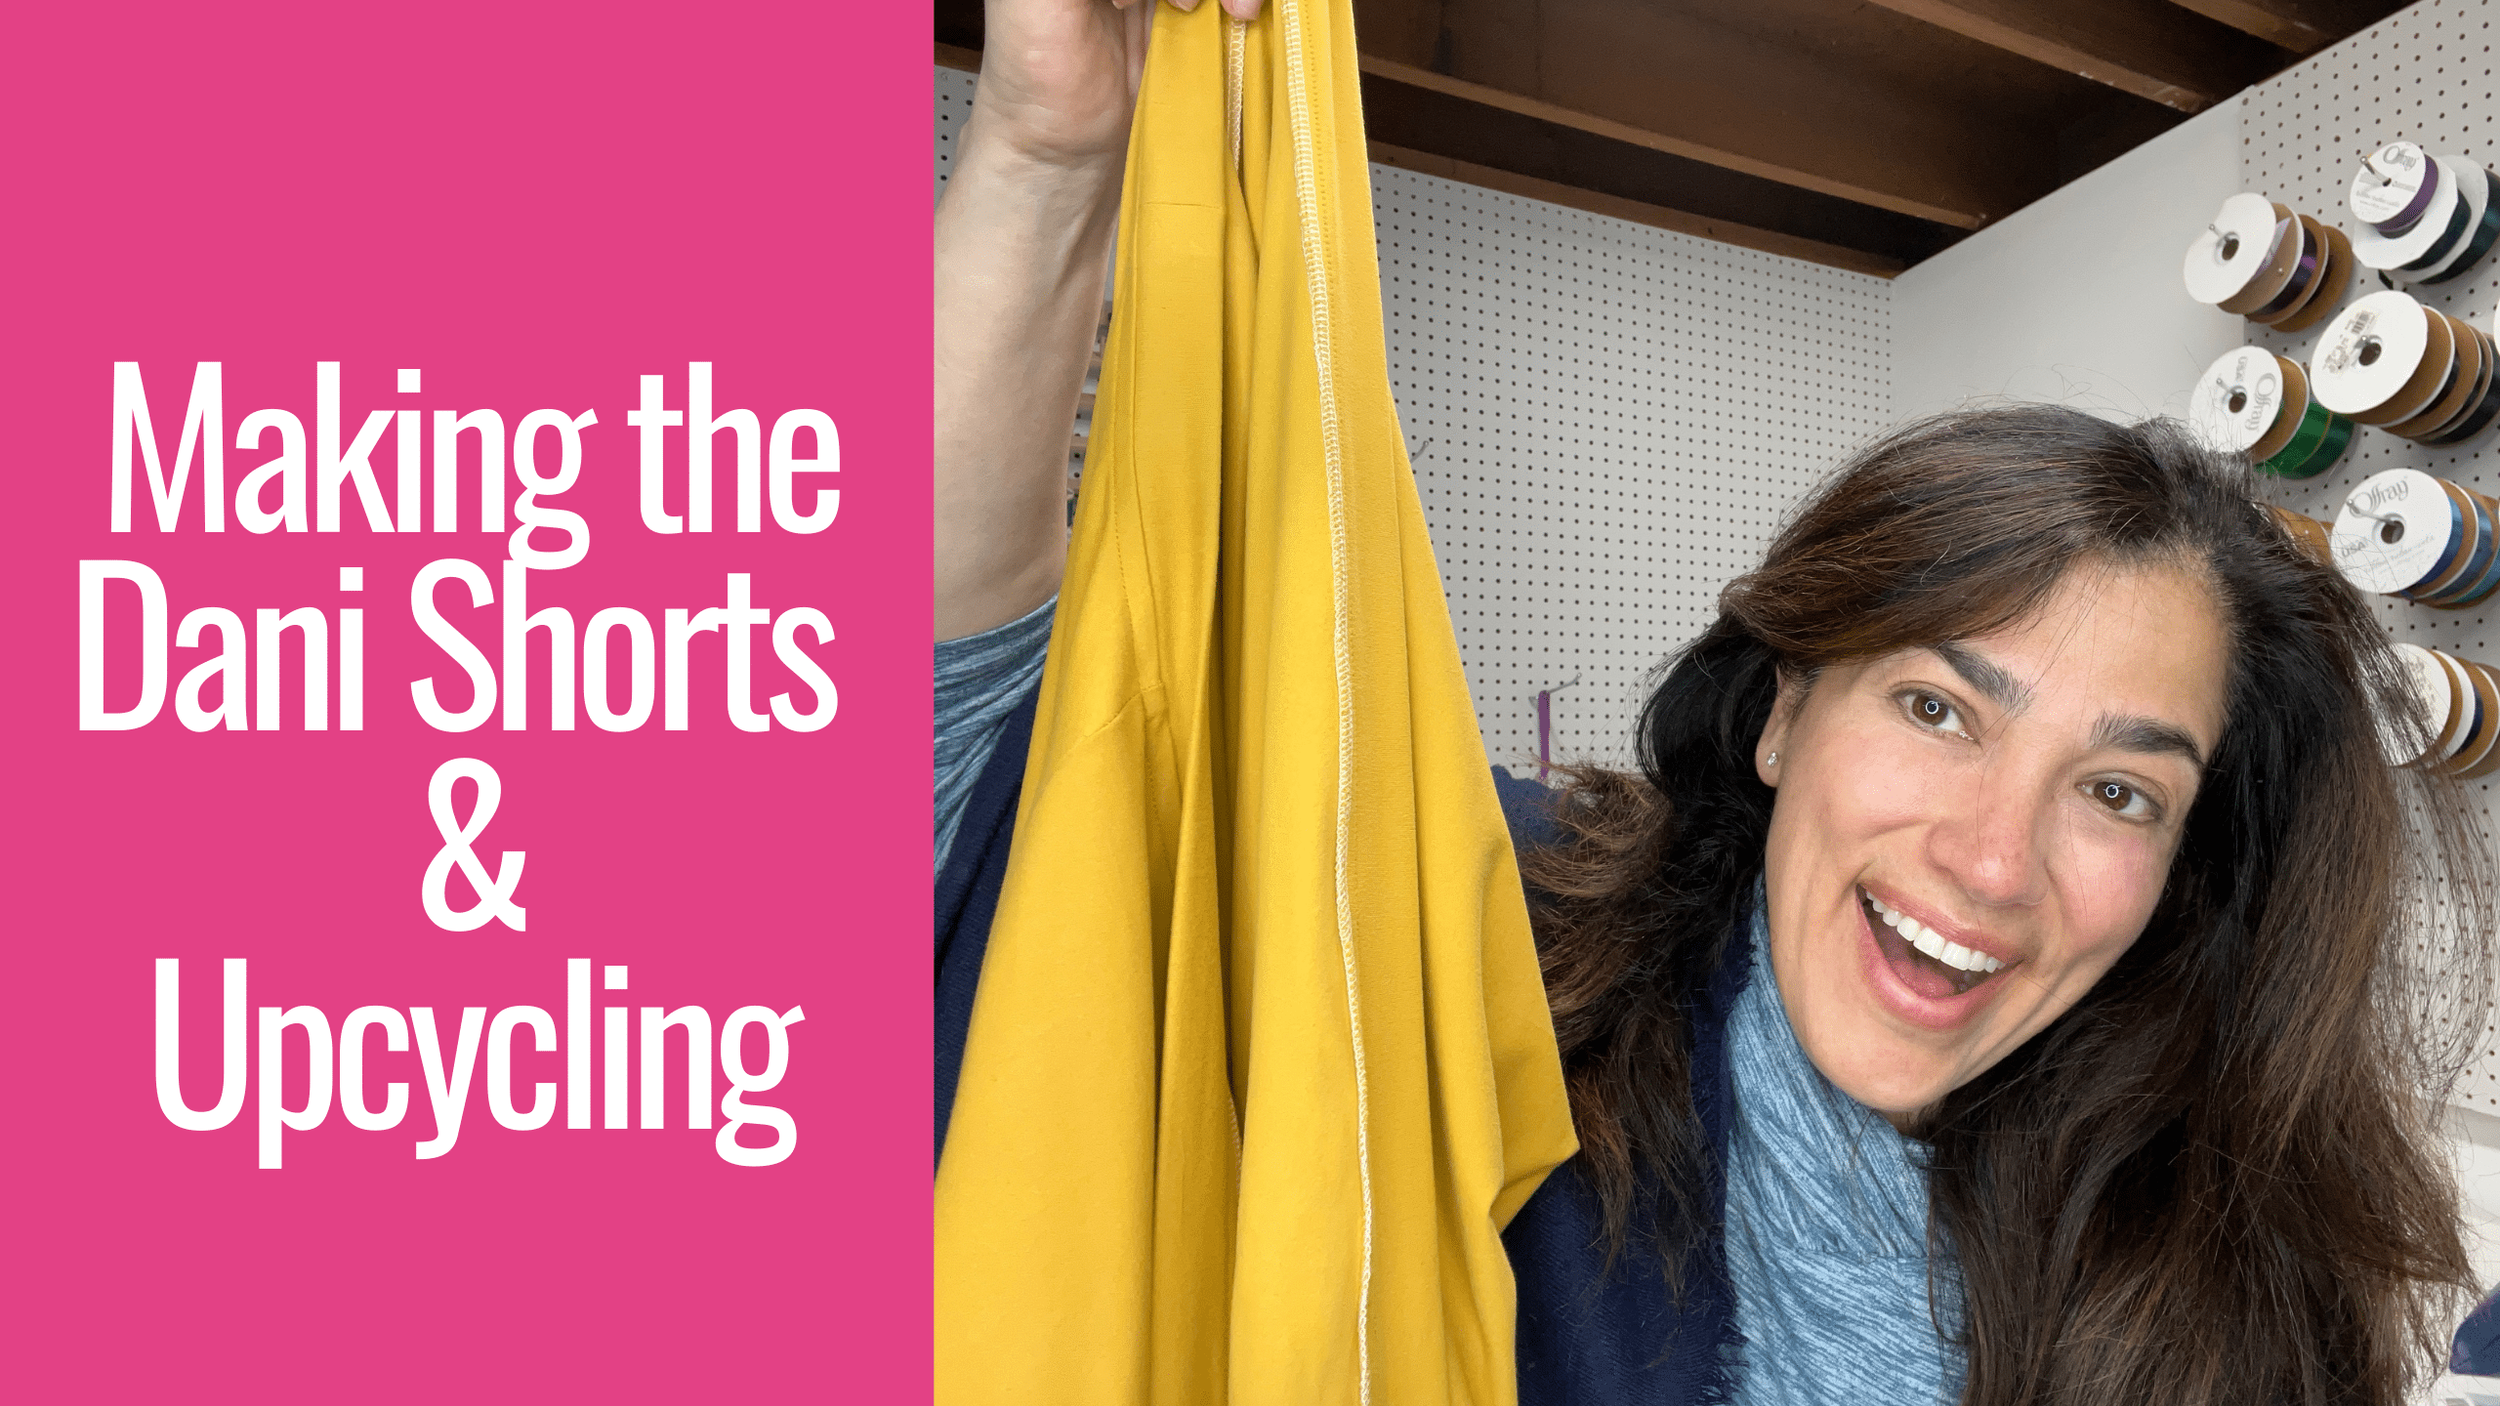
Making the Dani Shorts by Trie Bias & Upcycling

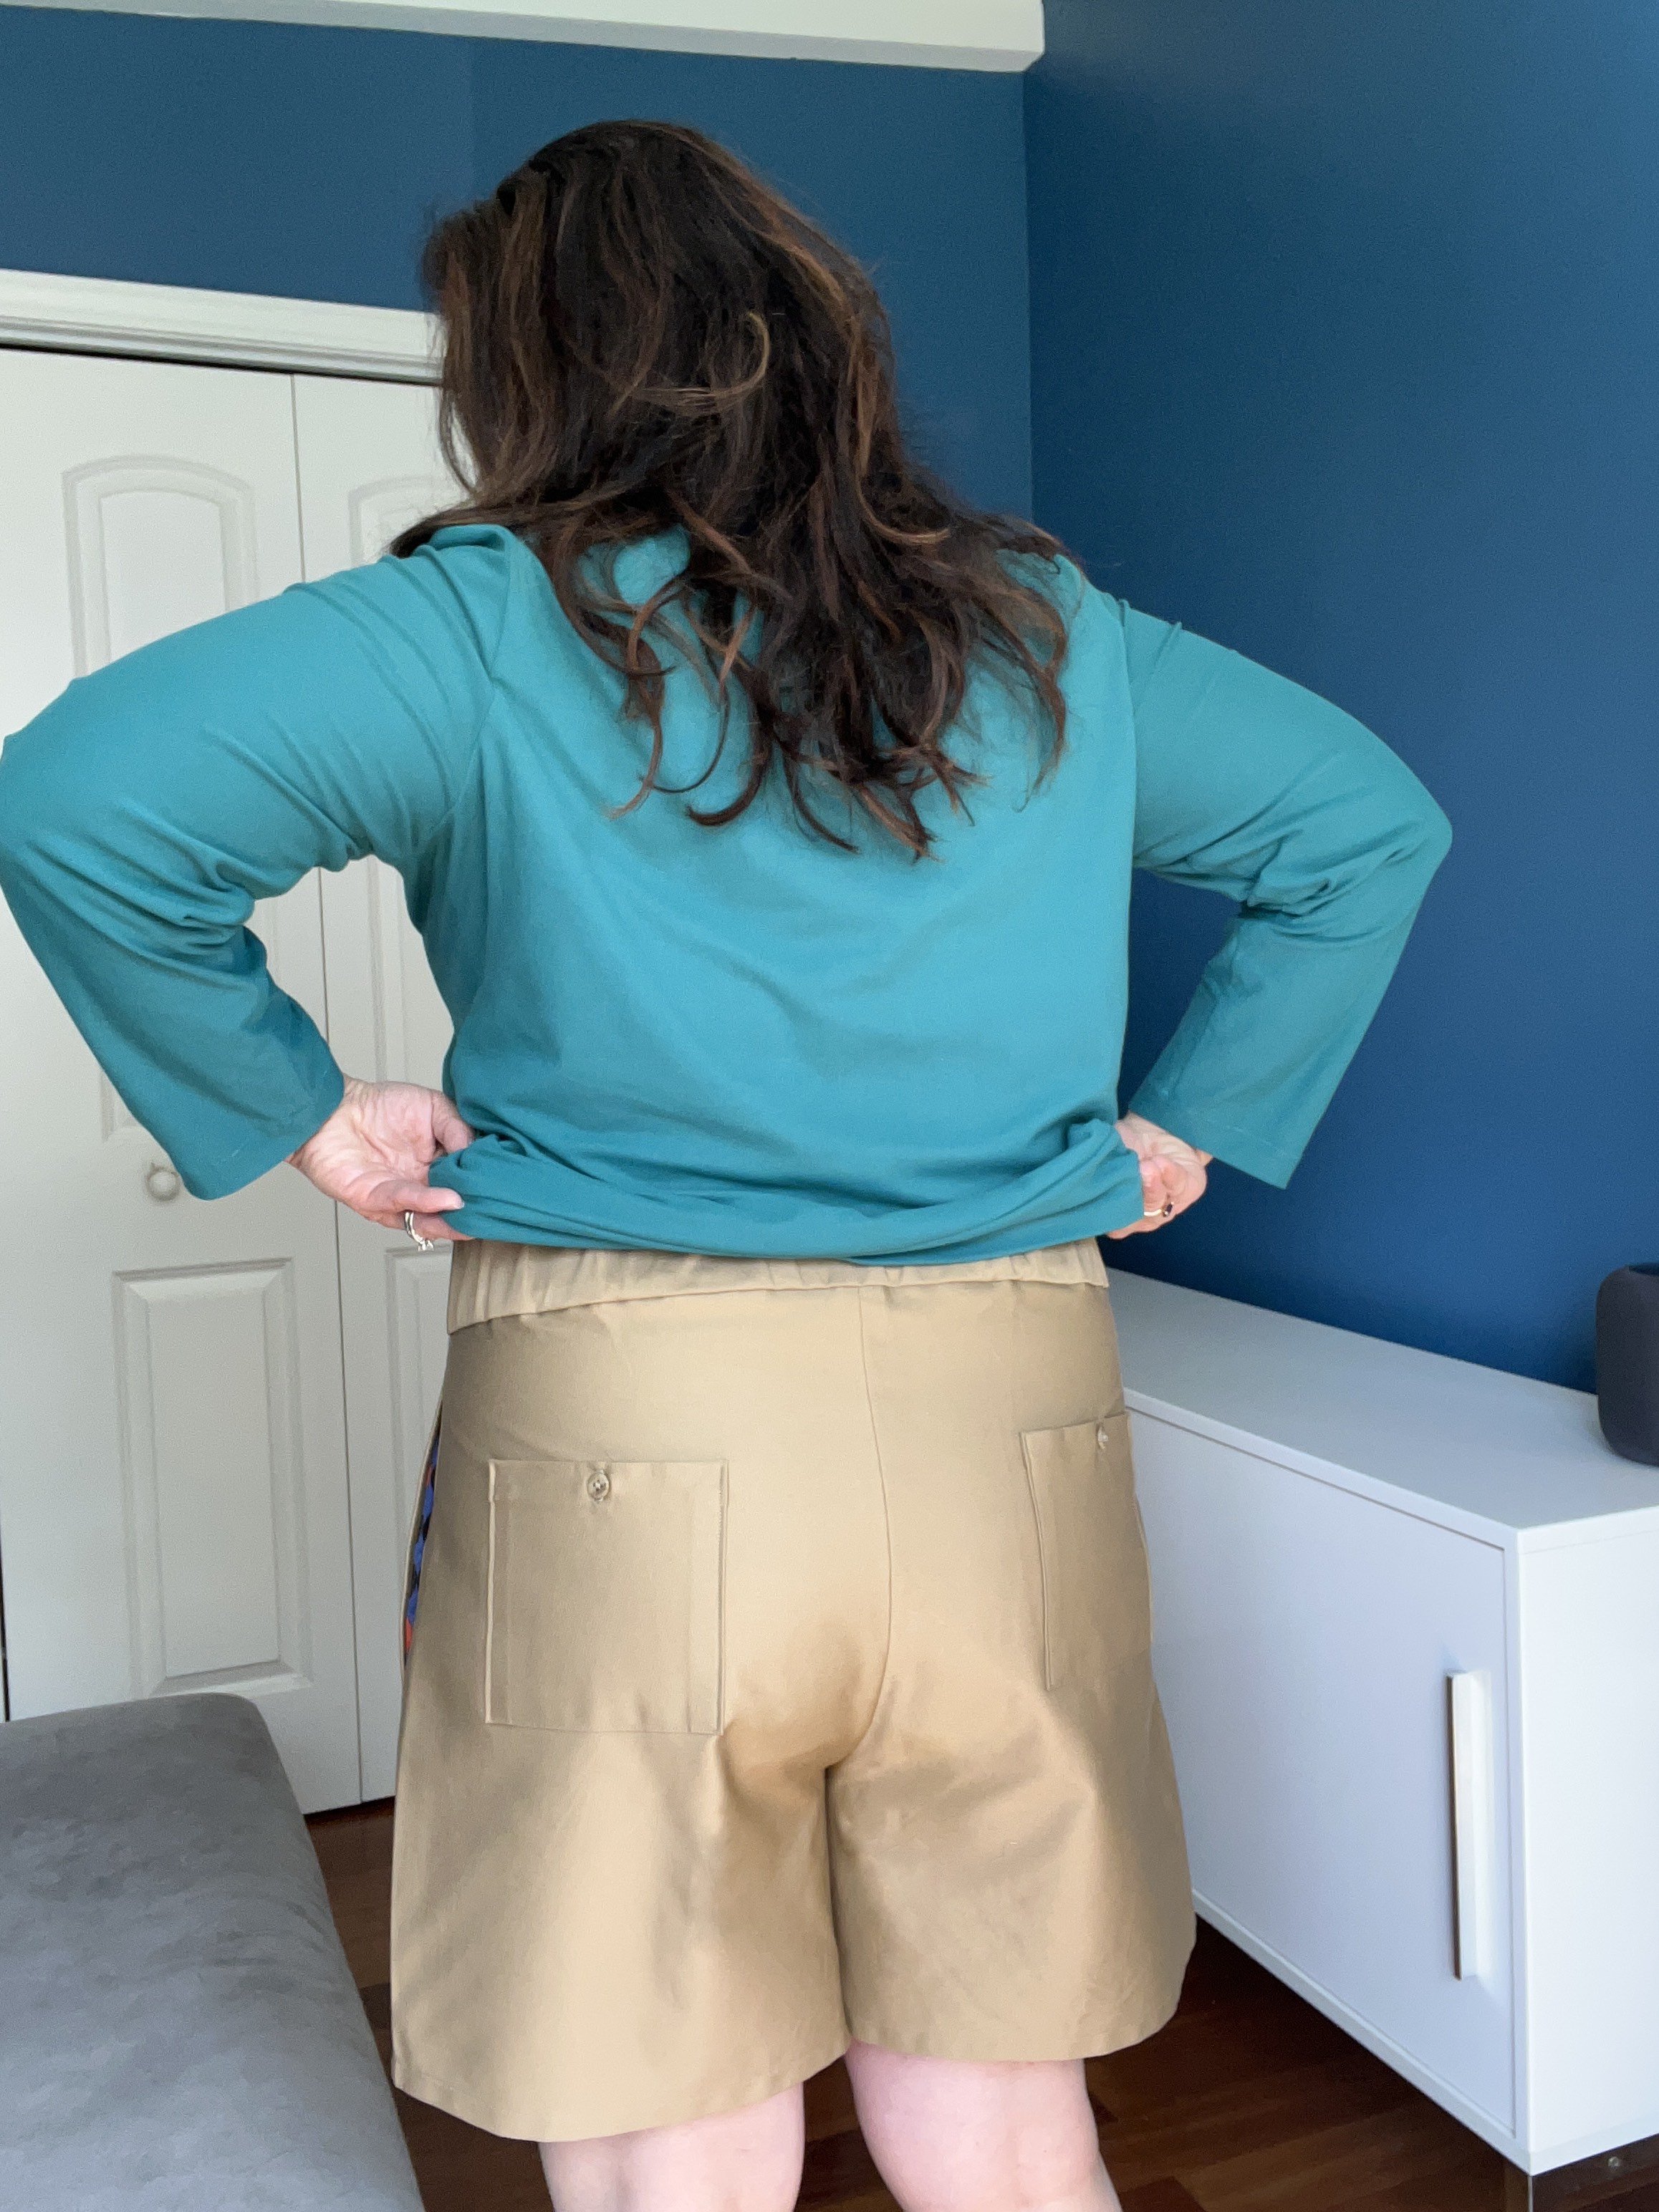
I hope everyone had a great Easter weekend. It was a busy one around here as the kids had different schedules. Some days there was school and other days no school. But I got to sew and I was able to finish my Dani Shorts from True Bias. They are amazing!
I did make two toiles on it to try and check the fit as I made the first toile I realized the pants would have looked too big based on my fabric choice. Which is a Kaufmann stretch Twill (it is actually quite nice!), it doesn’t drape or behave like the usual twill that drapes just a little more. But it has a little bit more body since it stretches ever so slightly. So I went down a size and then made another toile, I decided to go down to a size 16 for these shorts and I’m glad I did. Although they have an elastic waist they fit JUST the way I want them to. Keep in mind the Dani shorts pattern are meant to be a lot looser around the hips and the waist is meant to be a lot more gathered with an elastic. I kept the elastic but since my fabric was a little “stiffer” I decided to pull things in quite a bit.


If I make it in shorts again, I will most likely do a linen and go up a few sizes so it drapes a tad more. If you want to do a pair of similar shorts try S9549… but beware the sizing goes up to 18 on this pattern, and that’s it. Hence why I returned the Simplicity pattern and I went with the Dani shorts. They go from 0 - 18 and 14 - 32.


I may try making a longer version later on but I will do a toile again to make sure I like how the legs taper and such. I added a button the back pockets as I didn’t want them to pull out as some pockets do some times. It was not hard to do at all. I may even do a rounded corner next time.
I’ve also been looking thru some of the leftover fabrics I have…. some are really just that scraps! Then there are some other nice pieces that you can call remnants that are just sitting in the fabric stash. I was looking at this dress… that I love but that I don’t wear and thinking, can I “up cycle” and repurpose this in another way. Sure enough I did. Do you guys remember this dress? I made a sew along for it! Great dress but I don’t wear it, honestly I don’t know why. Perhaps because its now too big on me.
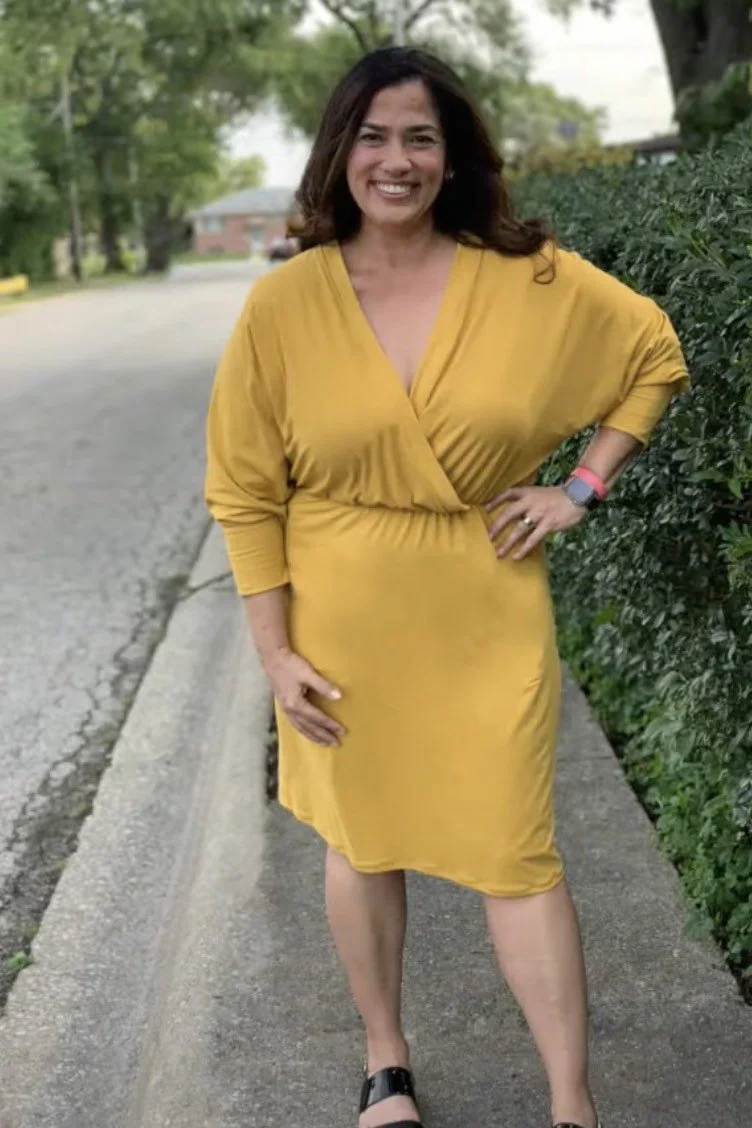

So I decided to detach the bodice to the skirt and make a wrap with the top and different top with the bottom portion along with my scraps of fabric.

You could use either the Pearl by Tilly and the Buttons to create something similar or you can also use S8424. Both patterns are similar. I will say the Pearl pattern has three different sleeves and its perfect for a beginner as TATB are great at explaining things in detail.


I still had some more fabric left… plus around 3/4 a yard so hey why not keep going since that skirt is good fabric. So I also made M7812…. I think its still a tad big on me around the neckline and I can most likely pick a smaller size.


How to change an elastic sleeve cuffs to sleeve binding

So we made S9469 earlier this week, and it is a great pattern! On my first version I had made a change to it. Mostly because I don’t care for elastic sleeves cuffs. There is nothing wrong with elastic on your cuffs but I just don’t care for it, they are actually somewhat uncomfortable for me. So today I’m going to show you how to change the elastic on your sleeve cuffs to a sleeve binding.
First things first, you need to remove the stitches on the sleeves and also the elastic. So get your seam ripper out and remove those stitches. Give your sleeve a good press.

Time to take out that elastic and rip out those stitches. Give it a good press once you are done.
You will also need to do two rows of your longest running stitch on your machine as you want to create gathers as we have quite a bit of width on the sleeve cuffs.

Add two rows of gathering stitches… longest running stitch on your machine. Leave those threads long and don’t lock your stitches!
Next measure your forearm! Grab the measuring tape and measure the circumference of your forearm. That is the length of your forearm.

Length of Forearm + 1/2” Ease +6/8” Seam Allowance (3/8” per seam allowance and you have two) equals the total length of your pattern piece
Cut a 2” wide ( 5cm ) and use the length of your forearm plus 1/2” ( 1.27cm ) for ease and an additional 3/8” ( .95 cm) for seam allowance. Remember there are 2 seam allowances so you need to add 3/8” for each one… so 6/8”. That will give you the length of the pattern piece. In addition, this piece needs to be cut on the BIAS. I repeat, this sleeve binding pattern piece you are creating from scratch needs to be cut on the bias because it needs to stretch.
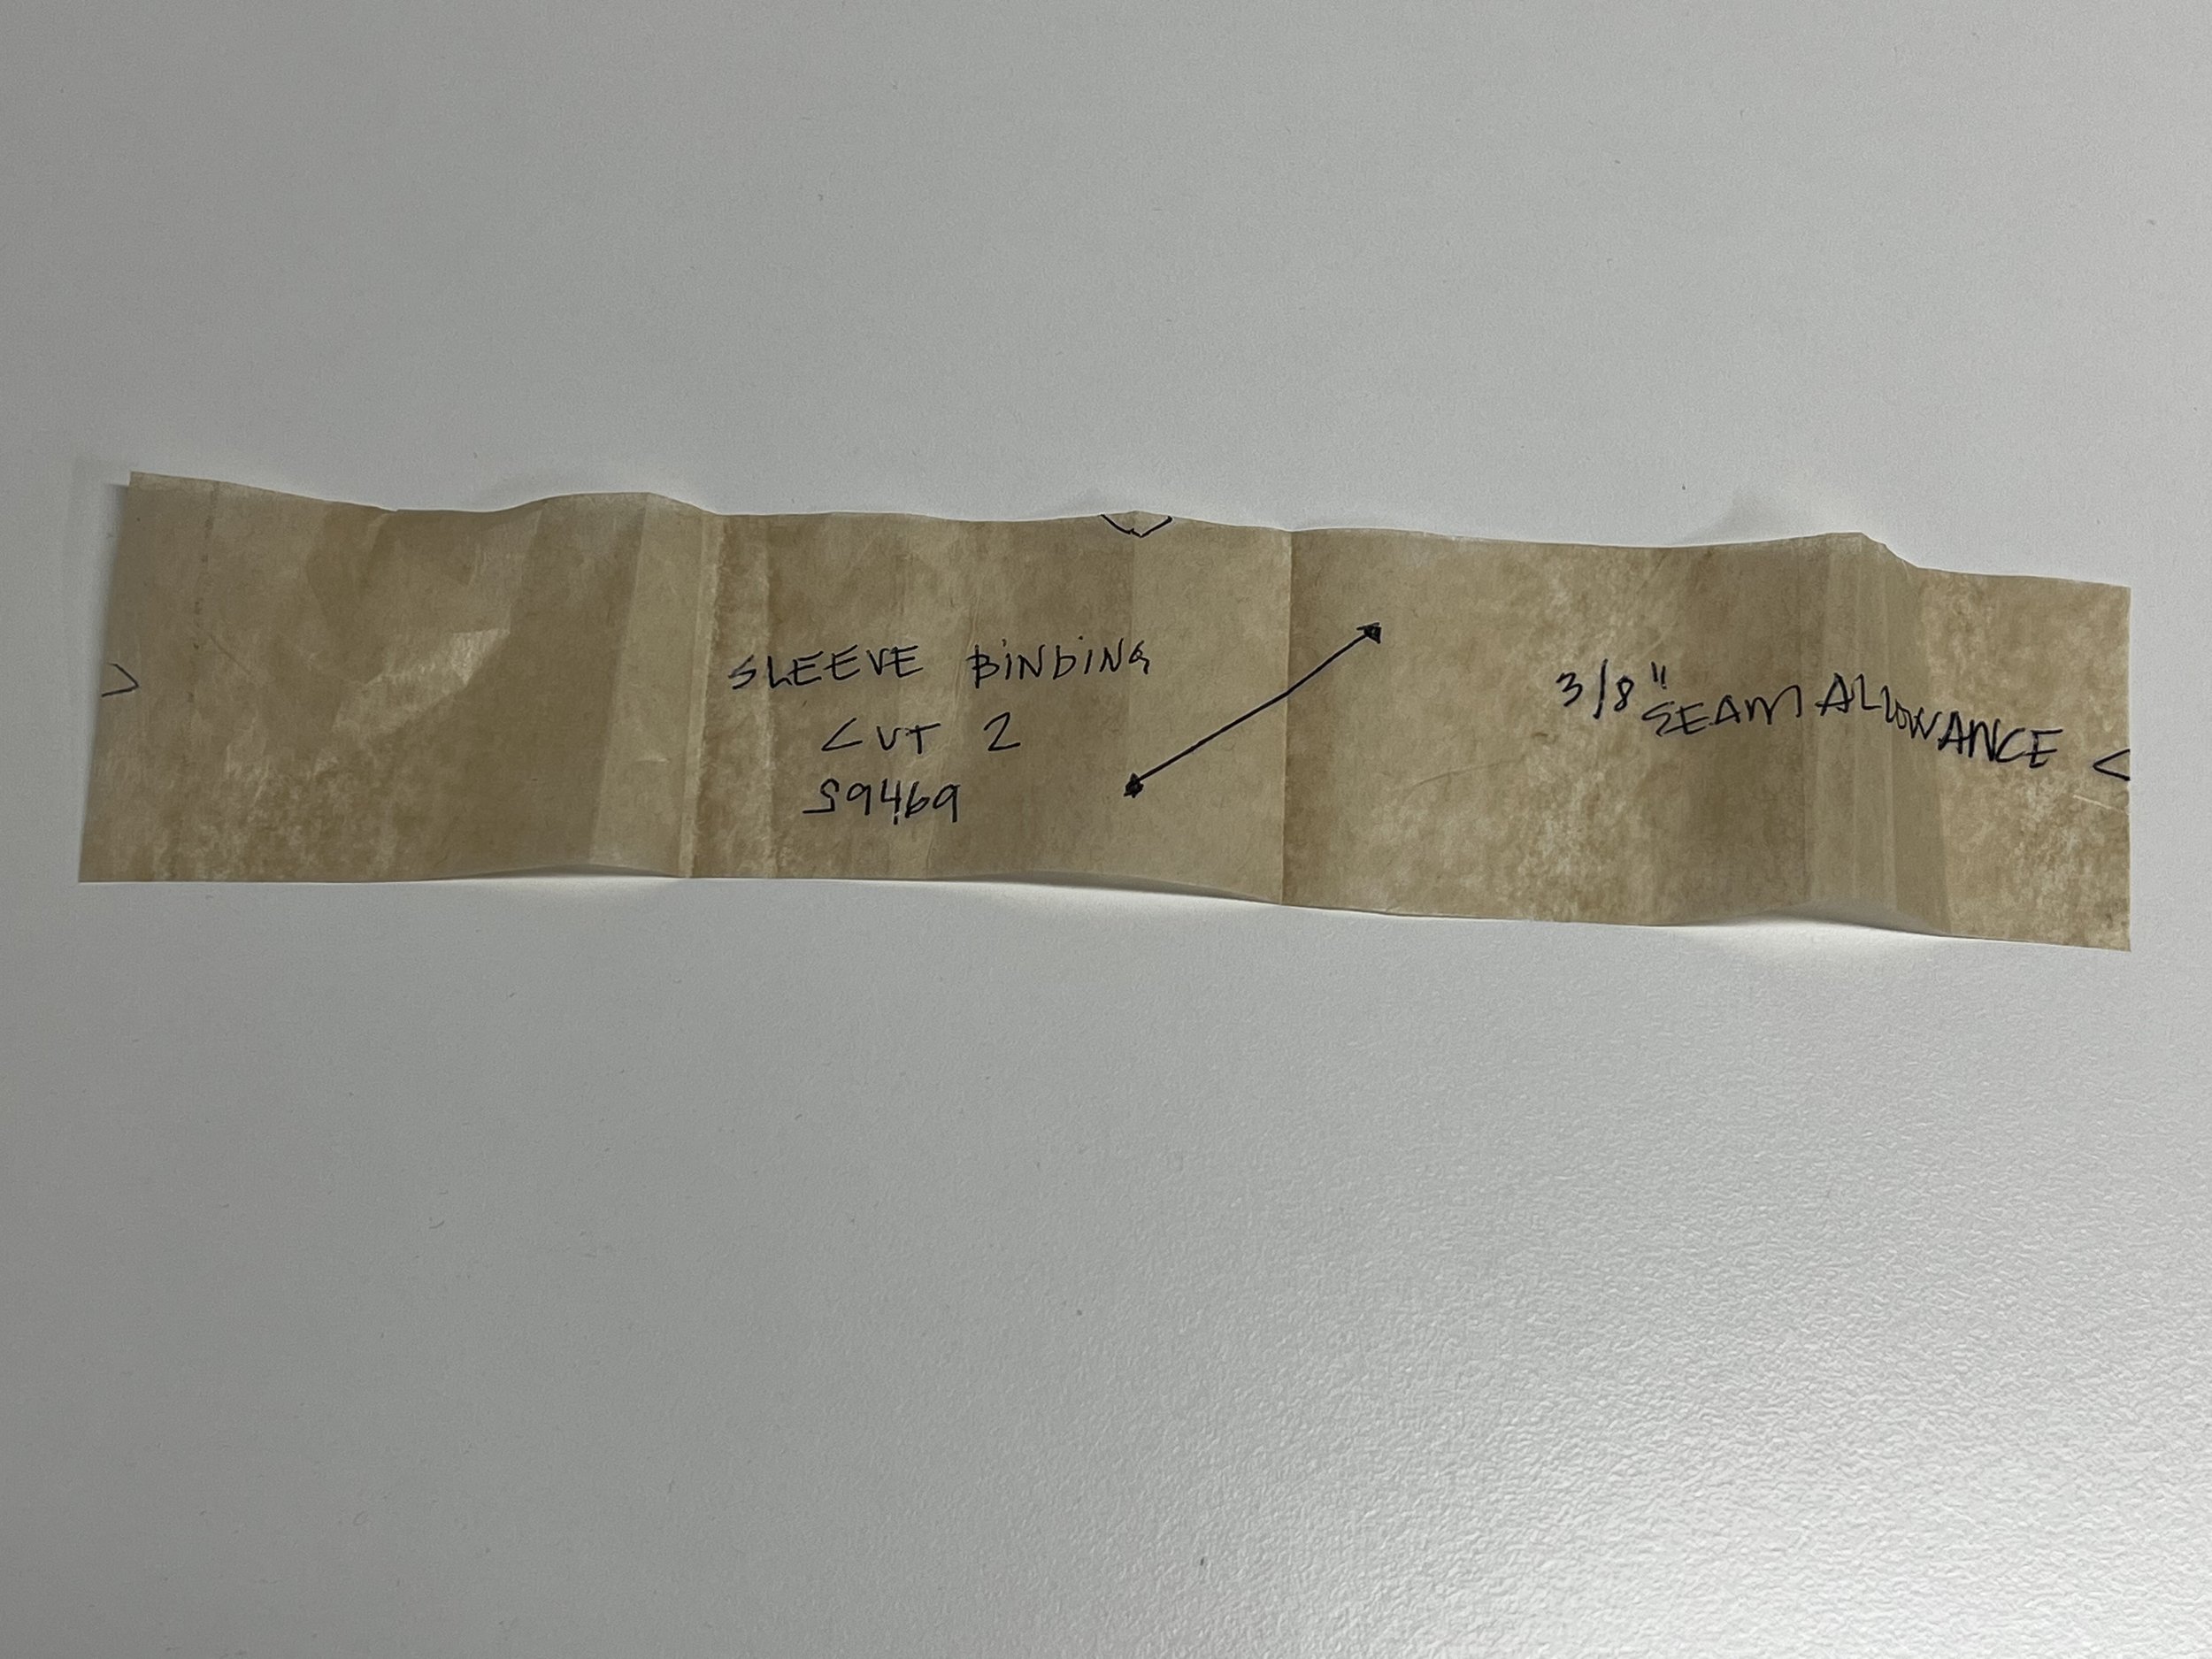
Self drafted sleeve binding pattern piece
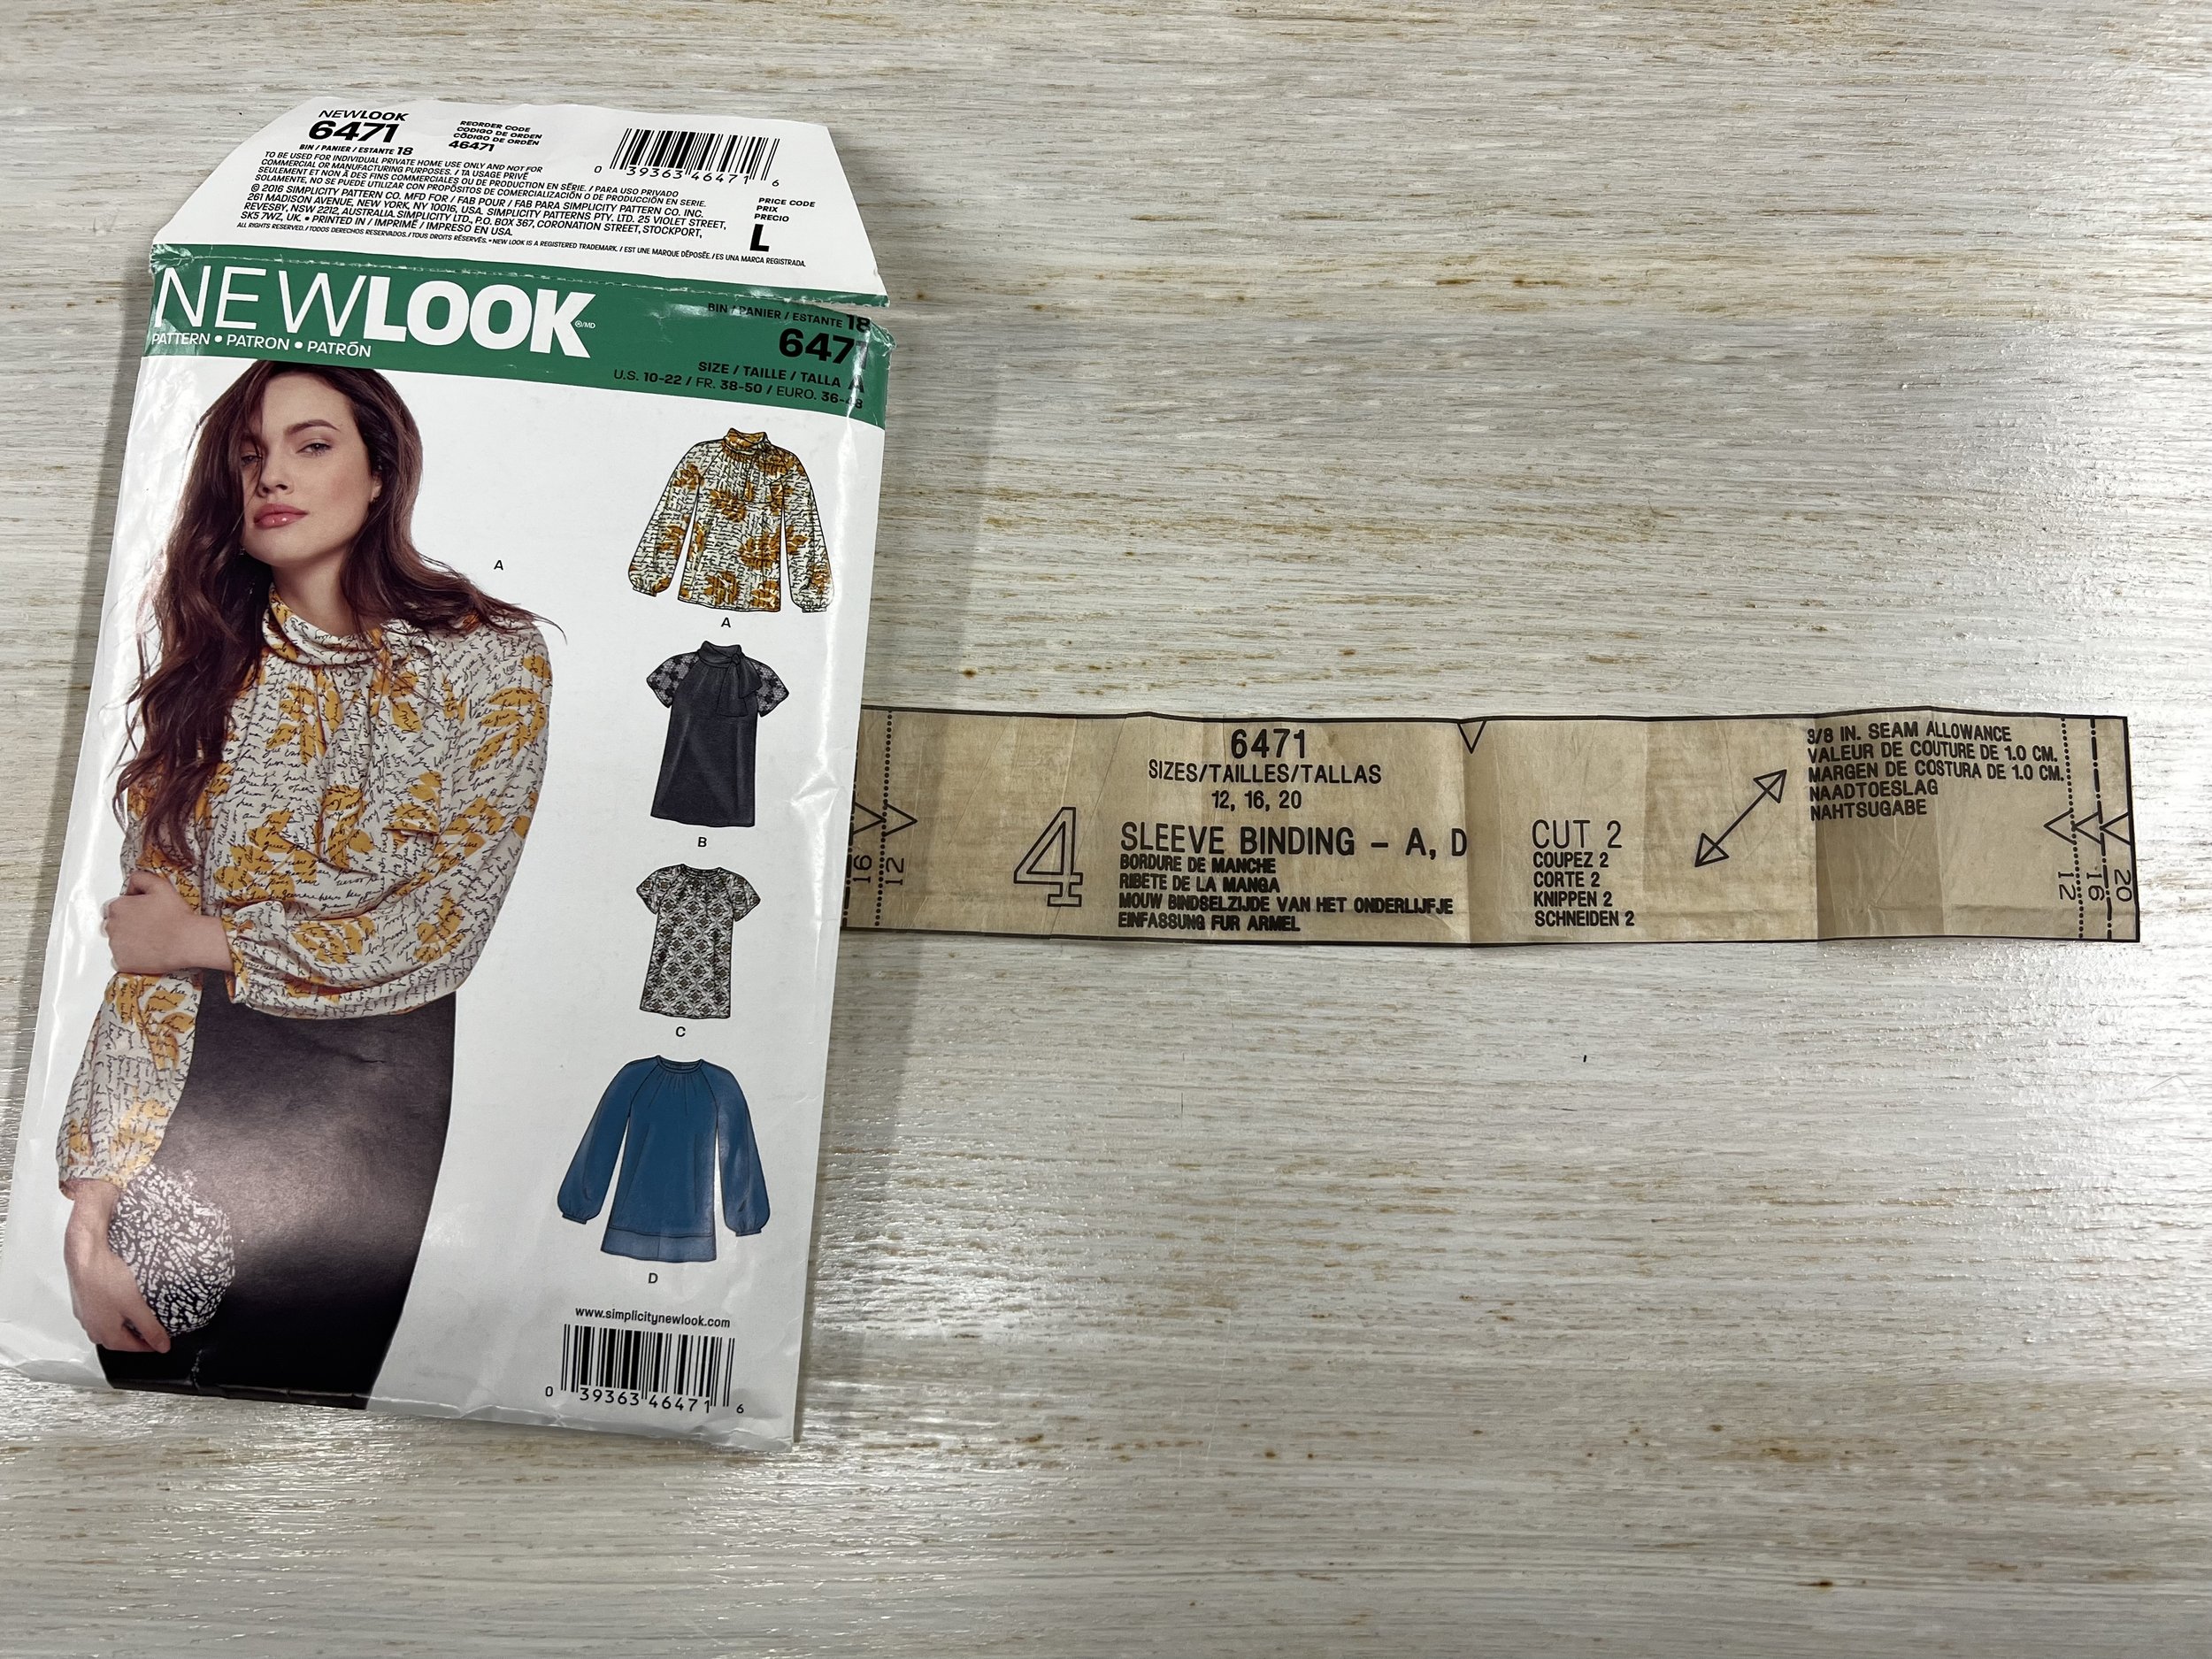
If you are not a lover of self drafting your own pattern pieces you can also use pattern New Look 6471 and a sleeve binding piece is included with this pattern. HOWEVER, you should measure it and see if you need to add a little length to it so it fits your forearm.
Now you need to stitch the sleeve cuff together. So with right sides together you have a 3/8” seam allowance. Press the seam allowance open!

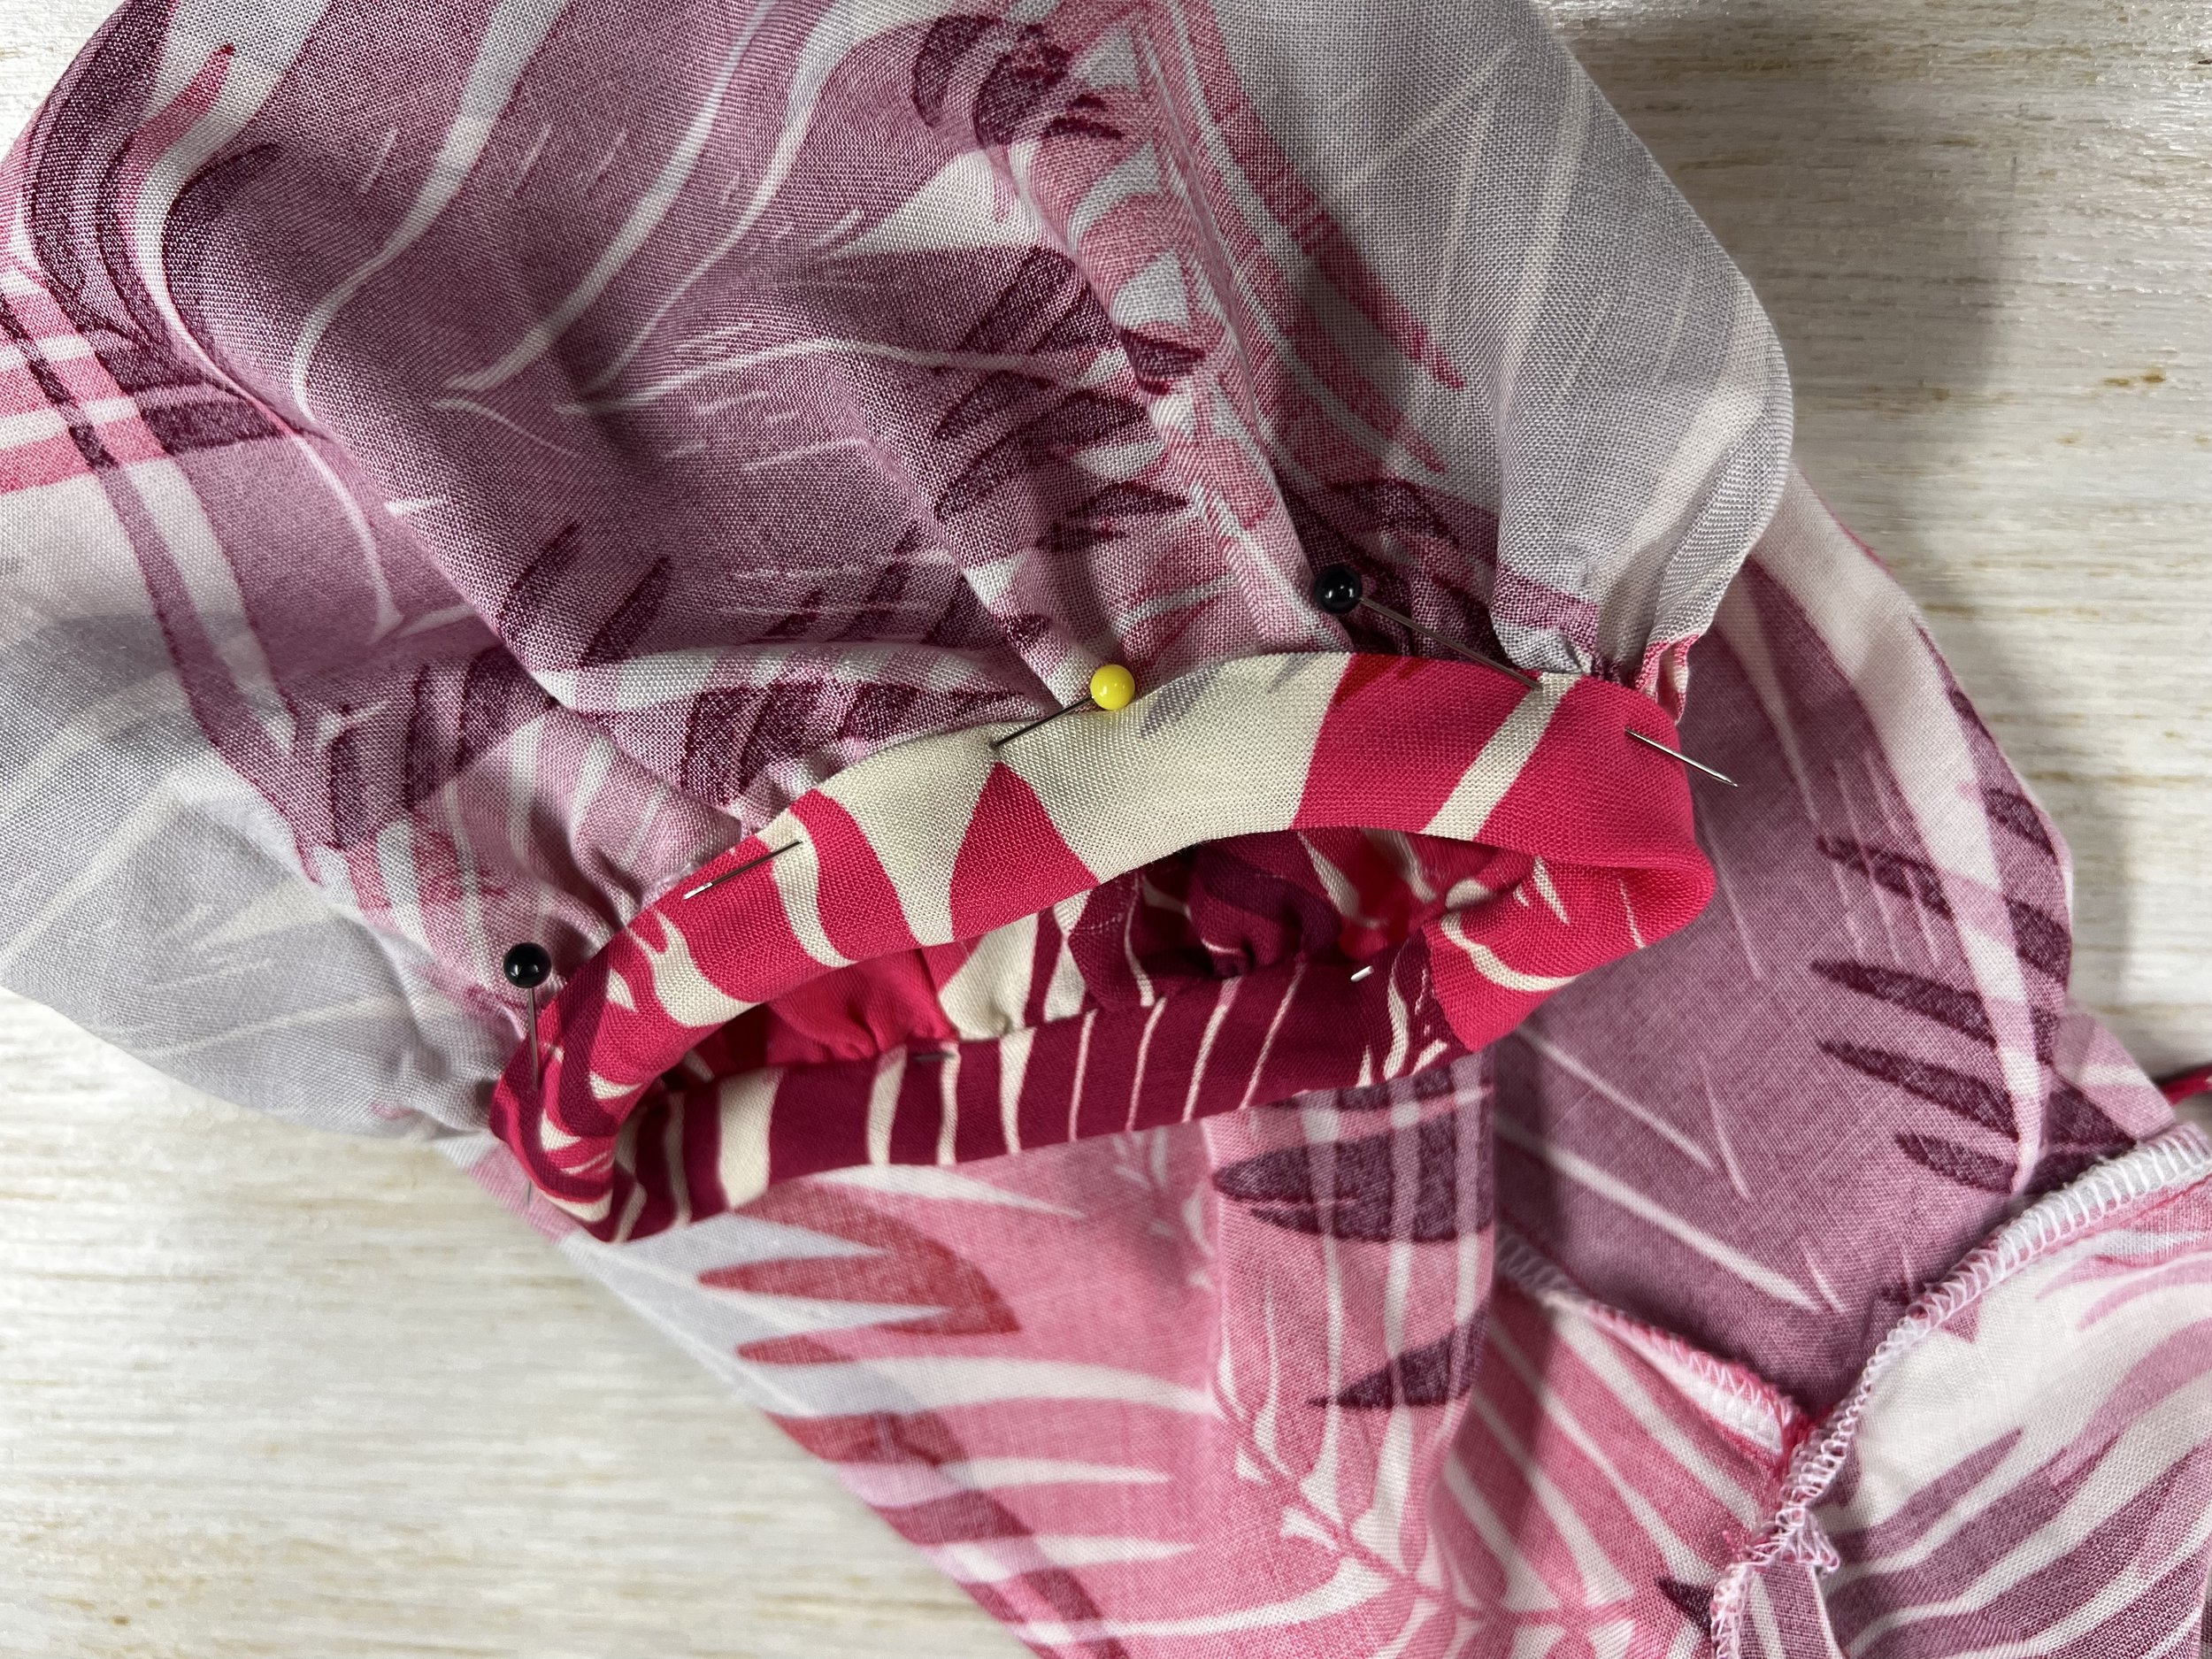
Line up your seam with the seam on the sleeve. Pin. Pull your gathers so its the same opening width as the gathers on your sleeve binding. Pin. Remember you are pining on the outside (right sides together) because we are going to fold this towards the inside.
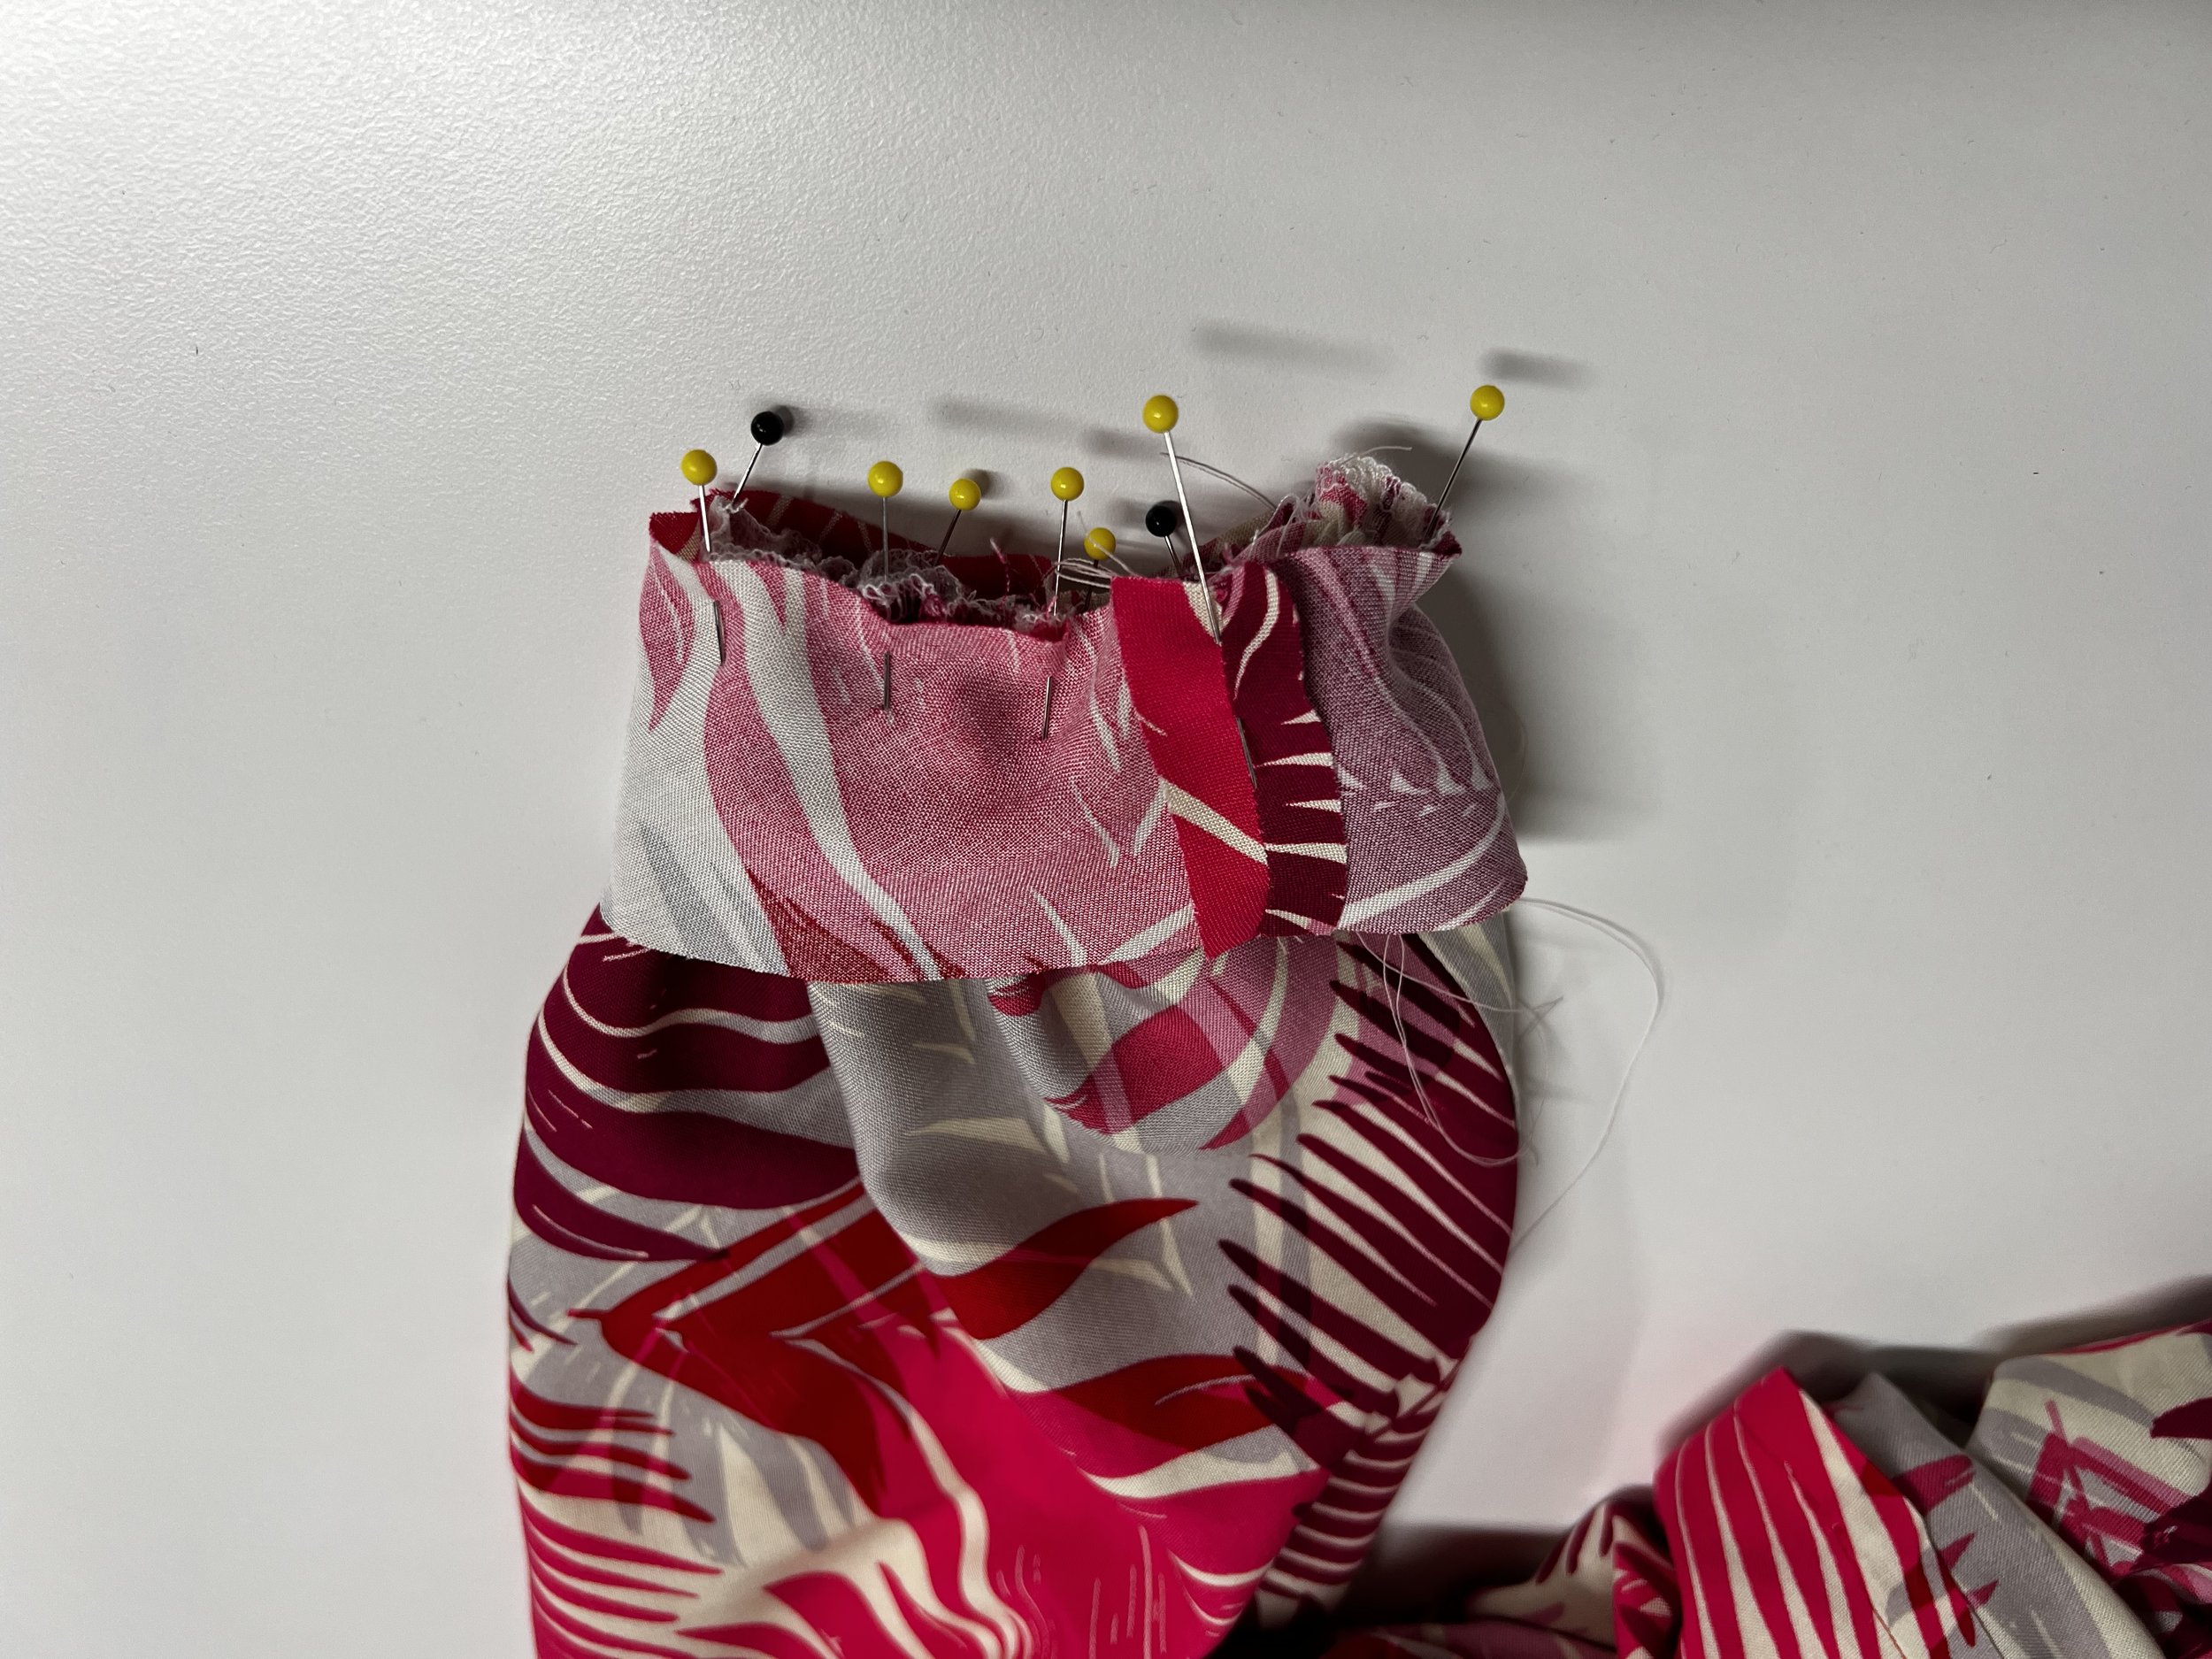
Stitch at 3/8” seam allowance all around. Don’t forget to back stitch at the start and at the end.
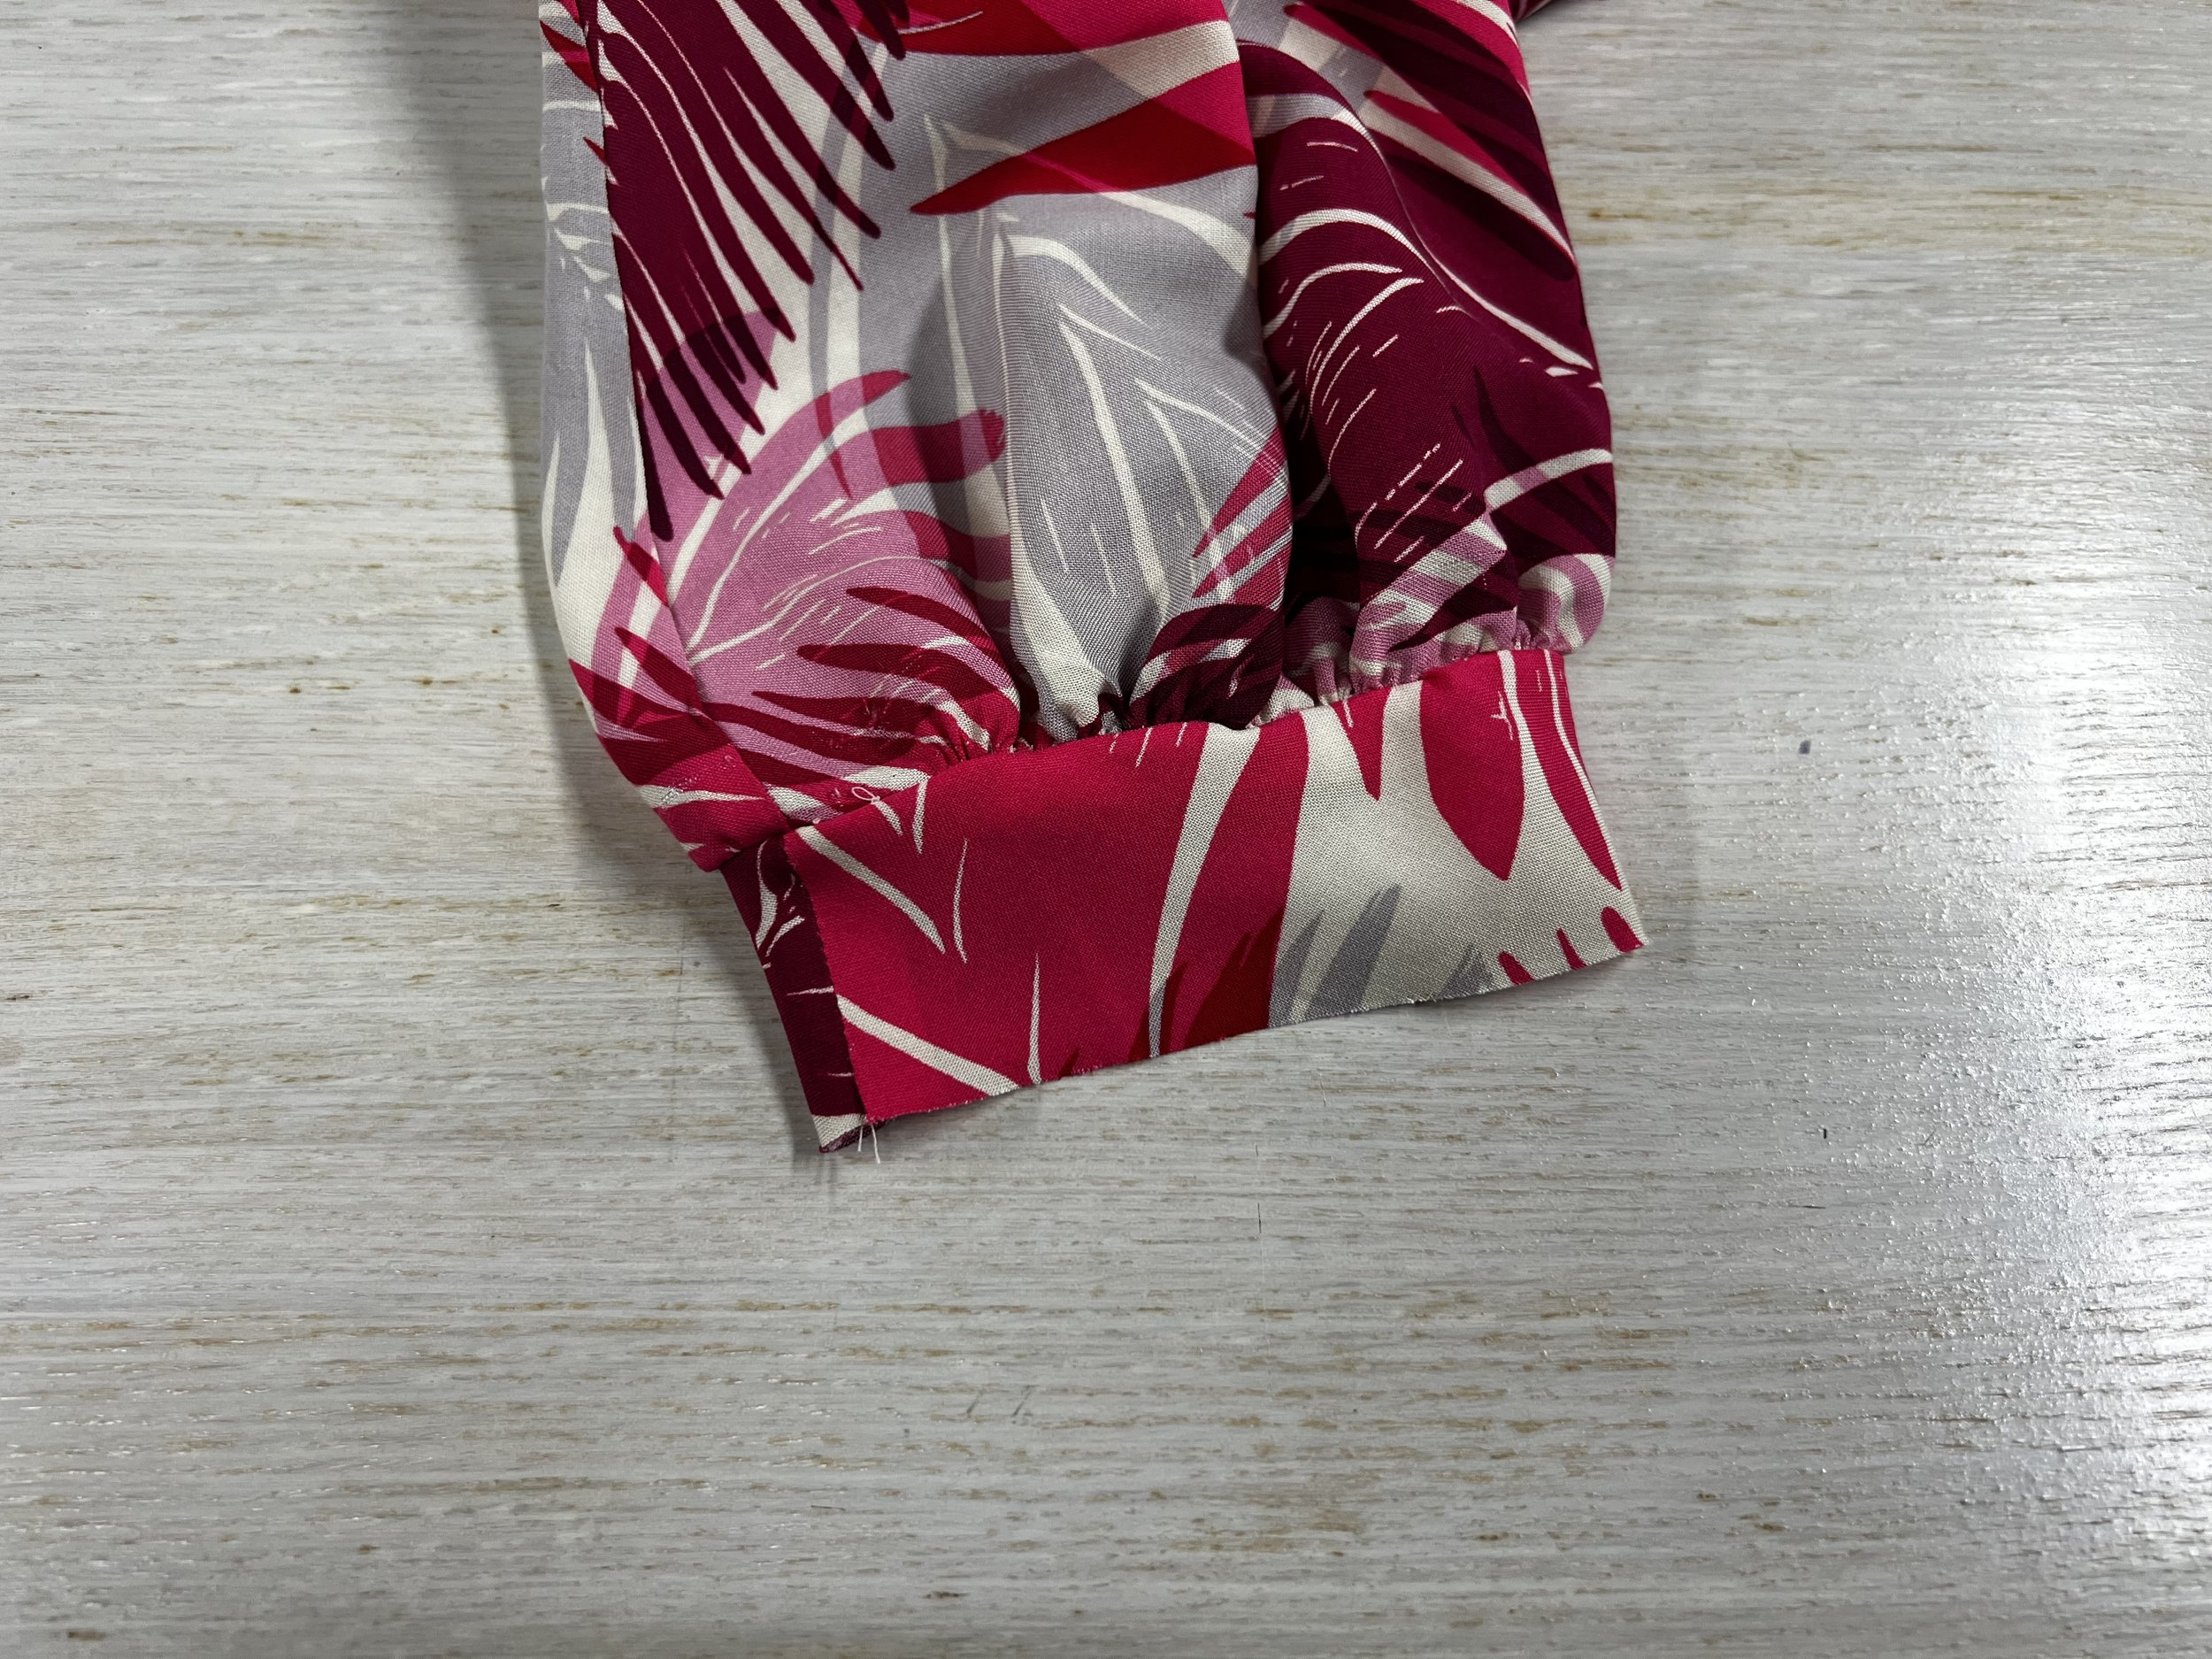
Now trim the gathered seam allowance down to 1/4” on the inside of the cuff and press your cuff towards the outside, and then press towards the inside 3/8”..

Now you need to slip stitch the inside of your cuffs. You can also stitch in the ditch (this is if you rather use your sewing machine!) but if you do make sure you catch the fabric inside the sleeve with your sewing machine…. hence why I like to use needle and thread and do it by hand. Give it one final press and you are done!
Which one do you prefer? Elastic cuffs or sleeve binding? I prefer sleeve binding, it elevates the look of the blouse, both are perfectly acceptable.

Love, Love, love my blouse! Now that I switched the elastic cuff with sleeve binding, it is also a lot more comfortable.

And better yet, I can put my arm on my hip, off to the side or even bend my elbow all the way and it doesn’t pull on my blouse!

Yes, it does take a little bit of extra work and time but I feel that it is well worth it.

Subscribe to our newsletter.
Sign up with your email address to receive news and updates.